INSERT ALTERNATIVE TEXT FOR YOUR HEADER IMAGE HERE

Tuesday, June 30, 2009

Sherry got An Award


I received an award from Citygurl Thanks so much Sweetie!
I want to pass this award to some ladies that have been so helpful to me.
One goes to Zalinka for her Beautiful kits that I adore
http://zalinka1.blogspot.com
Lorna for her Beautiful Templates
http://simplysensationsscraps.blogspot.com
Babs for her Beautiful Scrapkits
http://babsbitzybeez.blogspot.com
And Emma for her Beautiful Scrapkits
http://sensualposers.blogspot.com

Thanks ladies yall deserve this Award more than I do!


I

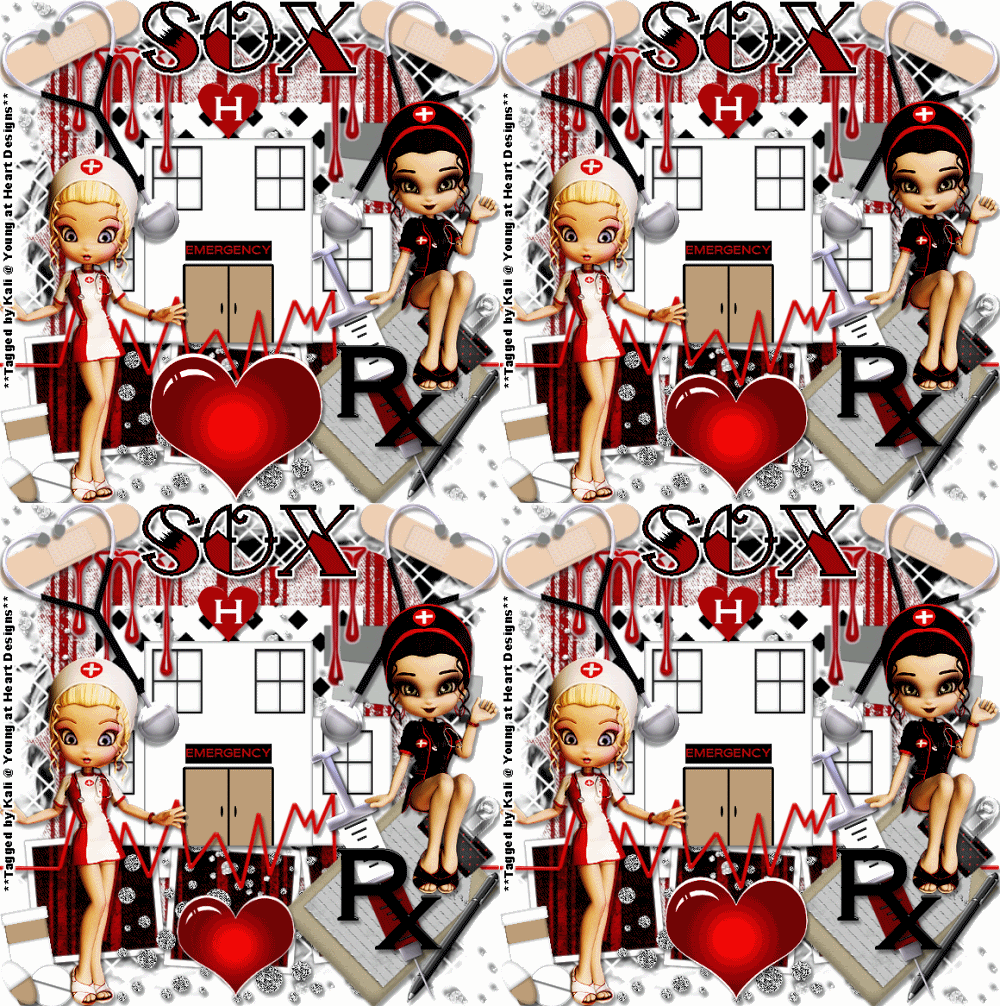
Nurse Nikki (Animated) Tut

Photobucket

To do this tutorial you must have some knowledge of PSP and Animation Shop.

This tut was written and copyright by Kali at Young at Heart Designs.
I used PSPX2 and Animation Shop to create this tut.

Supplies:
-Mask: HERE
Template #5 by Sara and can be found HERE.
-Incrediable Kit by Soxsational Scraps called "Nurse Nikki" and can be found HERE.
-Font: Tattoo Ink

I have added a drop shadow to pretty much every layer and I also sharpened all elements if I resized them so they maintained the same
quality as the original one.

1 Open template and delete the copyright and Heart layers.
2 Click on the Bracket Shape layer and open your choice of paper.
3 Click back on Bracket Shape layer and go to Selections>Select All>Float>Defloat.
4 Click on the newly added paper and go to Selections>Invert and hit delete on your keyboard.
5 Delete the original Bracket Shape layer.
6 Repeat Steps #:2-5 for all included layers in the template.
7 Open the TW-NurseNikki1 and TW-NurseNikki2 from the kit.
8 Resize and position where desired.
Use my example for reference.
9 Open TWNikki-Needle, TWNikki-Stethoscope, TW-Nurse-Bandaide, TW-Nurse-Blook Drip2, TW-Nurse-Blood Drip3, TW-Nurse-Clip Board,
TW-Nurse Hospital and any other elements you desire from the kit.
10 Resize and position where desired.
11 Open the mask layer and minimize it.
12 Go to your very first layer and open your choice of paper.
13 Move this newly added paper layer to the bottom making it the 1st layer.
14 Go to Layers>New Mask Layer>From Image.
15 In the drop down window for Source select the mask.
16 Hit ok.
17 Go to Layers>Merge>Merge Group.
18 Resize the mask layer to make it bigger.
19 Get your text tool and font of choice.
20 Type out any desired wording.
21 Add copyrights.
22 If you are not doing the animation resize and save as a png.

If you are doing the animation, follow these steps:

23 Go to your 1st layer and add a new raster layer.
24 Move the new raster layer to the bottom making it the 1st layer.
25 Get your paint bucket tool and flood fill white.
26 Open TW-Nurse-Heart from the kit.
27 Position where desired.
28 Duplicate the heart and resize to be a little smaller than the original one.
29 Duplicate the smaller heart and resize to be a little smaller than the 2nd heart.
30 Hide all heart layers except the original one.
31 Copy merge and go to Animation Shop.
32 Paste as a new animation.
33 Back in PSP, hide the original heart and unhide the 2nd heart which should be the medium size heart.
34 Copy merge and go to AS.
35 Right-click on the frame and select Paste After Current Frame.
36 Back in PSP, hide the 2nd heart and unhide the smallest heart.
37 Copy merge and got AS.
38 Right-click on the frame and select Paste After Current Frame.
39 Go to your frame that has the medium heart and copy.
40 Go to your very last fram and right click.
41 Select Paste after current frame.
42 Select All and change the frame properties to 55.
43 Resize and save as gif.
You are all done!!!

Thanks for doing my tut,
Kali

Sunday, June 28, 2009

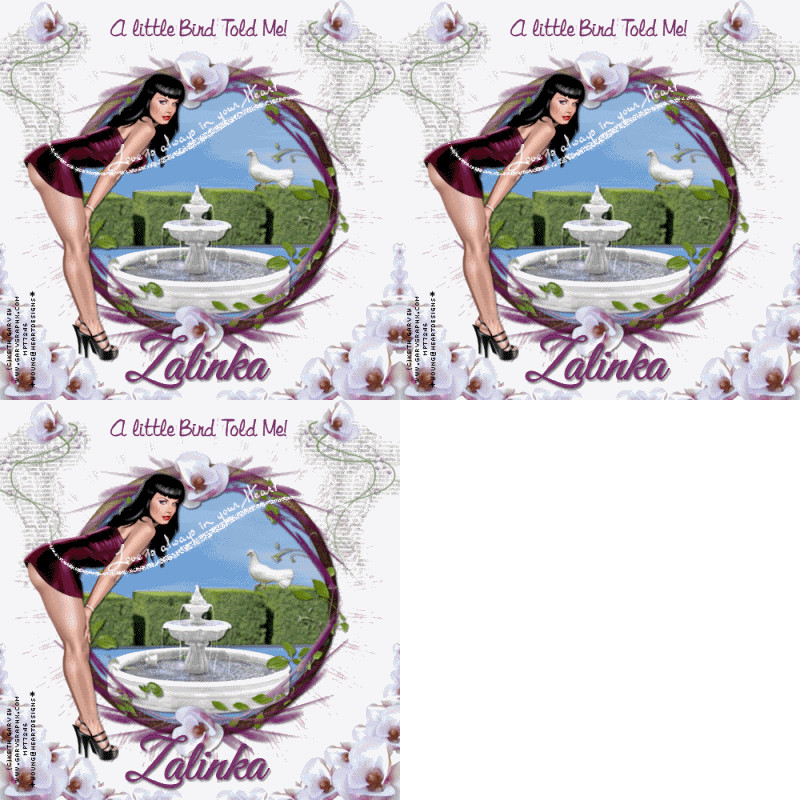
A Little Bird Told Me Animated Tutorial By Sher

This tutorial was written By Me On June 28, 2009 and similarities is purely
coincidental. Im using the beautiful work of Keith Garvey, you must have a license to use his tubes. You can get his tubes and license Here
The Scrap kit is called Sweet Magnolia and it was created by Zalinka ,Thanks Sweetie for this Beautiful free kit! you can get it Here
This is a full size kit and you will have to work a little on the resizing of the elements but it will be well worth it! Its so Beautiful!!
The font for the title is Libby script you can get it Here
The font For the name is called Good Vibrations and it is a PTU font so I cant provide it, any pretty
script font will work.
The Mask is Vix's mask 95 you can get her cool masks Here
The bling is in my supplies . I obtained it on a random search in 4 shared. Lisa I would love to give you the credit for creating such a Beautiful bling, I did a search on the group in the copywrite layer and couldnt find you to properly ask you for the usage. If you find this tutorial and want the credit for the bling please email me so I can add it to this tutorial.
If you dont want me to use this , please email me and I will take it it off this tag
My Supplies are Here
Plug ins Xenofex you can get a demo version Here
You must have a working knowledge of Psp and Animation shop to do this
tutorial. Remember it is just a guide to a fairly simple tutorial. You can use any tubes you wish and any kit.

Ok lets get going

1.Open a new layer 600x600
flood fill white

2. Open the mask in psp and minimize it for now
2.Open the bling in Animation shop and leave open till we are ready for animations.
3. Open a frame of choice I used element 14 and resize to your liking , then copy and paste it in center of your canvas.
4. Using your magic wand tool click in center of frame and copy and paste a new paper ~ go
to selections ~ invert~ hit delete on keyboard~ move this layer under frame.
5. Go to effects~ plug ins ~ xenofex~little puffy clouds~ click ok
6.Open frame 9 and resize to your liking and copy and paste it as a new layer over the other frame.
7. Start adding all you Beautiful elements , resizing then and placing them where desired or see my tag for placements.
8. Add drop shadows of choice to all you elements.
9. Add the tube you wish to use, resize to your liking, and place where desired,or see my tag for
Placement, add a slight drop shadow and sharpen a little.
10. When you have everything the way you want, Go to image and resize all layers to 500x500
Add your copyrights, names , text ect.
If you do not wanna animate this tag merge all layers and your done.

Are you ready to animate this?
Ok lets go!
1.In animation shop go to windows cascade and then to view zoom out by 1
delete the first layer. You should have 5 layer left.
2 . In psp go to edit~ copy special ~ copy Merge~
take this tag now to animation shop and paste as a new animation
Duplicate it 4 times so we have the same number of frames .
3. On the Tag animation go to edit select all
On the bling animation go to edit~ select all~ copy
Take this now back to your tag animation and paste into selected frames
In a spot you desire.
Go to view and Look at your Beautiful Creation. If you Love it , save as a gif and your done!
I hope you enjoyed doing my Tutorial!

Huggies

Sher


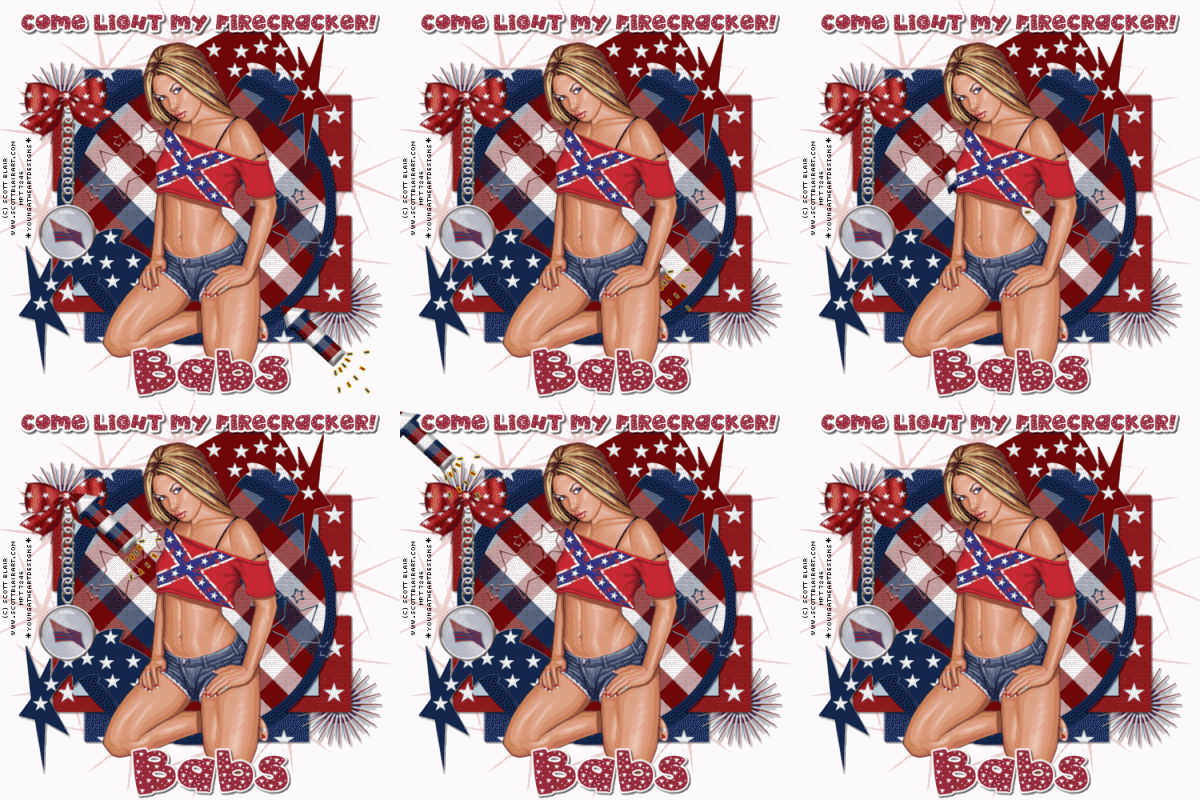
Come Light My Firecracker Animated Tutorial By Sher


This tutorial was written by me on June 28, 2009 any similarities is purely coincidental.
You must have a working knowledge of psp and animation shop to do this tutorial.
Today im using the beautiful work of Scott Blair you must have a license to use his tubes. You can purchase his tube and get the license Here
The FTU scrap kit was made by Babs, Thanks Sweetie! you can get this sensational kit Here
The template I am using was made by Yvette Thanks Sweetie for this wonderful template! You can get it Here
The mask I'm using is Vix's mask 166 Thanks Hun! you can get her cool masks Here
The font I'm using is 2 peas 4th of July You can get it Here

This is just a guide for a pretty easy tutorial remember any kit or tube can be substituted.

Ok Let go!
1. Open mask in psp and minimize it
2. Open the template in psp and copy and close original.
Delete the copy write layer.

Go to Image and resize the canvas layer to 700x700
Flood fill this layer white.
3. Select the papers from the kit you will be wishing to use in the templates and copy and close the originals and resize the papers to 400x400.
4. Starting on layer 1 (circle layer) duplicate this layer. On the duplicate layer select it in the layer pallet~ select all~ float ~defloat~
copy paper of choice and add as a new layer~invert~ hit delete on keyboard ~ select none.
5 . select the original duplicated layer and resize it to 110 % and repeat step 3. After adding new paper you can now delete both the template circle layers.
6. Repeat step 3 on the other 3 layers and once you have new papers added you can delete the original template layers.
Add a drop shadow of choice to the papers.
7. Add your elements ~ resize to your liking and place them where desired or see my tag for placement. Add drop shadows of choice.
7. Add your main tube of choice .
8. Click on canvas layer ~ add a new raster layer~ copy and paste a new paper or flood fill
with a color of choice~ go to layers ~ new mask layer~ from image~select Vix mask 166~ check the source luminance and click ok~ merge this group on one layer.Lower the opacity to 40 %
If you do not plan on animating this tag , resize the tag (all layers) to 500x500
Add copyright , Name and whatever text you want ~ merge all layers and your done.

Animation

If you want the firecracker animation on your tag make sure the lady tube is on top
of all the layers and the firecracker is right under her. Place the firecracker in the right hand corner. Go to edit~ copy special~ copy merge and take to animation shop and place as a new layer. Back to psp ~ Move the firecracker a tad and repeat ~ keep repeating until your firecracker is completely gone, I had 11 frames in all. It just depends on how you want yours to look.
View your animation and set your frame properties to whatever you wish~ I set mine to 20~If you like what you have created save as a gif and your done.
Thanks for trying my Tutorial!

Huggies
Sher


Thursday, June 25, 2009

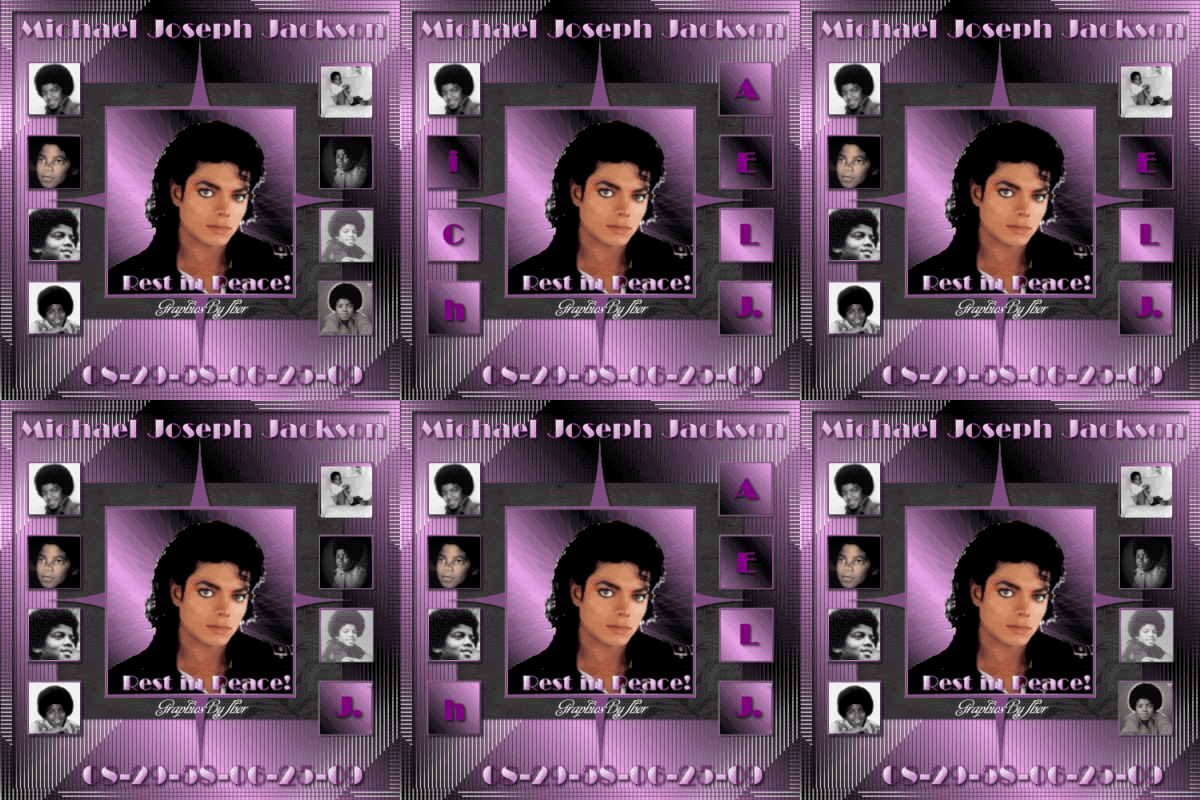
Michael Joseph Jackson Tribute tag


Well so shortly after Farrah's Passing Michael Joined her in Heaven! This seems
like a dream that we lost two Major Icons in One Day! My Heart goes out to The Jackson Family!
Michael we will Miss you! May you Rest In Peace!
I made this tag using Alyssa's Template number 8
You can get it Here

Rest in Peace Sweet Angel


Today The country mourns the Death of an Angel! We will Miss the Smile that Melted the Hearts of many of us! I made this tag as a tribute to Farrah! My Heart goes out to her Family!
The scrapkit I used is called Vintage Love Made by Nancy Here
Her Store is Here
Rest in Peace Farrah Jesus has called his Angel Home!
We will Miss you !

Love Listens Animated tutorial By Sher


This tutorial was written by me on June 25, 2009
any similarities is purely coincidental. This is a fairly easy tutorial, but you must
have a working knowledge of PSP and Animation Shop. No outside filters were used.
Today In using the beautiful works of Mark Blanton
You must purchase those tubes and get his licenses to use his work. You can get them Here
The FTU scrap kit was made By Zalinka, Thanks sweetie for this awesome kit! You can get it Here
The Font I used is called Libby Script you can get it Here

Ok lets go!
1. Open a new canvas 700x700 and flood fill white.
2. Open paper of choice from kit and resize to 800x800
I used paper 10 from the kit. Copy and paste it as a new layer and position it so the crumples and invisible.
3.Open Zalinka Ship and copy and paste as a new layer ~ resize to your liking and place where desired on the horizon. Name this layer Zalinka ship layer
4. Open Lighthouse element and paste it as a new layer and resize to your liking, position it
where desired or see my tag for placement. Name this layer lighthouse.
5. Open palm tree and copy and paste it as a new layer, resizing it to your liking and positioning
it where you want, or see my tag for placement.Name this layer Palm Tree
6.Open Lifebuoy and copy and paste as a new layer~resize to your liking and
position it where desired . Name this layer Lifebuoy
7. Open you Mermaid of choice and copy and paste as a new layer~ Re-size to your liking~ positioning her where desired or see my tag for placement. Name this layer Mermaid.
8. Open shells , starfish or other elements and resize them to your liking then paste them
where desired , then merge all those together
so they are all on one layer. Name this layer Shells
9. Open Seagull and copy and paste it as a new layer~ resize to your liking and position it where desired or see my tag for placement. Name this layer Seagull.
10. resize all layers to 500x500
add your name , text of choice , and designer copyrights , if you don't plan to do animations, merge all layers and
your done.
If you do want to animate this , 1st frame- go to edit ~ copy special ~copy merge
take to animation shop and paste as a new animation.
2nd frame- back to psp~ move the ship a tad and the seagull a tad~
edit ~copy special~copy merged~ take to animation shop and paste after current frame.
continue doing these steps you may want to use your deform tool and rotate the seagull 10 degrees or so in a couple of the steps. I have 10 frames , on the last frame no seagull or ship is showing.
after you get 10 frames in animation shop go to edit~select all~ frame properties ~ set them at 100.
View animation and if you like what you have created, save as a gif and your done.
Thanks for trying my tutorial.

Huggies
Sher


Tuesday, June 23, 2009

I Do Believe (Animated) Tut

Photobucket
To see full size click on the example.

To do this tutorial you must have some knowledge of PSP and Animation Shop.

This Tag was made using PSPX2 and Animation Shop. This tutorial is also copyrighted by Young at Heart Designs.
Im using the Beautiful work of Joel Adams. If you wish to use her work you must have a license to use her work before using her tubes.
To purchase her tubes, images and receive a license go to HERE.
The adorbale kit I used is called "I Do Believe" by Kristi W. at ScrappinDivaz Designz and it can be found HERE.

Supplies I used:
Mask: HERE
(If this is your mask please let me know so I can give proper credit.)
Font: English111 Presto BT
Plug-in: Alien Skin Xenofex 2->Constellation
Plug-in: Eye Candy 4000>Gradient Glow.

I used shadow settings V3,H2, O50, B5, Color Black on ALL elements, layers, text and the tube except for the mask layer.
I also sharpened every element and image I had to re size to get the quality like the original size.

k lets get going!!

1 Open a new canvas 700x600.
2 Open, copy and paste as a new layer the kristiw_idobelieve_frame2 from the kit.
3 Resize and position it where desired.
Use my example for reference.
4 Open the kristiw_idobelieve_castle from the kit and move this below the frame layer.
5 Resize and position where desired.
6 Go to your very 1st layer and open your choice of paper.
7 Resize to the canvas size.
8 Open the mask and minimize it.
9 Go to Layers>New Mask Layer>From Image.
10 In the drop down for Source select the mask.
11 Make sure Source luminance is selected and hit ok.
12 Go to Layers>Merge>Merge Group.
13 Open your choice of tube.
14 Resize and position where desired.
15 Open any desired elements from the kit. I used a gradient glow to some of the elements.
16 Resize and position where desired.
17 Get your text tool and font of choice.
18 Type out any desired wording. I used a gradient glow to the wording as well.
19 Add copyrights.
20 If you are not doing the animation, resize and save as png.

If you are doing the animation, follow these steps:

21 Go to you very 1st layer and get your paint bucket tool.
22 Flood fill white.
23 Click on the mask layer and duplicate twice- giving you 3 total.
24 Rename them mask1, mask2 and mask3.
25 Click on mask1 and go to Effects>Plug-ins>Alien Skin Xenofex 2->Constellation.
26 Apply these settings: 5.50-100-35-15-50-75
Twinkle Rotation: 45
Keep Original Image.
27 Hit ok.
28 Apply the same settings for both Mask2 and Mask3 except for each hit the Random Seed once.
29 Hide Mask2 and Mask3.
30 Copy Merge and go to Animation Shop.
31 Paste as a new animation.
32 Back in PSP, hide Mask1 and unhide Mask2.
33 Copy Merge and go to AS.
34 Right-click on your current frame and select Paste After Current Frame.
35 Back in PSP, hide Mask2 and unhide Mask3.
36 Copy Merge and go to AS.
37 Right-click on your current frame and select Paste After Current Frame.
38 Select all and change the frame properties to 55.
39 Resize and save as gif!
You are all done!!!

Thanks,
Kali

Floating Elegance Tut

Photobucket

To do this tutorial you must have some knowledge of PSP.

This Tag was made using PSPX2. This tutorial is also copyrighted by Young at Heart Designs.
Im using the awesome work of Jennifer Jenesko. If you wish to use her work you must have a license to use her work before using her tubes.
To purchase her tubes and receive a license go to HERE.
The adorbale kit I used is "Souvenirs" by Lynn at Scrappin Divaz and it can be found HERE.


Supplies:
Template #13 by Lacarolita's Designz: HERE
Clouds and Mask: HERE
(If the clouds and mask is yours please let me know so I can give proper credit.)
Plug-in: Eye Candy 4000>Gradient Glow
Font: Brush Script Std

I used shadow settings V3,H2, O50, B5, Color Black on ALL elements, layers, text and the tube except for the mask layer.
I also sharpened every element and tube I had to resize to get the quality like the original size.

1 Open the template.
2 Delete the copyright and background layer.
3 Click on the Raster 1 layer.
4 Open, copy and paste as a new layer your choice of paper from the kit.
5 Click back on your Raster 1 layer and go to selections>Float>Defloat.
6 Click on your newly added paper.
7 Go to Selections>Invert and hit delete on your keyboard.
8 Go to Selections>Select None.
9 Delete the original Raster 1 layer.
10 Repeat Steps #:3-9 for all included layers in the template.
11 Go down to your very 1st layer and open your choice of paper.
12 Resize to the canvas size and then open your mask.
13 Minimize the mask and go to Layers>New Mask Layer>From Image.
14 In the drop down for Source select the mask.
15 Make sure Source luminance is selected and hit ok.
16 Go to Layers>Merge>Merge Group.
17 Open your choice of tube.
18 Resize and position where desired.
19 Open, copy and paste as new layers your choice of elements from the kit.
20 Resize and position where desired.
21 Open the supplied clouds.
22 Resize and position where desired.
23 Open your text tool and font of choice.
24 Type out your desired wording. I added a gradient glow- width 3 and settings set on FAT.
25 Add copyrights.
26 Resize and save as png.
You are done!!!

Thanks,
Kali

Monday, June 22, 2009

The Winery Tut

Photobucket

To do this tutorial you must have some knowledge of PSP and Animation Shop.

This Tag was made using PSPX2 and Animation Shop. This tutorial is also copyrighted by Young at Heart Designs.
Im using the Beautiful work of Pinup Toons. If you wish to use his work you must have a license to use his work before using his tubes.
To purchase his tubes, images and receive a license go to HERE.
The adorbale kit I used is called "Blush" by Ivory's Designz at Scrap Heaven Boutique and it can be found HERE.

Supplies I used:
Tag Template #10 by Lacarolita's Designz: HERE
Font: Brush Script Std

I used shadow settings V3,H2, O50, B5, Color Black on ALL elements, layers, text and the tube except for the mask layer.
I also sharpened every element and image I had to re size to get the quality like the original size.

1 Open template and delete the copyright layer.
2 Click on raster 1 and open, copy and paste your choice of paper.
3 Resize to canvas size and click on raster 1 again.
4 Go to Selections>Select All>Float>Defloat.
5 Click on your newly added paper layer and go to Selections>Invert and hit delete on your keyboard.
6 Delete the original raster 1 layer.
7 Repeat Steps #: 2-6 for all included layers in the template.
8 Open, copy and paste as a new layer your choice of tube.
9 Resize and position where desired.
Use my example for reference.
10 Duplicate your tube and move the duplicated tube below the frame.
11 Get your eraser tool and erase any of the both tubes that are sticking out paste the bottom part of the frame.
12 Open, copy and paste as new layers the ID_blush_elements_glitterframe1 and ID_blush_elements_glitterspray2 from the kit.
13 Resize and postion these right above the background layer.
14 Open, copy and paste as new layers the ID_blush_elements_bottle and the ID_blish_elements_glass from the kit.
15 Resize and position where desired.
16 Open, copy and paste as new layers your choice of elements from the kit.
17 Resize and position where desired.
18 Get your text tool and font of choice and type out desired wording.
19 Add copyrights.
20 Delete the background layer if you choose.
21 Resize and save as png.

You are all done!!!

Thanks,
Kali

American Babe


This Tutorial was written by Me On June 22, 2009
Any similarites is purely coincidental. You need to have a basic Knowledge of Psp and animation shop to do this tutorial.
Today Im using the Beautiful work of Elias Chadzoudis you must have his license numbers to use his tubes, you can get the tubes and licenses Here
The template im using was made by Missy , template 200 you can get it Here
The FTU Scrapkit was Made by Simone you can get it Here
The Font USStarsNStripes can be found Here
You can get my Word Art Here
Ok lets go!
1. Open Template up in psp~copy and close original
Delete the copyrights
click on bottom layer In the pallet and go to image~canvas size and resize to 650x650
Flood fill layer white.
2. Click on Circle background layer in the pallet~Selections~select all~float~defloat~
Open paper of choice~ I used paper 1~ and copy and paste as a new layer~resize if you choose , I did because I wanted the starts to be smaller~ Invert~ Hit delete on keyboard~selections~select none. Delete the circle template layer
3. Click on the dotted circle layer~ go to selections~select all~float~defloat~ Open a new canvas
650X650 and flood fill red color I used c00000~ copy and paste as a new layer~ selections~
Invert~Hit delete on Keyboard~selections~select none~ delete the dotted circle template layer.
4. click on star layer~ select all~ float~defloat~Open a new canvas layer and flood fill
with a color of blue I used 000080~ copy and paste this new paper as a new layer~
selections~invert~ hit delete on keyboard~ selections~select none. Delete the star template layer.
5. Click on star background layer~ select all~float~defloat~ open red paper up again and paste
as a new layer~selections~ invert~ Hit delete on keyboard ~selections~select none
delete the star background template layer.
If you wanna animate this tag do steps 6 and 7 if you dont you can skip these two steps.
6. Click on the Red Star layer in the pallet~ duplicate this layer twice.
Click on the middle red star and select all~ float~ defloat~ flood fill white ~select none.
7. Click on top red star layer ~repeat 6 but change the color to Blue instead of White~ select none. Name these layers star 1 start 2 and star 3
8. Resize all layers to 500X500
9 Add tube of choice and place where desired , resizing to your liking, or see my tag
for placement.
10. Open any elements you want and copy and paste where you want
resizing and adding drop shadows of choice.
11.Add word art or create your own.
12. Add copyrights and name.

No we are ready to animate this tag!!
1. In Psp Close off the star 2 and star 3 layer~ edit ~copy special~copy merge
take to animation shop and paste as a new animation.
2. Back to psp close off star layer 1 and open star layer 2~
Edit~copy special~copy merged~
Take to animation shop and paste after current frame.
3. Back to psp ~ close off star layer 2 and open star layer 3
Edit~ciopy special ~copy merged~ take to animation shop and
Paste after current frame.
4. In animation shop go to edit ~ select all~ animations~ frame properties and set to 50
View your animation and if you like what you have created save as a gif and your done!
Thanks for trying my tutorial!

Huggies
Sher


Saturday, June 20, 2009

Dreamcatcher-Animated Tutorial By Sher


This tutorial was written on June 20, 2009. Any similarities is purely coincidental. You need to have a working knowledge of Paint shop pro and Animation shop to do this tutorial. I used Paint Shop Pro X2 but any version is ok.
I'm using the beautiful work Of Elias Chatzoudis. You must have a License to use his work. You can can purchase his tubes Here
The kit Im using is called Dream Catcher , Its on sale right now, You can purchase it Here
The Native American art I got in a random search , If these images belong to you, I will remove them if you want me too.
The font I used is Courier New but any font will do!

My Supplies are Here

Ok Lets go!
1 .Open new canvas in PSP 650X650
Flood fill White
2. Open kit and copy and paste wigwam in center of canvas~resize to 80% rename layer wigwam
3. Copy and paste skin element and place beneath Wigwam~see my tag for placement. rename layer skin layer
4. Copy and paste circle frame as a new layer and resize to 125 %
Click inside frame with magic wand and copy and paste paper of choice ~selections~invert~
Hit delete on keyboard~select none. Rename this layer circle background
5. Open dream catcher and paste it as a new layer~resize to 50% and move to center of frame.Move frame , background and dream catcher up some so all the feathers of dream catcher are on the working canvas. name this layer dream catcher
6. Open butterfly of choice and copy and paste as a new layer~ resize to your liking~duplicate and mirror the new one. Reposition the new butterfly where desired. merge down and name this butterfly layer
7.Open my Native art, or your own images, click on the circle background layer~select all~
float~defloat~ open Image 16 in my supplies and resize to 125% copy and paste as new layer~ invert~ hit delete on keyboard~ select none. Move this layer under frame layer and Name this layer art 1.
8. Open Native art , image 14 ~copy~ click on the circle background layer ~select all~float~
defloat~ paste as a new layer the native art~ selections~invert~Hit delete on keyboard~
selections~select none. Move this layer under Art 1 layer and Name this layer Art 2
9.Open Last Native Art~ Image 15 and repeat ~ Name this layer Art 3.
10. Add drop shadows of choice to your images.
11.Go to selections~ select all~ modify~contract by 20
open new canvas up and flood fill with color of choice~ I used#8e2520~
go to effects~ texture effects~blinds~ I used color #7999b3 for the blinds width 1o
opacity 50% ~ Now copy this paper as a new layer ~invert~hit delete on keyboard~selections
select none. Add drop shadow to this layer.
12. Click on Bottom layer~ copy and paste as a new layer the sky background paper.
13. Add word art~ see my tag for placements.
14. resize all layers to 500 x500 and add copyrights
15. If you do not plan to animate this tag choose one of the Native art layers, or photo of your choice,and delete the others. Place your choice of art behind the dream catcher , add a name and place where desired and merge all layers. And your done.
16. If you plan on animating close off all art layers , add a name of choice on its own layer and place it in center of dream catcher. 1st frame~ Edit copy special~ copy merge ~ take to animation shop and paste
as a new animation, Back to psp
frame 2
close off name layer and dream catcher layer ~open art one layer
Edit ~ copy special~ copy merged~ take to animation shop and paste after current frame~
back to psp
Frame 3
Close off art 1 layer and open art 2 layer repeat
Frame 4 ~close off art 2 layer and open art 3 layer~ repeat then on frame properties first 3 should be set too 100 and last frame 200.
View animation and if you like your creations save as a gif and your done! Thanks for doing my tutorial.

Huggies
Sher

Friday, June 19, 2009

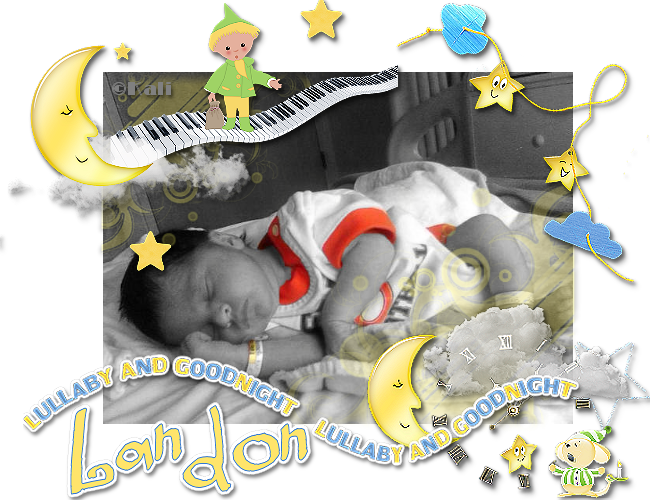
Lullaby Tut

Photobucket
To see the original size of the example- click on the tag because I had to make it smaller to fit on my blog. :)

To do this tutorial you must have some knowledge of PSP.

This Tag was made using PSPX2. This tutorial is also copyrighted by Young at Heart Designs.
The awesome kit I used is called "Just Another Lullaby" by Just a Girls Designs and it can be found HERE.


Supplies:
Your choice of Photo- I used a photo of my son.
Font: FB Neapolitan
Plug-in: Eye Candy 4000>Gradient Glow

I used shadow settings V3,H2, O50, B5, Color Black on ALL elements, layers, and text.
I also sharpened every element and photo I had to resize to get the quality like the original size.

1 Open new canvas 650x500.
2 Open your choice of photo. **DO NOT PASTE AS NEW LAYER YET.**
3 On the Layer Palette right-click the Background layer and choose Duplicate.
4 On the Layer Palette, click the duplicated background layer to make sure it’s the active layer.
5 Go to Effects>Photo Effects>Black and White Film.
6 Hit the Suggest Color button or play around with the settings to get exactly what you want.
7 Hit ok.
8 Select the Eraser Tool from the Tools toolbar. On the Tool Options
Palette at the top of the screen set:
Size: 32
Hardness: 75
Step: 5
Leave all the other settings alone.
9 Now, zoom in close on photo, click and drag. You’ll see the color magically appear where ever you drag
your mouse.
10 Continue erasing until whatever you want colorized it showing color. As you work you may need a smaller
eraser. You can change the size in the Tool Options Palette at the top of the screen.
11 If you find that you’ve over erased and area, exposing color where you don’t want color,
just right-click and drag over the area to un-erase.
12 That’s all there is to it, once you’ve finished exposing the color in the photo, just save your work as a jpeg.
13 Now merge the 2 layers and copy.
14 Go to your new canvas and paste as a new layer.
15 Resize and position where desired.
16 Add a new raster layer.
17 Click on your brush tool- pick a brush of choice and change the opacity to 50%.
18 Use a color of choice. I just used the color yellow to match some of the elements I plan on using from the kit.
19 Click wherever you desire the brush to be and then add a drop shadow effect to the brush.
20 Open, copy and paste as new layers any desired elements from the kit.
21 Resize and position where desired.
22 Open, copy and paste as a new layer the wordart from the kit.
23 Resize and position where desired.
24 Add a gradient glow set on FAT, width 3 and color white.
25 Get your text tool and font of choice and type out desired wording.
26 Add your copyright.
27 Save as a png and you are all done!!!

I hope you enjoyed my tut!
Thanks,
Kali

Thursday, June 18, 2009

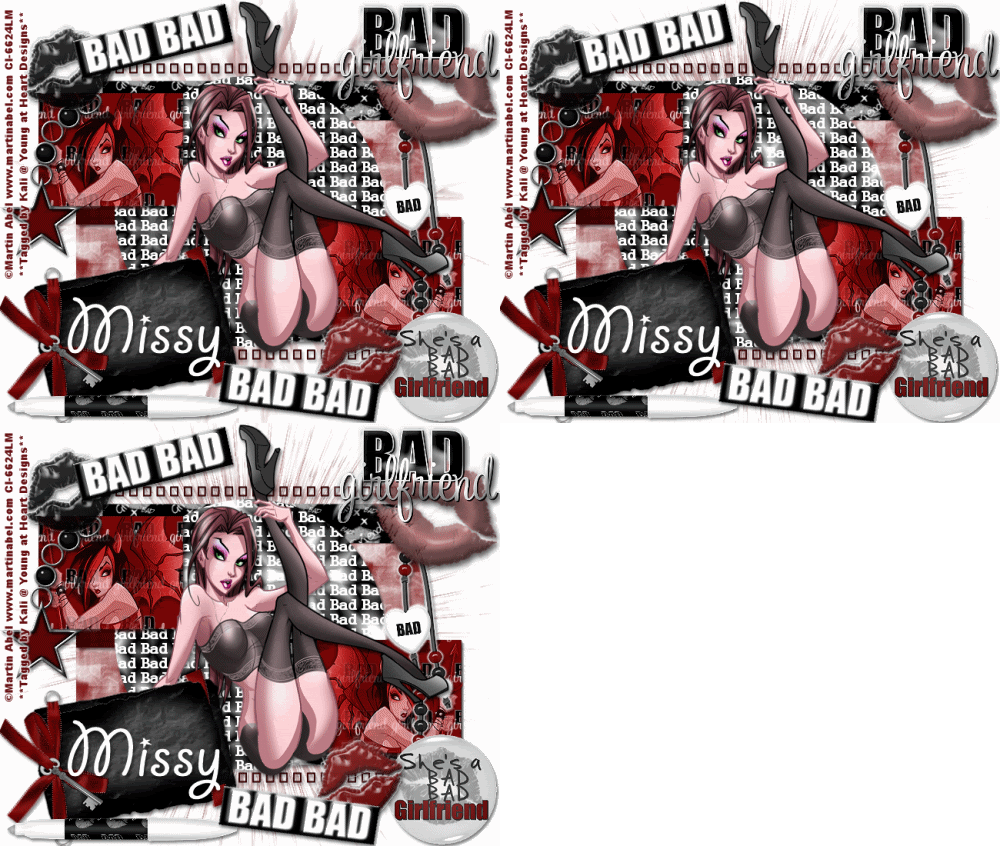
Such a Bad, Bad Girlfriend (Animated) Tut

Photobucket

To do this tutorial you must have some knowledge of PSP and Animation Shop.

This Tag was made using PSPX2 and Animation Shop. This tutorial is also copyrighted by Young at Heart Designs.
Im using the awesome work of Martin Abel. If you wish to use his work you must have a license to use his work before using his tubes.
To purchase his tubes and receive a license go to HERE.
The adorbale kit I used is "Bad Girlfriend" by Missy with Scraps with Attitude and it can be found HERE.

Supplies:
Mask #5 by WSL: HERE
Template #30 by Babes Designz: HERE
Wording: HERE
Font: Giddyup Std
Plug-in: Filters Unlimited 2.0>Bkg Designer sf101>Center Mirror
Plug-in: VM Instant Art>Barbwire

I used shadow settings V3,H2, O50, B5, Color Black on ALL elements, layers, text and the tube except for the mask layer.
I also sharpened every element and tube I had to resize to get the quality like the original size.

1 Open template and delete the copy right layer.
2 Click on the layer #1.
3 Open copy and paste as a new layer your choice of paper.
4 Click back on the layer #1 and go to Selections>Select All>Float>Defloat.
5 Click back on the newly added paper layer and go to Selections>Invert.
6 Hit delete on your keyboard and delete the original #1 layer.
7 Repeat Steps #:2-6 for all included layers for the template.
8 Open, copy and paste as new layers your choice of tubes. I used 2 tubes total.
9 Resize and position where desired.
10 I used the main tube in the middle of the big circle.
11 Place the other tube to be right above the small squares layer.
12 Move it to be right above the left square.
13 Click on the small squares layer and go to Selecions>Select All>Float>Defloat.
14 Click on the tube and go to Selections>Invert and hit delete on your keyboard.
15 Still on your tube duplicate it and then mirror the image.
16 Move the duplicated tube to be right above the right square.
17 Change the opacity for both tubes to 75%.
18 Open, copy and paste as a new layer the supplied wording.
19 Move this layer to be right above the big circle layer but right below your main tube.
20 Click on your big circle and go to Selecions>Select All>Float>Defloat.
21 Now click on on the wording layer and go to Selections>Invert and hit delete on your keyboard.
22 Go to your very first layer and open, copy and paste as a new layer your choice of paper.
23 Open the mask and minimize it.
24 Go to Layers>New Mask Layer>From Image.
25 In the drop down for Source select the mask.
26 Make sure the Source luminance is selected and hit ok.
27 Go to Layers>Merge>Merge Group.
28 Resize the mask layer and then duplicate it.
29 Mirror the duplicate mask layer and then merge them together.
30 Open, copy and paste as new layers your choice of elements from the kit.
31 Resize and position where desired.
32 Get your text tool and font of choice and type out your desired wording.
34 Add copyright.
35 If you are not doing the animation resize and save as png.

If you are doing the animation, follow these steps:

36 Go to your big circle layer and duplicate it twice- giving you a total of 3.
37 Rename them circle1, circle2 and circle3.
38 Click on circle1 and go to Effects>Plug-ins>VM Instant Art>Barbwire.
39 Leave all the settings at default except for Scale. Change Scale to 78.
40 Click on circle2 and go to Effects>Plug-ins>VM Instant Art>Barbwire.
41 Again just change the scale to 55.
42 Click on circle3 and go to Effects>Plug-ins>VM Instant Art>Barbwire.
43 Again just change the scale to 39.
44 Hide the circle2 and circle3 layers.
45 Click on your mask layer and duplicate it twice- giving you a total of 3.
46 Rename them mask1, mask2 and mask3.
47 Click on mask1 and go to Effects>Plug-ins>Filters Unlimited 2.0>Bkg Designer sf101>Center Mirror.
48 Apply these settings: 8-128.
49 Click on mask2 and go to Effects>Plug-ins>Filters Unlimited 2.0>Bkg Designer sf101>Center Mirror.
50 Apply these settings: 113-57.
51 Click on mask3 and go to Effects>Plug-ins>Filters Unlimited 2.0>Bkg Designer sf101>Center Mirror.
52 Apply these settings: 191-240.
53 Hide mask2 and mask3.
54 Copy merge and go to Animation Shop.
55 Paste as a new animation.
56 Back in PSP, hide mask1 and circle1.
57 Unhide mask2 and circle2 and copy merge.
58 Go to AS and right-click on the frame. Select Paste after current frame.
59 Back in PSP, hide mask2 and circle2.
60 Unhide mask3 and circle3.
61 Copy merge and go to AS.
62 Right-click on the current frame and select paste after current frame.
63 Select all and change the frame properties to 55.
64 Resize and save as gif.
You are all done!!!

Thanks,
Kali

Wednesday, June 17, 2009

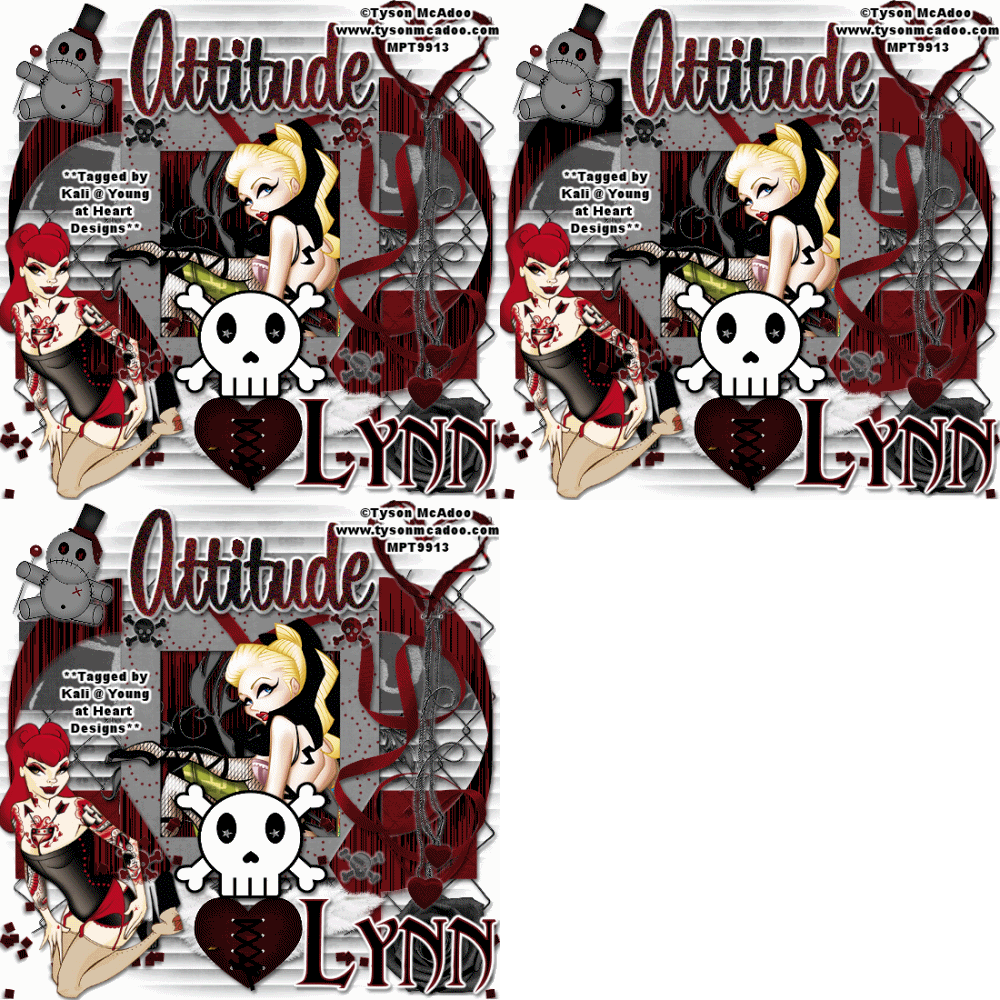
Ms. Goth Attitude (Animated) Tut

Photobucket

To do this tutorial you must have some knowledge of PSP and Animation Shop.

This Tag was made using PSPX2 and Animation Shop. This tutorial is also copyrighted by Young at Heart Designs.
Im using the awesome work of Tyson McAdoo. If you wish to use his work you must have a license to use his work before using his tubes.
To purchase his tubes and receive a license go to HERE.
The adorbale kit I used is "Chosen" by Lynn at The Scrappin Divaz Designz it can be found HERE.

Supplies:
Template made by Marie: HERE
Mask "Blindmask" by Zuzzanna: HERE
Font: Abaddon
Plug-in: Eye Candy 4000>Gradient Glow
Plug-in: Filters Unlimited 2.0>Pattern Generators>Audio Wave


I used shadow settings V3,H2, O50, B5, Color Black on ALL elements, layers, text and the tube except for the mask layer.
I also sharpened every element and tube I had to resize to get the quality like the original size.

1 Open the template and delete the copyright layer.
2 Click on the Lines Layer.
3 Open, copy and paste as a new layer your choice of paper.
4 Click back on the Lines Layer and go to Selections>Select All>Float>Defloat.
5 Click on the newly added paper and go to Selections>Invert and hit delete on your keyboard.
6 Go to Selections>Select None and delete the original Lines Layer.
7 Repeat Steps #:2-6 for all included layers in the template except for the text layer.
8 Click on the text layer.
9 In your materials pallete change the colors to gradient.
10 Use to colors from the colors from the kit.
11 Go to Selections>Select All>Float>Defloat and then get your paint bucket tool.
12 Flood fill the text the gradient.
13 Go to Selections>Select None.
14 Go to Adjust>Add/Remove Noise>Add Noise.
15 Apply these settings: Uniform and 50%.
16 Click ok.
17 Add a gradient glow with the settings: width 3, color white and set on Fat.
18 Open, copy and paste your choice of tubes. I choose 2 tubes.
19 Resize and position where desired.
20 Open, copy and paste as new layers your choice of elements from the kit. I added a small gradient glow as well.
21 Get your text tool and font of choice and type out your choice of wording.
22 Add a gradient glow to the wording.
23 Go to your very first layer and open the mask.
24 Minimize the mask.
25 Open, copy and paste as a new layer your choice of paper.
26 Go to Layers>New Mask Layer>From Image.
27 In the drop down for Source select zuzzanna-blindmask.
28 Make sure Source luminance is selected and hit ok.
29 Go to Layers>Merge>Merge Group.
30 Duplicate the mask layer to make it stand out more.
31 Add copyrights.
32 If you are not doing the animation resize and save as png or jpeg.

If you are doing the animation, follow these steps:

33 Click on the square backgroud that use to be named BG Behind frame.
34 Duplicate this layer twice giving you the total of 3.
35 Rename them square1, square2 and square3.
36 Click on the left arrow.
37 Duplicate this layer twice.
38 Rename them larrow1, larrow2 and larrow3.
39 Click on the right arrow and duplicate it twice.
40 Rename them rarrow1, rarrow2 and rarrow3.
41 Now go back to square1 and go to Effects>Plug-ins>Filters Unlimited 2.0>Pattern Generators>Audio Wave.
41 Leave it on the default settings and apply.
42 Click on the square2 and go to Effects>Plug-ins>Filters Unlimited 2.0>Pattern Generators>Audio Wave.
43 Hit randomize and then apply.
45 Repeat Steps #:42-43 for all the layers we just renamed such as all the left arrows and the right arrows.
46 Hide all layers except square1, larrow1 and rarrow1.
47 Copy merge and go to Animation Shop.
48 Paste as a new animation.
49 Back in PSP, hide the square1, larrow1 and rarrow1.
50 Unhide square2, larrow2 and rarrow2.
51 Copy merge and go to Animation Shop.
52 Right-click on the frame and select Paste after current frame.
53 Back in PSP, hide the square2, larrow2 and rarrow2.
54 Unhide square3, larrow3 and rarrow3.
55 Copy merge and go to AS.
56 Right-click on the current frame and select Paste after current frame.
57 Select all and change the frame properties to 25.
58 Resize and save as gif.
You are all done!!!

Thanks so much,
Kali

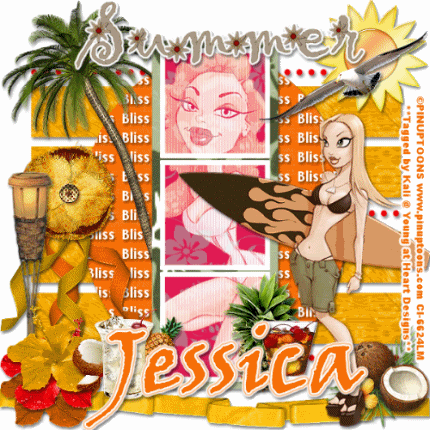
The Summer Bliss Tut

Photobucket

To do this tutorial you must have some knowledge of PSP.

This Tag was made using PSPX2. This tutorial is also copyrighted by Young at Heart Designs.
Im using the Beautiful work of Pinup Toons. If you wish to use his work you must have a license to use his work before using his tubes.
To purchase his tubes and receive a license go to HERE.
The awesome kit I used is called "Summer Bliss" by Gothic Inspirations and it can be found HERE.


Supplies:
Template #10 by MelissaVgraphics: HERE
Wording: HERE
Plug-in: Photoeffx>Scalines
Font: Viner Hand ITC

I used shadow settings V3,H2, O50, B5, Color Black on ALL elements, layers, text and the tube except for the mask layer.
I also sharpened every element and image I had to re size to get the quality like the original size.

1 Open template and hit shift+D and close the original template.
2 Delete the copyright layer.
3 Resize to 600x600.
4 Click on your bottom square layer.
5 Open, copy and paste as a new layer your choice of paper.
6 Resize the paper to the canvas size.
7 Hide the paper layer and click back on the bottom square layer.
8 Get your magic wand tool and click in the middle of the pink area.
9 Then unhide the paper layer and click on it.
10 Go to Selections>Invert and hit delete on your keyboard.
11 Go to Selecions>Select None.
12 Repeat Steps #:4-11 for the middle square and top square layers.
13 Once you have done this merge the bottom layer with your newly added paper that was inverted to it so it is all one layer.
14 Click on the back rectangle strips layer.
15 Open, copy and paste as a new layer your choice of paper.
16 Click back on the rectangle strips layer and go to Selections>Select All>Float>Defloat.
17 Click on the paper layer and go to Selections>Invert and hit delete on your keyboard.
18 Go to Selections>Select None and delete the original layer.
19 Repeat Steps #: 14-18 for the remainder layers that are included in the template.
20 Now open, copy and paste your choice of tubes. I used 2 tubes.
21 Resize and position where desired.
22 The bigger tube that is used for the square layers- duplicate twice giving you a total of 3.
23 Hide the 2 duplicated tubes.
24 Click on the top square and get your magic wand tool.
25 Click the top square and make sure the whole thing is selected.
26 Click on your tube and go to Selections>Invert and hit delete on your keyboard.
27 Go to Selections>Select None.
28 Click on the middle square layer and with your magic tool still active, click on the layer and selecting the whole layer.
29 Unhide the 1st duplicated tube and click on it.
30 Go to Selections>Invert and hit delete on your keyboard.
31 Go to Selecions>Select None.
32 Repeat Steps #: 28-31 for the second duplicated tube and the bottom square layer.
33 Change the layer properties to Screen for all three tubes in the square layers.
34 Now apply Photoeffex>Scalines to all three tubes used for the square layers.
Use these settings: 3-1-22-10-0-0 and select vertical toggle and hit apply.
35 Open, copy and paste as new layers your choice of elements from the kit.
36 Open the wording I supplied and move it to right above the big oval layer.
37 Go to Selections>Select All>Float>Defloat.
38 Click on the wording layer and go to Selections>Invert and hit delete on your keyboard.
39 Go to Selections>Select None.
40 Get your text tool and font of choice and type out any desired wording. I added a gradient glow to the wording as well.
41 Add your copyrights.
42 Resize and save as a png or jpeg.
You are all done!!!

I hope you enjoyed my tut!
Thanks,
Kali


Tuesday, June 16, 2009

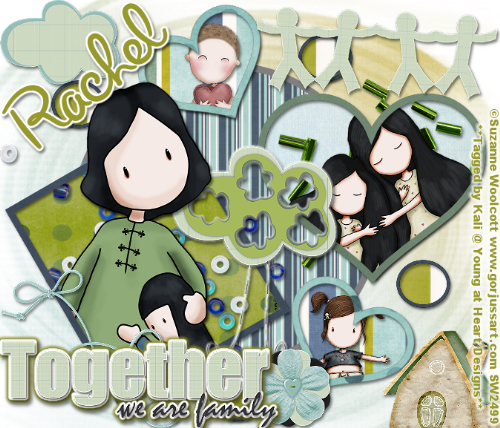
Me & My Family Tut

Photobucket

To do this tutorial you must have some knowledge of PSP.

This Tag was made using PSPX2. This tutorial is also copyrighted by Young at Heart Designs.
Im using the amazing work of Suzanne Woolcott. If you wish to use her work you must have a license to use her work before using her tubes.
To purchase her tubes and receive a license go to HERE.
The adorbale kit I used is "We are Family" by Captivated Visions and it can be found HERE.


Supplies:
Template #51 by Dezigns by Ali: HERE
Mask #1 by Ginas Gems: HERE
Font: Secret Recipe
Plug-in: Eye Candy 4000>Gradient Glow

I used shadow settings V3,H2, O50, B5, Color Black on ALL elements, layers, text and the tube except for the mask layer.
I also sharpened every element and tube I had to resize to get the quality like the original size.

1 Open template and delete the copyright layer.
2 Click on the Circle Back layer and open, copy and paste as a new layer your choice of paper.
3 Click back on your Circle Back layer.
4 Go to Selections>Select All>Float>Defloat.
5 Click back on your newly added paper and go to Selections>Invert.
6 Hit delete on your keyboard and go to Selections>Select None.
7 Delete your original Circle Back layer.
8 Repeat Steps #: 2-7 for all included layers in the template.
9 Open, copy and paste as new layers your choice of tubes. I used a total of 4 different tubes.
10 Resize and position where desired.
Use my example for reference.
11 Your biggest tube that you placed in the big heart frame- make it big enough where the head it sticking out past the frame.
12 Get your eraser tool and erase any of this tube that is sticking out past the frame at the bottom.
Leave the head sticking out.
13 Open your mask and minimize it.
14 Open, copy and paste as a new layer your choice of paper.
15 Resize this layer to the canvas size.
16 Move this layer to the bottom- making it the first layer.
17 Go to Layers>New Mask Layer>From Image.
18 In the drop down window for Source select GinasGemsMask_1.
19 Make sure the Source luminance is selected and hit ok.
20 Go to Layers>Merge>Merge Group.
21 Resize the mask layer to make it much bigger.
22 Open the wordart from the kit.
23 Resize and position where desired.
24 Add a gradient glow- width 4 and color white on settings FAT.
25 Add a drop shadow and then add another gradient glow- width 4 and color #98992d.
26 Open, copy and paste as new layers your choice of elements from the kit.
27 Get your text tool and font of choice and type out your choice of wording.
28 Add copyrights.
29 Resize and save as a png.
You are all done!!!

I hope you enjoyed my tut!

Thanks,
Kali

Misfits have more Fun - Animated tutorial by Sher


This tutorial was written by me on June 16, 2009, any similarities is purely coincidental. You must have a basic knowledge of Paint shop pro and Animation shop to do this tutorial.
I'm using the beautiful work of Ishmael Rac you must have a license to use his tubes, you can get
them Here For his newest tubes or for older ones Here
This particular tube cannot be purchased it was a free tube I obtained from being in a yahoo group called Creative Misfits
that hes a member of Also. Thanks Ishmael for this free gift!
The scrap kit is a PTU kit Called So Sweet from Bea Creations you can Purchase her kit Here
The font im using is called La Bamba You can get it Here
The Template im using was made by Missy template 229 you can get it Here
The Mask Im using is Omask 46 you can get it in my supplies Here
This Tag is just a guide and you can use any kit or tubes you wish and still have a cute Tag!

Ok Lets go!
Open template in psp, copy and close original.
delete the copyrights.
Click on frame 1 background in layer pallet, select all~float~defloat~open paper of choice, resize 50 % and paste
as a new layer~selections~invert~ hit delete on keyboard~selections , select none.
Repeat with frame 2 background.
delete the template originals of both.
rename the new layers background 1 and background 2
click on thin rectangle 1 in layer pallet~select all~ float~defloat~ open paper of choice
and resize 50% then copy and paste as a new layer~invert~ hit delete on keyboard~
selections~select none.
Repeat with Thin rectangle 2 then delete the original templates for both.
click on background 1 again and open tube up in psp, copy and paste it as a new layer, position
on the background layer with just the head showing~ invert~ hit delete on keyboard~ selections~select none~lower the opacity to 85%
Repeat for background 2 mirroring the tube this time.
Name these two layers tube 1 and tube 2
Open main tube up and position where desired.
Add elements of choice where desired.
On the frame 1 and frame 2 layer add drop shadows to each.
Add drop shadows to tubes and elements.
For text open new canvas up in psp
write out whatever text you wish , change to raster layer
add a gradient glow and drop shadow. Copy and paste this on the Background 1 and position it where desired, name this text 1 layer
Repeat this changing to alternate text for background 2. Name this text 2 layer
click on bottom layer~ add a new raster layer~ copy and paste paper of choice or color of choice on this layer
Open mask and minimize it
go to layers ~new mask layer~ from image ~ find the mask from the drop down menu
make sure source luminance is checked and click ok.
Merge this group together.

resize canvas layer to 525x525
Add name and copyrights.

If you want to animate this
close of tube 1 and text 2 ~edit~copy special~copy merge~
take to animation shop and paste as a new layer
back to psp
open tube 1 and close tube 2 and open text 2 and close text 1
edit~copy special~copy merge~ take to animation shop and paste
after current frame .
go to edit ~select all~ frame animations set to 75
view animations , if you like what you created save and your done!
Thanks for trying my tutorial!

Monday, June 15, 2009

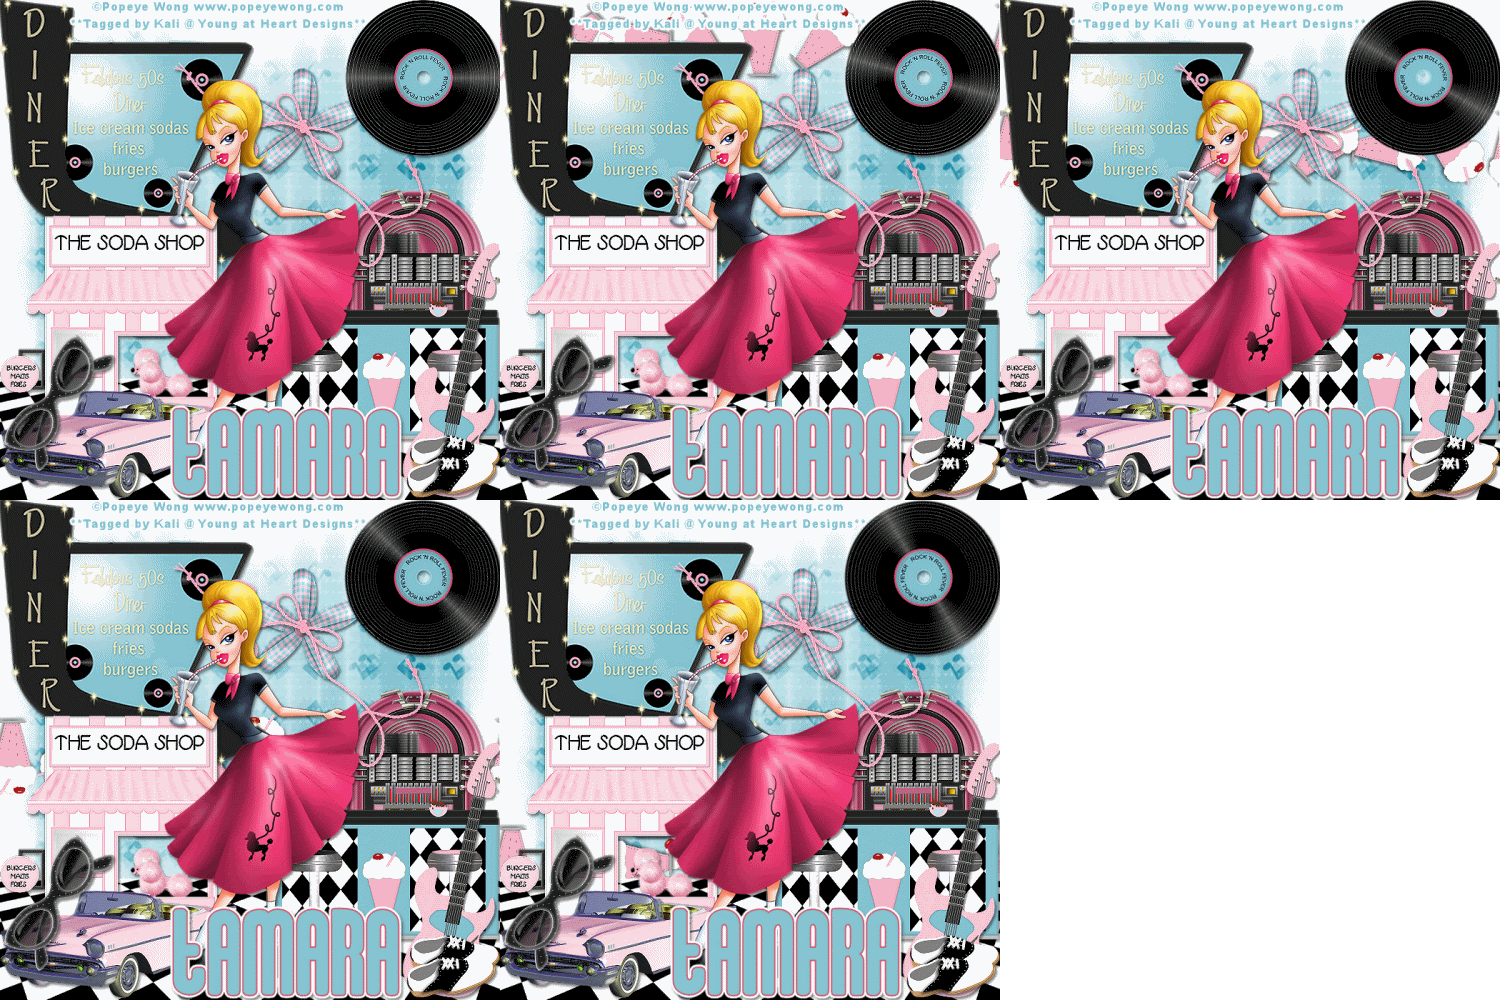
The Soda Shop (Animated) Tut

Photobucket

To do this tutorial you must have some knowledge of PSP and Animation Shop.

This Tag was made using PSPX2 and Animation Shop. This tutorial is also copyrighted by Young at Heart Designs.
Im using the awesome work of Popeye Wong. If you wish to use his work you can get it from HERE.
The awesome kit I used is called "Fabulous Fifties" by Just a Girls Designs and it can be found HERE.


Supplies:
Mask #5 by Ginas Gem: HERE
Plug-in->Eye Candy 4000->Gradient Glow
Plug-in->MuRa's Filter Meister>Copies
Font: Sugar

I used shadow settings V3,H2, O50, B5, Color Black on ALL elements, layers, text and the tube except for the mask layer.
I also sharpened every element and tube I had to resize to get the quality like the original size.

1 Open, copy and paste as new layers the FabulousFifties-Counter2, FabulousFifties-JAG-Car, FabulousFifties-JAG-Dinersign
FabulousFifties-JAG-Floor, FabulousFifties-JAG-Record2, and FabulousFifties-JAG-SodaShoppe.
2 Resize and position where desired.
Use my example for reference.
3 Open, copy and paste as a new layer your choice of tube.
4 Resize and position where desired.
5 Go to the very 1st layer and open, copy and paste as a new layer your choice of paper.
6 Move this layer to the bottom making it the 1st layer.
7 Open the mask and minimize it.
8 Go to Layers>New Mask Layer>From Image.
9 In the drop down for Source select BabesDesignz_Mask11.
10 Make sure Source luminance and Invert Mask Data are selected and hit ok.
11 Go to Layers>Merge>Merge Group.
12 Resize the mask layer to be bigger.
13 Duplicate your mask layer.
14 Mirror the duplicated mask and then merge the two together.
15 Duplicate your mask layer one more time to make it more visible.
16 Get your text tool and font choice and type your desired wording. I added a gradient glow to the wording.
17 Add copyright.
18 If you are not doing the animation, resize and save as png.

If you are doing the animation, follow these steps:

19 Go to the very 1st layer and get your paint bucket tool and flood fill white.
20 Click on your record layer.
21 We are going to duplicate it and then turn it once holding the shift key at the same time.
22 Duplicate it again, turning it once and holding the shift key at the same time.
23 Continue to do this until you have a total of 5 record layers.
24 Rename the layers as record1, record2 and so on.
25 Now open, copy and paste as a new layer the FabulousFifties-JAG-IceCreamSoda.
26 Resize to desired size. Use my example as a reference.
27 Move this in the center of the canvas and covert to raster.
28 Go to Effects>Plug-ins>MuRa's Filter Meister>Copies.
29 Apply these settings: Drop down window below the preview select Line (Random Rotate) and leave the rest as default.
30 Click ok.
31 Move this layer to the top of the canvas and right above your mask layer.
32 Now this is going to have to be done perfect to work out properly.
Duplicate the icecream layer once.
33 You need to hit shift and the down arrow button at the same time 3 times.
34 Duplicate this layer and repeat the step #:33.
35 Continue to do this until the there are icecream layers going all the way down the canvas.
If you did this properly you should have a total of 4 icecream layers.
36 Rename these layers icecream1, icecream2 and so on.
37 Hide all record layers and icecream layers except for record 1.
38 Copy merge and go to Animation Shop.
39 Paste as a new animation.
40 Back in PSP, hide record1 and unhide record2 and icecream1.
41 Copy merge and go back to AS.
42 Right-click on the frame and select Paste after current frame.
43 Back in PSP, hide record2 and icecream1 and unhide record3 and icecream2.
44 Copy merge and go to AS.
45 Right-click on the current frame and select paste after current frame.
46 Now repeat this until you have copy merged all the records and icecream layers.
You should have a total of 5 frames.
47 Select all and change the frame properties to 75.
48 Resize and save as a gif.
You are all done!!

Thanks,
Kali

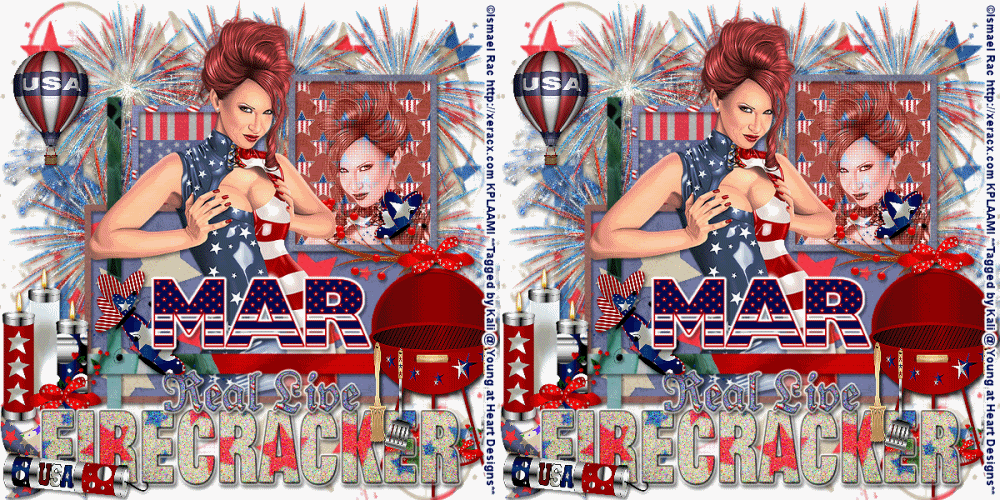
Real Live Firecracker (Animated) Tut

Photobucket

To do this tutorial you must have some knowledge of PSP and Animation Shop.

This Tag was made using PSPX2 and Animation Shop. This tutorial is also copyrighted by Young at Heart Designs.
Im using the awesome work of Ismael Rac. If you wish to use his work you must have a license to use his work before using his tubes.
To purchase his tubes and receive a license go to HERE.
The awesome kit I used is called "Glorious Day" by Scrapping Mar and it can be found HERE.


Supplies:
Template #9 by Sapphire:HERE
Mask #11 by Babes Designz: HERE
Plug-in->Penta.com>Color Dot
Plug-in->Eye Candy 4000->Gradient Glow
Plug-in->DSB Flux>Bright Noise
Font: USStarsNStripes

I used shadow settings V3,H2, O50, B5, Color Black on ALL elements, layers, text and the tube except for the mask layer.
I also sharpened every element and tube I had to resize to get the quality like the original size.

1 Open template and delete the copyright layer and the blueish green layer.
2 Click on Raster 5 and open, copy and paste as a new layer your choice of paper.
3 Click back on Raster 5 and go to Selections>Select All>Float>Defloat.
4 Click on the paper layer and go to Selections>Invert and hit delete on your keyboard.
5 Go to Selections>Select None and delete the original raster 5 layer.
6 Repeat Steps #:2-5 for all included layers in the template.
7 Delete raster 14 unless you would like to use it.
8 Click on the "Real Live" wordart and go to Adjust>Add/Remove Noise>Add Noise.
9 Apply these settings: Random and 50%.
10 Apply these same setting to the "Firecracker" wordart.
11 For both the wordarts apply a gradient glow- width 3 and color black.
12 Open, copy and paste as a new layer your choice of tube.
13 Resize and position this tube underneath the big rectangle frame and duplicate the tube.
14 Move the duplicate the tube above the frame.
15 Get your eraser tool and erase any of the tubes that are sticking out of the frame except for the tube's head.
16 Now duplicate your tube again and mirror it.
17 Move the mirrored duplicated tube to go under the small rectangle frame.
18 Click on the small paper rectangle background and go to Selections>Select All>Float>Defloat.
19 Click on the mirrored duplicated tube and go to Selections>Invert and hit delete on your keyboard.
20 Go to Selections>Select None.
21 Change the layer properties to Luminance Legecy.
22 Go to Effects>Plug-ins>Penta.com>Color Dot.
23 Apply these settings: 90-2-255-255-255.
24 Open, copy and paste any desired elements from the kit.
25 Resize and position the elements where desired.
26 Get your text tool and font of choice and type out the desired wording.
27 Go to the very 1st layer and open, copy and paste as a new layer your choice of paper.
28 Move this layer to the bottom making it the 1st layer.
29 Open the mask and minimize it.
30 Go to Layers>New Mask Layer>From Image.
31 In the drop down for Source select BabesDesignz_Mask11.
32 Make sure Source luminance and Invert Mask Data are selected and hit ok.
33 Go to Layers>Merge>Merge Group.
34 Resize the mask layer to be bigger.
35 Add copyright.
36 If you are not doing the animation, resize and save as png.

If you are doing the animation, please follow these settings:

37 Go to the very 1st layer and add a new raster layer.
38 Move this layer to the bottom making it the 1st layer.
39 Get your paint bucket tool and flood fill white.
40 Merge the firework layers together so there are all in one layer.
41 Duplicate your fireworks layer twice giving you 3 total.
42 Rename them fireworks1, fireworks2 and fireworks3.
43 Click on the fireworks1 layer and go to Effects>Plug-ins>DSB Flux>Bright Noise.
44 Apply these settings: Intensity- 55, Mix and hit ok.
45 Apply these same settings to fireworks2 and fireworks3.
46 Hide fireworks2 and fireworks3.
47 Copy merge and go to Animation Shop.
48 Paste as a new animation.
49 Back in PSP, hide fireworks1 and unhide fireworks2.
50 Copy merge and go to AS.
51 Right-click on the frame and select Paste after current frame.
52 Back in PSP, hide fireworks2 and unhide fireworks3.
53 Copy merge and to to AS.
54 Right-click on the current frame and select paste after current frame.
55 Select all and resize the animation.
56 Save as gif!
You are all done!!!

Thanks,
Kali

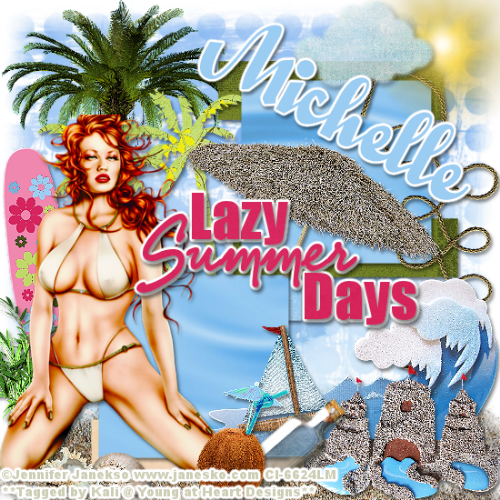
Lazy Summer Days Tut

Photobucket

To do this tutorial you must have some knowledge of PSP.

This Tag was made using PSPX2. This tutorial is also copyrighted by Young at Heart Designs.
Im using the Beautiful work of Jennifer Janesko. If you wish to use her work you must have a license to use her work before using her tubes.
To purchase her tubes and receive a license go to HERE.
The awesome kit I used is called "Beach Bliss" by Candy Kisses Designz and it can be found HERE.


Supplies:
Template #54 by Melissaz Creationz: HERE
Mask #290 by Weescott: HERE
Font: QuigleyWiggly
Plug-in: Eye Candy 4000>Gradient Glow (Used for the wordart but optional)

I used shadow settings V3,H2, O50, B5, Color Black on ALL elements, layers, text and the tube except for the mask layer.
I also sharpened every element and tube I had to resize to get the quality like the original size.

1 Open template and delete the copyright layer.
2 Click on the bottom rectangles layer and open, copy and paste as a new layer your choice of paper.
3 Resize to the canvas size.
4 Click back on the bottom rectangles layer and go to Selections>Select All>Float>Defloat.
5 Click on the newly added paper layer and go to Selections>Invert and hit delete on your keyboard.
6 Go to Selections>Select None and delete the original bottom rectangles layer.
7 Repeat Steps #:2-6 for all included layers in the template.
8 Go to your very 1st layer and open, copy and paste as a new layer your choice of paper.
9 Open the mask and minimize.
10 Go to Layers>New Mask Layer>From Image.
11 In the drop down for Source select WSL_Mask290.
12 Make sure Source luminance is selected and hit ok.
13 Go to Layers>Merge>Merge Group.
14 Resize the mask layer to be bigger.
15 open, copy and paste as a new layer your choice of tube.
16 Resize and position where desired.
17 Open, copy and paste as new layers your choice of elements from the kit.
18 Get your text tool and font of choice and type out your choice of wording.
19 Add copyrights.
20 Resize and save as a png.
You are all done!!!

Thanks,
Kali

The Bachelor Party (Animated) Tut

Photobucket

To do this tutorial you must have some knowledge of PSP and Animation Shop.

This Tag was made using PSPX2 and Animation Shop. This tutorial is also copyrighted by Young at Heart Designs.
Im using the awesome work of Jamie Kidd. If you wish to use her work you must have a license to use her work before using her tubes.
To purchase her tubes and receive a license go to HERE.
The awesome kit I used is called "Bachelor Party" by Kristi W. with Scrappin' Divaz and it can be found HERE.

Supplies:
Template #44 by Sara:HERE
Mask:HERE
Plug-in->VM Natural>Lightburst
Plug-in->Eye Candy 4000->Gradient Glow
Font: Harlow Solid Italic

I used shadow settings V3,H2, O50, B5, Color Black on ALL elements, layers, text and the tube except for the mask layer.
I also sharpened every element and tube I had to resize to get the quality like the original size.

1 Open template and delete the copyright.
2 Resize all layers to 600x717.
3 Now resize the canvas size to 799X836.
4 Click on the rectangle 1 layer and open your choice of paper.
5 Resize to the canvas size.
6 Now click the rectangle 1 layer again.
7 Go to Selections>Select All>Float>Defloat.
8 Click back on the paper layer and go to Selections>Invert and hit delete on your keyboard.
9 Delete the original rectangle 1 layer.
10 Repeat Steps #: 4-9 for all the included layers in the template.
11 Go to the 1st layer and open, copy and paste as a new layer your choice of paper.
12 Open the mask and minimize it.
13 Go to Layers>New Mask Layer>From Image.
14 In the drop down window for Source select the mask.
15 Make sure Source luminance is selected and hit ok.
16 Go to Layers>Merge>Merge Group.
17 Resize the mask layer to the canvas size.
18 Open, copy and paste as new layers your choice of tube(s).
19 Resize and position where desired.
20 Click on the paper layer you used for the circle layer.
21 Position the other tube to the left of it.
22 Change the layer properties to Screen.
24 Duplicate the tube and go to Image>Mirror.
25 Click back on the paper layer and go to Selections>Select All>Float>Defloat.
26 Click on the first tube and go to Selections>Invert and hit delete on the keyboard.
27 Go to Selections>Select None.
28 Now repeat Steps #:25-27 for the 2nd tube.
29 Open, copy and paste as new layers your choice of elements from the kit.
30 Get your text tool and font of choice and type out your choice of wording.
31 Add copyrights.
32 If you are not doing the animation resize and save as a png.

If you are doing the animation, follow these steps:

33 Go to the very first layer and add a rater layer.
34 Move the new raster layer to the bottom and get your paint bucket tool.
35 Flood fill white.
36 Click on the kristiw_bachelorparty_discoball layer.
37 Duplicate it twice so you have a total of 3.
38 Rename them discoball1, discoball2 and discoball3.
39 Click on discoball1 and go to Effects>Plug-ins>VM Natural>Lightburst.
40 Apply these settings: 128-128-18-9-0.
41 Click on discoball2 and go to Effects>Plug-ins>VM Natural>Lightburst.
42 Apply these settings: 128-128-39-9-0.
43 Click on discoball3 and go to Effects>Plug-ins>VM Natural>Lightburst.
44 Apple these settings: 128-128-82-9-0.
45 Hide discoball2 and discoball3.
46 Copy merge and go to Animation Shop.
47 Paste as a new animation.
48 Back in PSP, hide discoball1 and unhide discoball2.
49 Copy merge and go to AS.
50 Right-click the frame and select Paste after current frame.
51 Back in PSP, hide discoball2 and unhide discoball3.
52 Copy merge and go to AS.
53 Right-click on the current frame and select paste after current frame.
54 Select all and change the frame properties to 55.
55 Resize and save as gif.
You are all done!!

Thanks for doing my tut!

-Kali

Sunday, June 14, 2009

Glamour Girl (Animated) Tut

Photobucket

To do this tutorial you must have some knowledge of PSP and Animation Shop.

This Tag was made using PSPX2 and Animation Shop. This tutorial is also copyrighted by Young at Heart Designs.
Im using the awesome work of Elias Chatzoudis. If you wish to use his work you must have a license to use his work before using his tubes.
To purchase his tubes and receive a license go to HERE.
The awesome kit I used is called "Glamour Girl" by Grunge & Glitter and it can be found HERE.


Supplies:
Template #18 by DBV:HERE
Wordart:HERE
Plug-in->Photoeffex>Scalines
Plug-in->Eye Candy 4000>HSB Noise
Plug-in->Eye Candy 4000->Gradient Glow
Plug-in->Xero>Radiance
Font: Matura MT Script Capitals

I used shadow settings V3,H2, O50, B5, Color Black on ALL elements, layers, text and the tube except for the mask layer.
I also sharpened every element and tube I had to resize to get the quality like the original size.

1 Open new canvas 800x800.
2 Open, copy and paste as a new layer the GG_GlamourGirl_frame3 from the kit.
3 Open, copy and paste as a new layer your choice of paper.
4 Move the newly added paper under the frame layer.
5 Get your eraser tool and erase any of the paper sticking out paste the frame.
6 Open, copy and paste as a new layer your choice of tube.
7 Resize and position where desired.
Use my example for reference.
8 Duplicate your tube twice.
9 Resize and position where desired under the frame layer.
10 Click on the first duplicated layer and go to Effects>Plug-ins>Xero>Radiance.
11 Apply these settings: 128-50-128-255.
12 Apply the same settings to the 2nd duplicated tube.
13 Now click on the paper layer used as the background for the frame.
14 Go to Selections>Select All>Float>Defloat.
15 Click on the 1st duplicated tube and go to Selections>Invert and hit delete on your keyboard.
16 Go to Selections>Select None.
17 Go back to Selections>Select All>Float>Defloat.
18 Click on the 2nd duplicated tube and go to Selections>Invert and hit delete on your keyboard.
19 Go to Selections>Select None.
20 Now merge the duplicated tubes and the paper layer by going to Layers>Merge Down.
21 **ONLY FOLLOW THIS STEP IF YOU ARE NOT DOING THE ANIMATION**
Click on your merged layer and go to Effects>Plug-ins>Photoeffex>Scalines.
22 Apply these settings: 3-3-40-20.
23 Open, copy and paste as new layers any desired elements from the kit.
24 Open, copy and paste as a new layer the supplied wordart.
25 Open the mask and minimize.
26 Go to your very 1st layer and open, copy and paste as a new layer your choice of paper.
27 Resize the paper to the canvas size.
28 Go to Layers>New Mask Layer>From Image.
29 In the drop down box for Source select the mask.
30 Make sure Source luminance is selected and hit ok.
31 Go to Layers>Merge>Group.
32 Resize the mask layer to the canvas size.
33 Duplicate the mask layer 2 times and then merge them with the original mask layer.
We are doing this to make the mask layer more visible.
34 Go to the very top layer and get your text tool and choice of font.
35 Set your foreground to #9b2a6c and background to #ea5586.
36 Click on your background color so the Material Properties box pops up.
37 Click on the gradient tab at the top.
38 Apply these settings: Style: Sunburst, Angle: 36, Repeats: 10 and check Invert.
Leave all other settings to default.
39 Click ok.
40 Type out any desired wording.
41 Go to Adjust>Add/Remove Noise>Add Noise and apply these settings: Uniform, Noise: 40% and make sure Monochrome is checked.
42 Add a gradient- glow width 3 and color black.
43 Add copyrights.
44 If you are not doing the animation resize and save as png.

If you are doing the animation, follow these steps:

45 Go to your very 1st layer and get your paint bucket tool and flood fill white.
46 Click on your merged layer with the duplicated tubes and paper background.
47 Duplicate it twice- giving you 3 merged layers.
48 Click on the 1st one and go to Effects>Plug-ins>Photoeffex>Scalines.
49 Apply these settings: 3-3-40-20.
50 Click on the 2nd one and go to Effects>Plug-ins>Photoeffex>Scalines.
51 Apply these settings: 2-3-40-20.
52 Click on the 3rd one and go to Effects>Plug-ins>Photoeffex>Scalines.
53 Apply these settings: 1-3-40-20.
54 Click back on your 1st merged layer and go to Effects>Plug-ins>Eye Candy 4000>HSB Noise.
55 Under settings select Transparent Haze but change the Saturation Variation to 40, Brightness Variation to 18 and Opacity Variation to 0.
56 Hit ok.
57 Click on your 2nd merged layer and go to Effects>Plug-ins>Eye Candy 4000>HSB Noise.
58 Leave all the settings but hit random seed once.
59 Repeat Steps #:57-58 for the 3rd merged layer.
60 Hide the 2nd and 3rd merged layer and copy merge.
61 Go to Animation Shop and paste as a new animation.
62 Back in PSP, hide the 1st merged layer and unhide the 2nd one.
63 Copy merge and go to AS.
64 Right-click on the frame and select Paste After Current Frame.
65 Back in PSP, hide the 2nd merged layer and unhide the 3rd one.
66 Copy merge and go to AS.
67 Right-click on your current frame and select Paste After Current Frame.
68 Select all and change the frame properties to 25.
69 Resize and save as gif.
You are all done!!!

I hope you enjoyed my tut!
Thanks,
Kali

Saturday, June 13, 2009

Stunning (Animated) Tut

Photobucket

To do this tutorial you must have some knowledge of PSP and Animation Shop.

This Tag was made using PSPX2 and Animation Shop. This tutorial is also copyrighted by Young at Heart Designs.
Im using the Beautiful work of Jennifer Janesko. If you wish to use her work you must have a license to use her work before using her tubes.
To purchase her tubes and receive a license go to HERE.
The awesome kit I used is called "Ooohlala" by by Kristi W. at ScrappinDivaz Designz and it can be found HERE.

Supplies:
Template #6 by Simply Devilish Scraps: HERE
Animation: HERE
(If this is your animation, please let me know so I can give proper credit or link back to your site.)
Font: Adorable
Plug-in: Eye Candy 4000>Gradient Glow
Plug-in: DSB Flux>Bright Noise

I used shadow settings V3,H2, O50, B5, Color Black on ALL elements, layers, text and the tube except for the mask layer.
I also sharpened every element and tube I had to resize to get the quality like the original size.

1 Open template and hit shift+D and delete the original template.
2 Delete the copyright layer.
3 Click on the Multirectangler layer.
4 Open, copy and paste as a new layer your choice of paper.
5 Click back on the Multirectangler layer and get your magic wand tool.
6 Click in the center of it first rectangle making sure you are only selecting the opening of it and not the border.
7 Once you have the marching anys around the opening- hit shift and select the other five rectangle openings.
You need to hold down shift at the same time so you can select them all.
8 Click on your paper layer and go to Selections>Invert and hit delete on your keyboard.
9 Go to Selections>Select None.
10 Now open, copy and paste as a new layer your choice of paper.
11 Now get your magic wand tool again and click on each of the borders of the rectangles holding down the shift key at the same time.
12 Click on your paper layer and go to Selections>Invert and hit delete on your keyboard.\
13 Go to Selections>Select None and delete the original Mutirectangler layer.
14 Repeat Steps #: 3-14 for each included layer in the template.
15 Open, copy and paste as a layer your choice of tube.
16 Resize and position where desired.
17 Open, copy and paste as a new layer the kristiw_ooohlala_bracketframe.
18 Resize and position it in the center of the canvas.
19 Go to your tube and duplicate it.
20 Move the dupliated tube to above your frame.
21 Get your eraser tool and erase any of your tubes that are sticking out past the frame.
22 Open, copy and paste as new layers your choice of elements from the kit.
I used a gradient glow to almost all elements so they are easier to stand out. Width-4 and color-white.
23 Open, copy and paste as a new layer the wordart.
24 Follow this to make it stand out more:
Gradient Glow: Glow Width- 5, color white and have it set on Fat.
25 Once you did that go back to Gradient Glow and change the width to 3 and the color to black.
26 Get your text tool and desired font of choice- type out desired wording.
27 Again to make the wording stand out use the same settings for gradient glow we used for the wordart.
28 Add copyright.
29 If you are not doing the animation, resize and save as png or jpeg.

If you are doing the animation, follow these settings:

30 First thing is first, look at your tag and decide which elements you want animated.
31 Duplicate these items twice-giving you 3 of each. Rename them so you can keep track of them.
32 Click on the first element- the original one.
33 Go to Effects>Plug-in>DSB Flux>Bright Noise.
34 Apply the settings: Intensity 43 and Direction Mix and hit ok.
35 Now click on the 1st duplicated element and apply the same settings for DSB Flux.
36 Repeat this for each element and the duplicated elements that you wish to animate.
37 Now you will need to hide all duplicated elements and leave any original ones that you applied the noise too.
38 Copy merge and go to Animation Shop.
39 Paste as a new animation.
40 Back in PSP, hide all original elements and unhide the 1st set of duplicated elements.
41 Copy merge and go to Animation Shop.
42 Right-click on your frame and select paste after current frame.
43 Back in PSP, hide all of the 1st set of duplicated elements that are active.
44 Unhide the last set of duplicated elements.
45 Copy merge and go to Animation Shop.
46 Right-click on your current frame and select paste after current frame.
47 Select all and select copy.
48 Go to the very last frame and click on it so that is the only frame selected.
49 Then right-click and select paste after current frame.
50 This should give you a total of 6 frames.
51 Open the supplied animation.
52 Select all and copy.
53 Now go back your animation and go to the very 1st frame and select all so all frames are selected.
54 Right-click on the 1st frame and select past into selected frame.
55 Position the heart animation where desired. I actually pasted it twice to it was in the animation twice.
56 Once your satisfied where it is placed select all and go to frame properties and change it to 45.
57 Resize and save as gif.
You are all done!!!

I hope you like my tut!

Thanks,
Kali
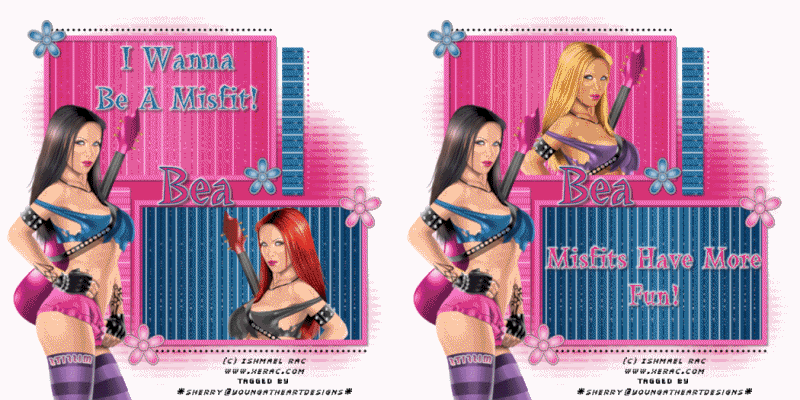
Wednesday, June 10, 2009

I Can't Drive 55 (Animated) Tut

Photobucket

To do this tutorial you must have some knowledge of PSP and Animation Shop.

This Tag was made using PSPX2 and Animation Shop. This tutorial is also copyrighted by Young at Heart Designs.
Im using the awesome work of Pinup Toons. If you wish to use his work you must have a license to use his work before using his tubes.
To purchase his tubes and receive a license go to HERE.
The adorbale kit I used is "I Can't Drive 55 (Girl Version)" by Kristi W. at ScrappinDivaz Designz and it can be found HERE.

Supplies:
Template #55 by Melissaz Creationz: HERE
Maske #32 by Butterfly Flutterby Creations: HERE
Plug-in: Greg's Outlet Factory Vol. II>Pool Shadow
Font: Ferro Rosso

I used shadow settings V3,H2, O50, B5, Color Black on ALL elements, layers, text and the tube except for the mask layer.
I also sharpened every element and tube I had to resize to get the quality like the original size.

1 Open template and delete the copyright layer.
2 Click on the lg circle layer.
3 Open, copy and paste as a new layer your choice of paper.
4 Click back on the lg circle layer and go to Selections>Select All>Float>Defloat.
5 Click on the newly added paper and go to Selections>Invert and hit delete on the keyboard.
6 Go to Selections>Select None and delete the original lg circle layer.
7 Now repeat Steps #:2-6 for all included layers for the template.
8 Now open, copy and paste as a new layer your choice of tube.
9 Resize and position where desired.
10 Open the mask and minimize it.
11 Go to your very 1st layer and open, copy and paste as a new layer your choice of paper.
12 Resize to the canvas size.
13 Move this layer to the bottom so it is the 1st layer now.
14 Go to Layers>New Mask Laye>From Image.
15 In the drop down window for Source select BflyFlbyMask32.
16 Make sure Source luminance is selected and hit ok.
17 Go to Layers>Merge>Merge Group.
18 Resize the mask layer to be the canvas size.
19 Open, copy and paste as new layers any desired elements.
Use my example for reference.
20 (ONLY DO THIS STEP IF YOU ARE NOT DOING THE ANIMATION)
Click on the kristiw_Icantdrive55_flames layer.
21 Go to Effects>Plug-ins>Greg's Outlet Factory Vol. II>Pool Shadow
22 Do the settings: 50-50-50-50-50-50-255-232 and apply.
23 Get your text tool and font of choice and type out desired wording.
I used the colors: foreground: #ffffff
background: #e26d88
I also used font size 120. (Don't worry- the tag is going to be resized.)
24 Add copyrights.
25 If you are not doing the animation, resize and save as png.

If you are doing the animation, follow these steps:

26 Go to the very 1st layer and add a raster layer.
27 Move this layer to the bottom so it is the 1st layer.
28 Get your paint bucket tool and flood fill white.
29 Click on the kristiw_Icantdrive55_flames layer.
30 Duplicate this layer so you have a total of 3.
31 Now rename them flames1, flames2 and flames3.
32 Click on the flames1.
33 Go to Effects>Plug-ins>Greg's Outlet Factory Vol. II>Pool Shadow
34 Do the Settings: 50-50-50-50-50-50-255-232 and apply.
35 Click on your flames2.
36 Go to Effects>Plug-ins>Greg's Outlet Factory Vol. II>Pool Shadow
37 Do the Settings: 50-50-50-50-50-50-128-179 and apply.
38 Click on your flames3.
39 Do the Settings: 50-50-50-50-50-50-128-114 and apply.
40 Now click on your kristiw_Icantdrive55_stoplight layer.
41 Click on your magic wand tool.
42 Use the settings: Tolerance 10 and Feather 0.
43 Click on the red light so it is selected.
44 The go to Selections>Promote Selection to Layer.
45 Now on the promoted layer rename it red light.
46 Change the layer properties to Dodge.
47 Go to Adjust>Brightness and Contrast>Clarify.
48 Change the Strength of effect to 6.6 and hit okay.
49 Go to Selections>Select None.
50 Now repeat Steps #:43-49 for the yellow light and the green light.
51 Now hide the yellow light and the green light.
52 Copy merge and go to Animation Shop.
53 Paste as a new animation.
54 Back in PSP, hide the flames1 and red light.
55 Unhide flames2 and yellow light.
56 Copy merge and go to AS.
57 Right-click on the frame and select paste after current frame.
58 Back in PSP, hide the flames2 and yellow light.
59 Unhide the flames3 and green light.
60 Copy merge and go to AS.
61 Right-click on the current frame and select paste after current frame.
62 Select all and go to Animation>Frame Properties.
63 Change it to 85.
64 Resize and save as a gif.
You are all done!!!

I hope you enjoyed my tut!

Thanks,
Kali