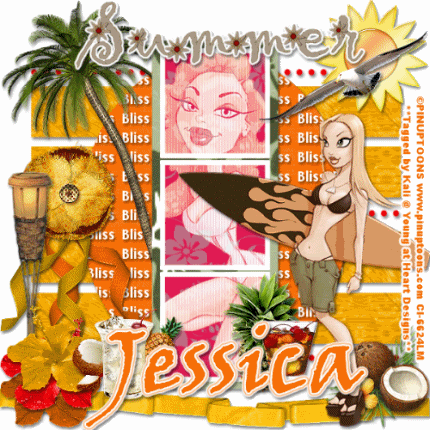
To do this tutorial you must have some knowledge of PSP.
This Tag was made using PSPX2. This tutorial is also copyrighted by Young at Heart Designs.
Im using the Beautiful work of Pinup Toons. If you wish to use his work you must have a license to use his work before using his tubes.
To purchase his tubes and receive a license go to HERE.
The awesome kit I used is called "Summer Bliss" by Gothic Inspirations and it can be found HERE.
Supplies:
Template #10 by MelissaVgraphics: HERE
Wording: HERE
Plug-in: Photoeffx>Scalines
Font: Viner Hand ITC
I used shadow settings V3,H2, O50, B5, Color Black on ALL elements, layers, text and the tube except for the mask layer.
I also sharpened every element and image I had to re size to get the quality like the original size.
1 Open template and hit shift+D and close the original template.
2 Delete the copyright layer.
3 Resize to 600x600.
4 Click on your bottom square layer.
5 Open, copy and paste as a new layer your choice of paper.
6 Resize the paper to the canvas size.
7 Hide the paper layer and click back on the bottom square layer.
8 Get your magic wand tool and click in the middle of the pink area.
9 Then unhide the paper layer and click on it.
10 Go to Selections>Invert and hit delete on your keyboard.
11 Go to Selecions>Select None.
12 Repeat Steps #:4-11 for the middle square and top square layers.
13 Once you have done this merge the bottom layer with your newly added paper that was inverted to it so it is all one layer.
14 Click on the back rectangle strips layer.
15 Open, copy and paste as a new layer your choice of paper.
16 Click back on the rectangle strips layer and go to Selections>Select All>Float>Defloat.
17 Click on the paper layer and go to Selections>Invert and hit delete on your keyboard.
18 Go to Selections>Select None and delete the original layer.
19 Repeat Steps #: 14-18 for the remainder layers that are included in the template.
20 Now open, copy and paste your choice of tubes. I used 2 tubes.
21 Resize and position where desired.
22 The bigger tube that is used for the square layers- duplicate twice giving you a total of 3.
23 Hide the 2 duplicated tubes.
24 Click on the top square and get your magic wand tool.
25 Click the top square and make sure the whole thing is selected.
26 Click on your tube and go to Selections>Invert and hit delete on your keyboard.
27 Go to Selections>Select None.
28 Click on the middle square layer and with your magic tool still active, click on the layer and selecting the whole layer.
29 Unhide the 1st duplicated tube and click on it.
30 Go to Selections>Invert and hit delete on your keyboard.
31 Go to Selecions>Select None.
32 Repeat Steps #: 28-31 for the second duplicated tube and the bottom square layer.
33 Change the layer properties to Screen for all three tubes in the square layers.
34 Now apply Photoeffex>Scalines to all three tubes used for the square layers.
Use these settings: 3-1-22-10-0-0 and select vertical toggle and hit apply.
35 Open, copy and paste as new layers your choice of elements from the kit.
36 Open the wording I supplied and move it to right above the big oval layer.
37 Go to Selections>Select All>Float>Defloat.
38 Click on the wording layer and go to Selections>Invert and hit delete on your keyboard.
39 Go to Selections>Select None.
40 Get your text tool and font of choice and type out any desired wording. I added a gradient glow to the wording as well.
41 Add your copyrights.
42 Resize and save as a png or jpeg.
You are all done!!!
I hope you enjoyed my tut!
Thanks,
Kali


No comments:
Post a Comment