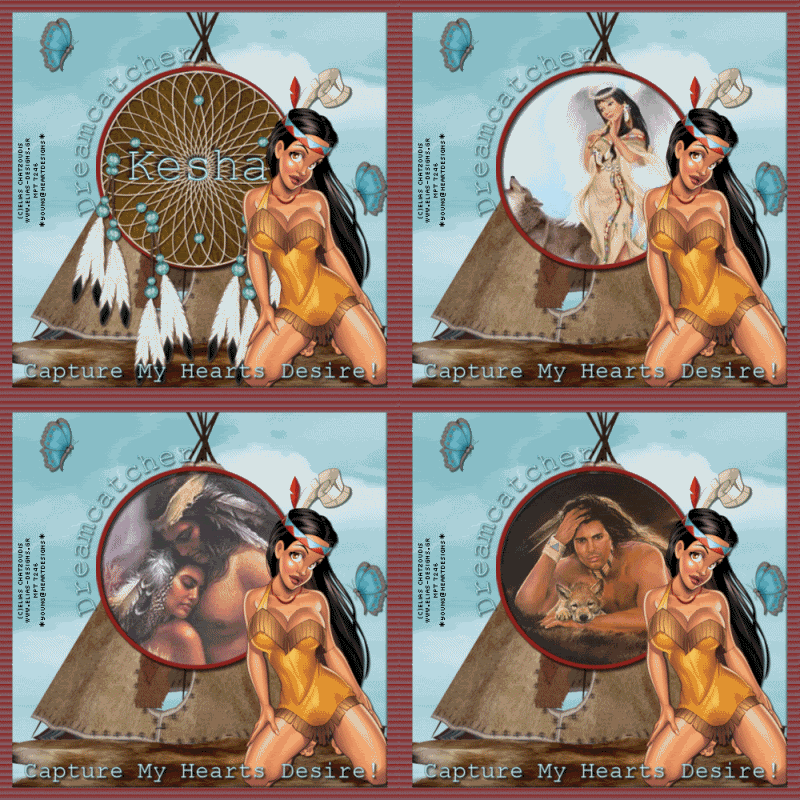
This tutorial was written on June 20, 2009. Any similarities is purely coincidental. You need to have a working knowledge of Paint shop pro and Animation shop to do this tutorial. I used Paint Shop Pro X2 but any version is ok.
I'm using the beautiful work Of Elias Chatzoudis. You must have a License to use his work. You can can purchase his tubes Here
The kit Im using is called Dream Catcher , Its on sale right now, You can purchase it Here
The Native American art I got in a random search , If these images belong to you, I will remove them if you want me too.
The font I used is Courier New but any font will do!
My Supplies are Here
Ok Lets go!
1 .Open new canvas in PSP 650X650
Flood fill White
2. Open kit and copy and paste wigwam in center of canvas~resize to 80% rename layer wigwam
3. Copy and paste skin element and place beneath Wigwam~see my tag for placement. rename layer skin layer
4. Copy and paste circle frame as a new layer and resize to 125 %
Click inside frame with magic wand and copy and paste paper of choice ~selections~invert~
Hit delete on keyboard~select none. Rename this layer circle background
5. Open dream catcher and paste it as a new layer~resize to 50% and move to center of frame.Move frame , background and dream catcher up some so all the feathers of dream catcher are on the working canvas. name this layer dream catcher
6. Open butterfly of choice and copy and paste as a new layer~ resize to your liking~duplicate and mirror the new one. Reposition the new butterfly where desired. merge down and name this butterfly layer
7.Open my Native art, or your own images, click on the circle background layer~select all~
float~defloat~ open Image 16 in my supplies and resize to 125% copy and paste as new layer~ invert~ hit delete on keyboard~ select none. Move this layer under frame layer and Name this layer art 1.
8. Open Native art , image 14 ~copy~ click on the circle background layer ~select all~float~
defloat~ paste as a new layer the native art~ selections~invert~Hit delete on keyboard~
selections~select none. Move this layer under Art 1 layer and Name this layer Art 2
9.Open Last Native Art~ Image 15 and repeat ~ Name this layer Art 3.
10. Add drop shadows of choice to your images.
11.Go to selections~ select all~ modify~contract by 20
open new canvas up and flood fill with color of choice~ I used#8e2520~
go to effects~ texture effects~blinds~ I used color #7999b3 for the blinds width 1o
opacity 50% ~ Now copy this paper as a new layer ~invert~hit delete on keyboard~selections
select none. Add drop shadow to this layer.
12. Click on Bottom layer~ copy and paste as a new layer the sky background paper.
13. Add word art~ see my tag for placements.
14. resize all layers to 500 x500 and add copyrights
15. If you do not plan to animate this tag choose one of the Native art layers, or photo of your choice,and delete the others. Place your choice of art behind the dream catcher , add a name and place where desired and merge all layers. And your done.
16. If you plan on animating close off all art layers , add a name of choice on its own layer and place it in center of dream catcher. 1st frame~ Edit copy special~ copy merge ~ take to animation shop and paste
as a new animation, Back to psp
frame 2
close off name layer and dream catcher layer ~open art one layer
Edit ~ copy special~ copy merged~ take to animation shop and paste after current frame~
back to psp
Frame 3
Close off art 1 layer and open art 2 layer repeat
Frame 4 ~close off art 2 layer and open art 3 layer~ repeat then on frame properties first 3 should be set too 100 and last frame 200.
View animation and if you like your creations save as a gif and your done! Thanks for doing my tutorial.
Huggies
Sher


No comments:
Post a Comment