
 This tutorial was written By Me On June 28, 2009 and similarities is purely
coincidental. Im using the beautiful work of Keith Garvey, you must have a license to use his tubes. You can get his tubes and license Here
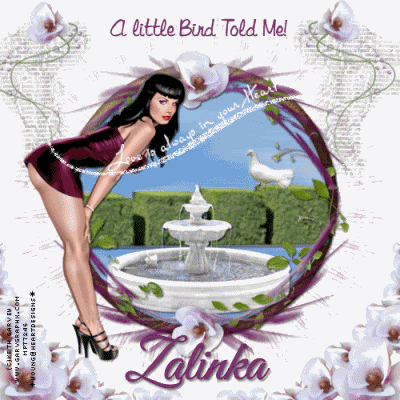
The Scrap kit is called Sweet Magnolia and it was created by Zalinka ,Thanks Sweetie for this Beautiful free kit! you can get it Here
This is a full size kit and you will have to work a little on the resizing of the elements but it will be well worth it! Its so Beautiful!!
The font for the title is Libby script you can get it Here
The font For the name is called Good Vibrations and it is a PTU font so I cant provide it, any pretty
script font will work.
The Mask is Vix's mask 95 you can get her cool masks Here
The bling is in my supplies . I obtained it on a random search in 4 shared. Lisa I would love to give you the credit for creating such a Beautiful bling, I did a search on the group in the copywrite layer and couldnt find you to properly ask you for the usage. If you find this tutorial and want the credit for the bling please email me so I can add it to this tutorial.
If you dont want me to use this , please email me and I will take it it off this tag
My Supplies are Here
Plug ins Xenofex you can get a demo version Here
You must have a working knowledge of Psp and Animation shop to do this
tutorial. Remember it is just a guide to a fairly simple tutorial. You can use any tubes you wish and any kit.
Ok lets get going
1.Open a new layer 600x600
flood fill white
2. Open the mask in psp and minimize it for now
2.Open the bling in Animation shop and leave open till we are ready for animations.
3. Open a frame of choice I used element 14 and resize to your liking , then copy and paste it in center of your canvas.
4. Using your magic wand tool click in center of frame and copy and paste a new paper ~ go
to selections ~ invert~ hit delete on keyboard~ move this layer under frame.
5. Go to effects~ plug ins ~ xenofex~little puffy clouds~ click ok
6.Open frame 9 and resize to your liking and copy and paste it as a new layer over the other frame.
7. Start adding all you Beautiful elements , resizing then and placing them where desired or see my tag for placements.
8. Add drop shadows of choice to all you elements.
9. Add the tube you wish to use, resize to your liking, and place where desired,or see my tag for
Placement, add a slight drop shadow and sharpen a little.
10. When you have everything the way you want, Go to image and resize all layers to 500x500
Add your copyrights, names , text ect.
If you do not wanna animate this tag merge all layers and your done.
Are you ready to animate this?
Ok lets go!
1.In animation shop go to windows cascade and then to view zoom out by 1
delete the first layer. You should have 5 layer left.
2 . In psp go to edit~ copy special ~ copy Merge~
take this tag now to animation shop and paste as a new animation
Duplicate it 4 times so we have the same number of frames .
3. On the Tag animation go to edit select all
On the bling animation go to edit~ select all~ copy
Take this now back to your tag animation and paste into selected frames
In a spot you desire.
Go to view and Look at your Beautiful Creation. If you Love it , save as a gif and your done!
I hope you enjoyed doing my Tutorial!
Huggies
Sher


No comments:
Post a Comment