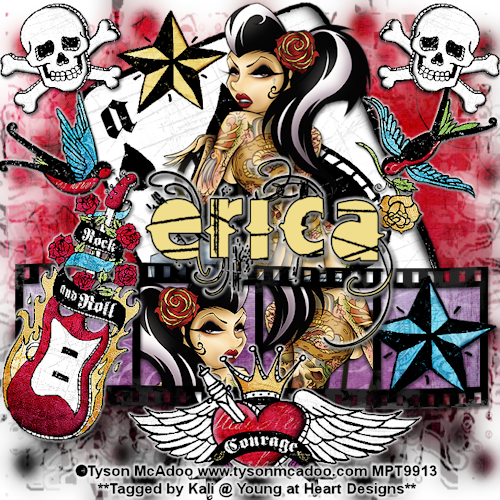
To do this tutorial you must have some knowledge of PSP.
This Tag was made using PSPX2. This tutorial is also copyrighted by Young at Heart Designs.
Im using the awesome work of Tyson McAdoo. If you wish to use his work you must have a license to use his work before using his tubes.
To purchase his tubes and receive a license go to HERE.
The adorbale kit I used is "Skin Deep " by Erica Hite at ScrapGirls and it can be found HERE.
Supplies:
Mask #7 by BabesDesignz: HERE
Filmstrip: HERE
Plug-in: Eye Candy 4000>Gradient Glow
Font: Vtks Mercearia
I used shadow settings V3,H2, O50, B5, Color Black on ALL elements, layers, text and the tube except for the mask layer.
I also sharpened every element and tube I had to resize to get the quality like the original size.
1 Open a new canvas 700x700
2 Open, copy and paste as a new layer the supplied filmstrip.
3 Resize and position where desired.
4 Open, copy and paste as a new layer your choice of paper.
5 Resize to the canvas size.
6 Now click back on the filmstrip and get your magic wand tool.
7 Click in each individual opening and holding the shift key down at the same time.
You are selecting each opening of the filmstrip.
8 Go to Selections>Modify>Expand and put 10.
9 Now click on your newly added paper layer.
10 Go to Selections>Invert and hit delete on your keyboard.
11 Go to Selections>Select None.
12 Move the paper layer below the filmstrip layer.
13 Now open your choice of tube.
14 Resize and position it where desired.
Use my example for reference.
15 Now duplicate your tube twice and move the two duplicated tubes under the filmstrip layer.
16 Position each in one of the middle openings. Again, use my example as a reference.
17 Now click on the paper layer again.
18 Go to Selections>Select all>Float>Defloat.
19 Click on the 1st duplicated tube and go to Selections>Invert.
20 Then hit delete on your keyboard and then go to Selections>Select None.
21 Click on your paper layer again.
22 Go to Selections>Select All>Float>Defloat.
23 Click on the 2nd duplicated tube and go to Selections>Invert.
24 Again, hit delete on your keyboard and go to Selections>Select None.
25 Now click back on your 1st duplicated tube and get your eraser tool.
26 Erase any of the tube that is sticking out past the opening.
(This way is looks like it is only sitting in the one opening.)
27 Repeat Steps #: 25-26 for the 2nd duplicated tube.
28 Now open your mask and minimize it.
29 Open, copy and paste as a new layer your choice of paper.
30 Resize to the canvas size.
31 Go to Layers>New Mask Layer>From Image.
32 In the drop down window for Source Select BabesDesignz_Mask7.
33 Make sure both Source luminance and Invert mask data are selected and hit ok.
34 Go to Layers>Merge>Merge Group.
35 Now resize the mask layer so it is much bigger.
36 Duplicate your mask layer.
37 Click on the original mask layer and go to Adjust>Blur>Gaussian Blur.
38 Change the Radius to 15 and hit ok.
39 Open, copy and paste as new layers any elements desired.
Use my example for a reference. I added a gradient glow to some of the elements as well.
40 Get your text tool and font choice and type out your name. Position where desired.
I used the colors: foreground: #000000
background: #f0de8c
I also used font size 48 and added a gradient glow- width 5 and color white.
41 Add copyrights.
42 Resize and save as a png.
You are all done!!!!
I hope you enjoyed my tut! Send me the results please!!!
Thanks,
Kali


No comments:
Post a Comment