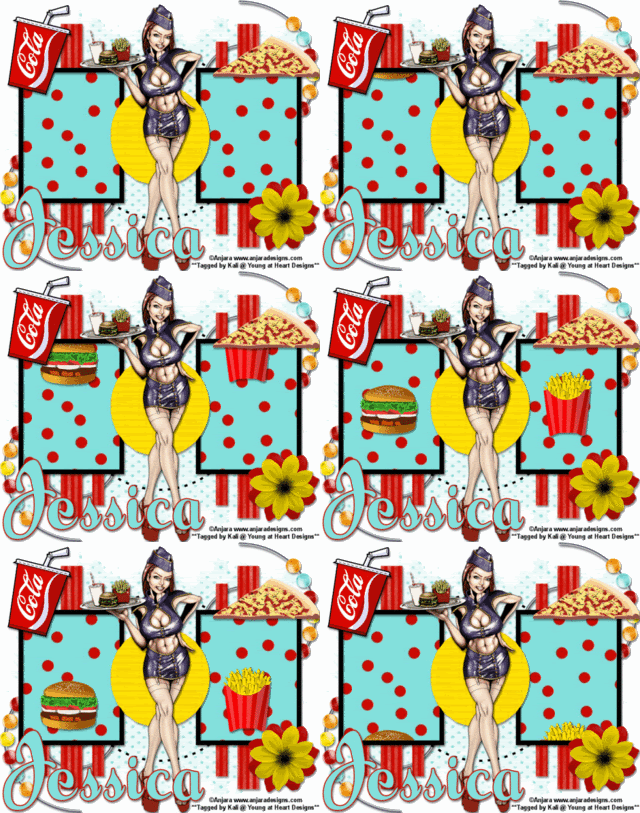
To see animated click on the example above.
To do this tutorial you must have some knowledge of PSP and Animation Shop.
This Tag was made using PSPX2 and Animation Shop. This tutorial is also copyrighted by Young at Heart Designs.
Im using the Beautiful work of Anjara. If you wish to use his work you must have a license to use his work before using his tubes.
To purchase his tubes and receive a license go to HERE.
The adorbale kit I used is called Diet Disaster by "Scraps by Jessica" and it can be found HERE.
Supplies I used:
Tag Template # 15 by Babes Designs which can be found HERE.
Mask # 7 by Babes Designs which also can be found HERE.
Font: ScarletRibbons
I used shadow settings V3,H2, O50, B5, Color Black on ALL elements, layers, text and the tube except for the mask layer.
I also sharpened every element and tube I had to re size to get the quality like the original size.
OK lets get going!!
1 Open your tag template and duplicate by hitting shift+D.
2 Delete your original tag template.
3 Delete the copyright layer & flower frame layer.
4 Click on the Background layer.
5 Open, copy and paste as new layer your choice of paper.
I used DD_paper11_JD
6 Open mask and minimize it.
7 Make sure you are on your new paper layer.
8 Go to Layers->New Layer Mask->From Image
9 Click on Source Window Drop Down and select BabesDesigns_Mask7
10 Make sure source luminace and invert mask data are selected and hit okay.
11 Right click on the mask layer and select Merge->Merge Group
12 Duplicate the Group Layer and then right click and select Merge->Merge Down
(I did this to make the mask layer more visible)
13 Click on your Rectangles layer.
14 Open, copy and paste as new layer your choice of paper. Resize to desired size.
I used DD_paper8_JD
15 Now click on your Rectangles layer again.
16 Go to Selections->Select All->Float->Defloat
17 Then click on your paper layer that your just added.
18 Go to Selections->Invert and then hit Delete on your keyboard.
19 Go back to Selections->Select None
20 Delete the original rectangles layer.
21 Click on your Frame Fill layer and repeat Steps #: 13-20.
I used DD_paper6_JD
22 Click the Circle layer and repeat Steps #: 13-30.
I used DD_paper7_JD
23 Open your tube of choic, copy and paste as new layer. Resize to desired size.
24 Open, copy and paste as new layers any elements you desire.
I used: DD_swirl_beads_JD
DD_soda_JD
DD_pizza_JD
DD_flower_JD
Place the elements & tube where desired.
25 Choose desired font and type out your desired text.
I used colors: Foreground: #c21101
Background: #84e0dd
I also used text size: 65
26 Add Copyrights
27 If you are not doing the animation merge all layer, resize all layers to 500x500 and save.
ALL DONE!!
If you are doing the animation follow these steps:
28 Open, copy and paste as new layers the elements: DD_burger_JD
DD_frenchfries_JD
Resize to desired size. Use my example for reference.
29 Click on the 6th layer which is the layer right before your Frame layer.
30 Move your burger element at the top of the layer where you can barely see but only the
very bottom of the burger. Duplicate as many times as you need I ended up with 7 Burger
layers.
Each time you duplicate it move the new burger down a little bit and keep duplicating and
moving down until you barely see the burger anymore at the bottom.
31 Rename your Burger layers to Burger1, Burger2 and so on so you don't get confused when
doing the actual animation.
32 Now repeat Steps #: 29-31 for your frenchfries element.
33 For layers Burger1, Frenchfries1, Burger2, Frenchfries2, Burger 6, Frenchfries6, Burger7 and Frenchfries7 get your
erase tool and erase any that shows outside the frame so it looks like the elements are only in
the frame.
34 Once you have all your duplicates in place, renamed and ready please go and hide all the
burger and frenchfries layers.
35 Right click on your canvas and select Copy Merged.
36 Go to Animation Shop.
37 Right click and select Paste as New Animation.
38 Go back to PSP and unhide Burger1 and Frenchfries1. Repeat Steps #: 34-35.
39 Once you are back in Animation Shop Right click on your frame and select Paste->After
Current Frame.
40 Go back to PSP and hide Burger1 and Frenchfries1. Unhide Burger2 and Frenchfries2.
Repeat Steps #: 34-35 and Step #: 38.
Keep doing this until you have done this for each Burger and Frenchfries layer.
I ended up with 8 frames.
41 Once you have all your frames go to the very first frame.
42 Go to Edit->Select All or you can hit Ctrl+A.
43 Go to Animation->Frame Properties
44 Next to Display time change it to 55.
45 Next we are going to resize it to 500x500 by going to Animation->Resize Animation
46 Select Pixel Size and type in 500 for width. Make sure Maintain aspect ratio is clicked and
the height will automatically be calculated.
Also make sure in the drop down box next to Resize Type says Smart Size.
47 If you want to view the animation before saving it go to View->Animation.
48 If it is what you want then go to File->Save As and save it where you desire on your
computer.
You are all done!!!
I hope you enjoyed my very 1st tutorial.
I would love to see your results so I can save them to my slideshow on the site.
I hope you enjoyed my very 1st tutorial.
I would love to see your results so I can save them to my slideshow on the site.


No comments:
Post a Comment