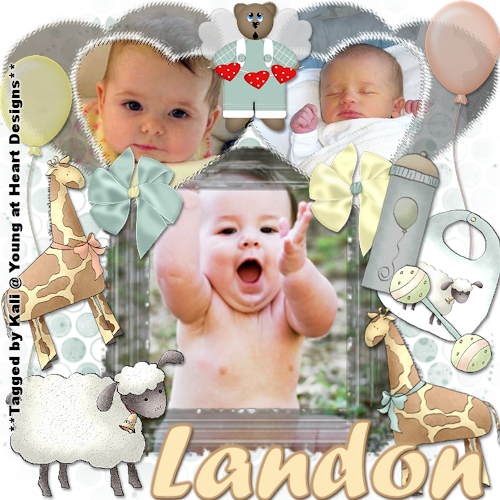
To do this tutorial you must have some knowledge of PSP.
This Tag was made using PSPX2. This tutorial is also copyrighted by Young at Heart Designs.
The adorbale kit I used is "Baby Mine" by Danielle Scraps and it can be found HERE.
Supplies:
3 Photo Images of your choice
FTU Photo Masks #7 & 16 by Pelzi's Scrapblog and can be found HERE.
Mask #16 by Babes Designz and can be found HERE.
Font: Forte
1 Open new canvas 700x700.
2 Open, copy and paste as new layers both photo masks. Resize to desired size.
Use my example for reference.
3 Put the rectangle photo mask towards the middle and down towards the bottom of the canvas.
4 Put the heart photo mask up at the corner of the canvas. Duplicate and then go to Image->Mirror.
This way you have two of the heart photo masks side by side.
5 Now click on your rectangle photo mask and then open, copy and paste your choice of image.
6 Position your image right over the rectangle photo mask.
7 Click back on your rectangle photo mask.
8 Go to Selections->Select All->Float->Defloat
9 Click on your image layer and go to Selections->Invert and then hit delete on your keyboard.
10 Right click on the image layer and then select Merge->Merge Down.
11 Repeat Steps #: 5-9 for both heart photo mask layers.
12 Now go to your very first layer which should be raster 1. Get your paintbucket tool and flood fill it white.
13 Open, copy and paste as a new layer your choice of paper. Resize it to the size of the canvas.
I used: paper 12
14 Open your mask and minimize.
15 Still on your new paper you just added go to Layers->New Mask Layer->From Image.
16 In the pop-up window there is a drop down for source window. Click on this and select BabesDesignz_Mask16.
Make sure Source luminance and invert mask data are both checked and hit ok.
17 Right click on your mask layer and select Merge->Merge Group.
18 Now resize your mask layer to much bigger so you can see it better behind your photo masks.
19 Open, copy and paste as new layers any deisred elements. Resize to desired size.
I used: balloon1
balloon2
bear 1
bib3
bottle 1
bow 1
bow 3
giraffe 1
giraffe 2
lamb1
rattle1
Place where desired.
20 Get your text tool and type out desired wording/text.
I used colors: foreground=#c59e75 and background=#fce8b8
I also used size 36.
21 Add your copyrights and then save as jpg.
You are all done!!
I hope you enjoyed my tut and send me your results!!
Thanks,
Kali


No comments:
Post a Comment