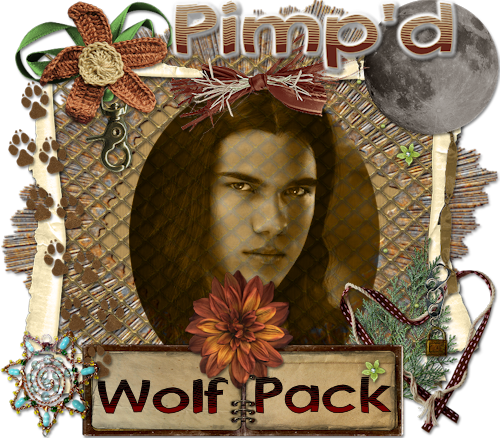
To do this tutorial you must have some knowledge of PSP.
The awesome kit I used is called "The Saga : Wolf Pack" by Pimp'd Designz and can be found HERE.
Supplies:
Plug-in->Eye Candy 4000->Gradient Glow
Font: Australian Sunrise
Image of choice.
I used shadow settings V3,H2, O50, B5, Color Black on ALL elements, layers, text and the tube except for the mask layer.
I also sharpened every element and tube I had to resize to get the quality like the original size.
1 Open a new canvas 800x700 (Don't worry we will resize later)
2 Open, copy and paste as new layer frame-04.
3 Open, copy and paste your choice of image and move this under the frame layer.
4 Change the image layer properties to Luminance Legecy and opacity to 84%.
5 Now click oon the frame layer and open, copy and paste as a new layer the memory-book.
6 Resize and position where desired. Use my example as a reference.
7 Now get your text tool and type out "Wolf" on one side and "Pack" on the other side.
8 Go to your very 1st layer and open, copy and paste as a new layer the mesh.
9 Resize and position where desired. Use my example as a reference.
10 Now go to the first layer again and open, copy and paste as a new layer the pimpd-jasper-prev.
11 Resize and position where desired. Again use my example as a reference.
18 Open, copy and paste as new layers your choice of elements. See my example for reference.
19 Get your text tool and type desired text.
I used colors: foreground- #c5a978
background- #62251a
I also used a gradient glow on the text with the color white and glow width 5.
20 Add your copyrights.
21 Resize to desired size.
22 Save as a png and you are all done!!!
Thanks so much for doing my tut and send me the results!!!
Thanks,
Kali


No comments:
Post a Comment