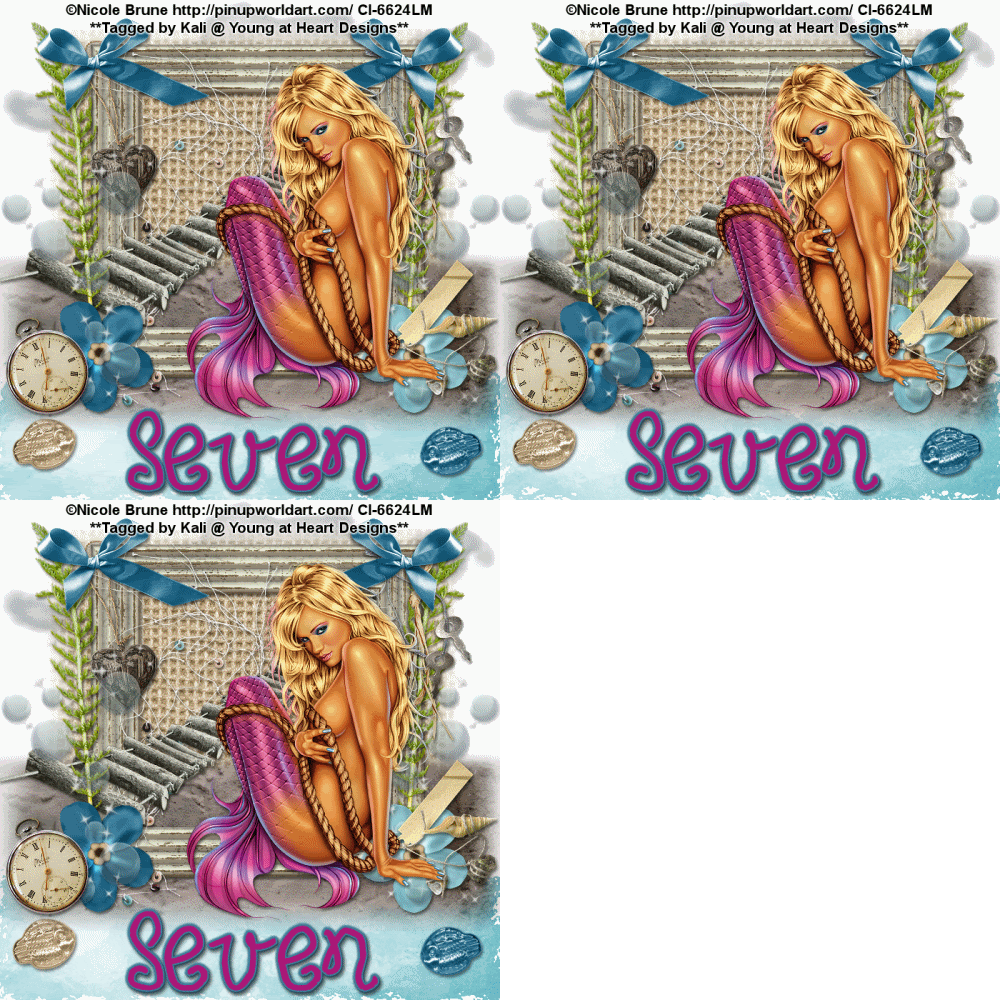
To do this tutorial you must have some knowledge of PSP and Animation Shop.
This Tag was made using PSPX2 and Animation Shop. This tutorial is also copyrighted by Young at Heart Designs.
Im using the Beautiful work of Nicole Brune. If you wish to use her work you must have a license to use her work before using her tubes.
To purchase her tubes, images and receive a license go to HERE.
The adorbale kit I used is called "One Day at the Seashore" by Sevens Scraps and it can be found HERE.
Supplies I used:
Font: FB Melissa
Plug-in: Eye Candy 4000->Gradient Glow
Plug-in: Eye Candy 4000->Jiggle
I used shadow settings V3,H2, O50, B5, Color Black on ALL elements, layers, text and the tube except for the mask layer.
I also sharpened every element and image I had to re size to get the quality like the original size.
1 Open new canvas 700x700 (we will resize later)
2 Open, copy and paste as a new layer the 7S_ODATS_frame07.
3 Resize to desired size and place it towards the middle of the canvas.
4 Open, copy and paste as a new layer the 7S_ODATS_matte01. Resize to desired size and move this below the frame.
5 Open, copy and paste as a new layer the 7S_ODATS_sand01. Place this between the frame and the matte layers.
Use my example as a reference to see where to place this.
6 Get your selection tool and use the freehand selection.
7 Draw at the bottom of the canvas a squiggly area that looks similar like water. See my example to get a better idea.
8 Once your selection is selected and the marching ants are moving around it open, copy and paste your choice of paper to fill this area.
I used: 7S_ODATS_paper12
9 Go to Selections->Invert and hit delete on your keyboard.
10 Go to Selections->Select None
11 Open, copy and paste as a new layer your choice of tube. Resize to desired size and place where desired.
12 Open, copy and paste as new layers your choice of elements.
I used a ton of elements from this kit so please refer to my example to see which ones I used.
13 Get your text tool and choose your desired font.
14 Type out the wording/text you choose. I used text size 36.
I used colors: foreground-#3f7e99
background-#aa1878
I also added a gradient glow to my text with the width of 3 and the same color as the foreground.
15 Add copyrights.
16 If you are not doing the animation, merge all layers, resize to 500x500 and save as a png.
Your all done!!!
If you are doing the animation, follow these steps:
17 Click on your water layer.
18 Duplicate this layer twice giving you 3 layers total.
19 Now rename each water1, water2 and water3.
20 Click on your water1 and go to Effects->Plug-ins->Eye Candy 4000->Jiggle
21 Use the settings: Movement Type: Brownian Motion
Bubble Size: 50.00
Warp Amount: 15.00
Twist: 10
Make sure Seamless Tile is not selected and hit random seed once. Click ok.
22 Now repeat Steps #:12-14 for both water2 and water3.
23 Go to your very 1st layer and get your paint bucket tool.
24 Flood fill white.
25 Now go and hide both water2 and water3.
26 Right-click and select copy merge.
27 Go to Animation shop and right-click. Paste as a new animation.
28 Back in PSP- hide water1 and unhide water2.
29 Copy merge and go back to Animation Shop.
30 Right click on your frame and paste after current frame.
31 Go back to PSP and hide water2 and unhide water3.
32 Copy merge and go back to Animation Shop and paster after current frame.
33 Still in Animation Shop select all and go to Animation->Frame Properties and change it to 35.
34 Resize and save as a gif.
You are all done!!!
I hope you enjoyed my tut and send me your results!!!
Thanks,
Kali


No comments:
Post a Comment