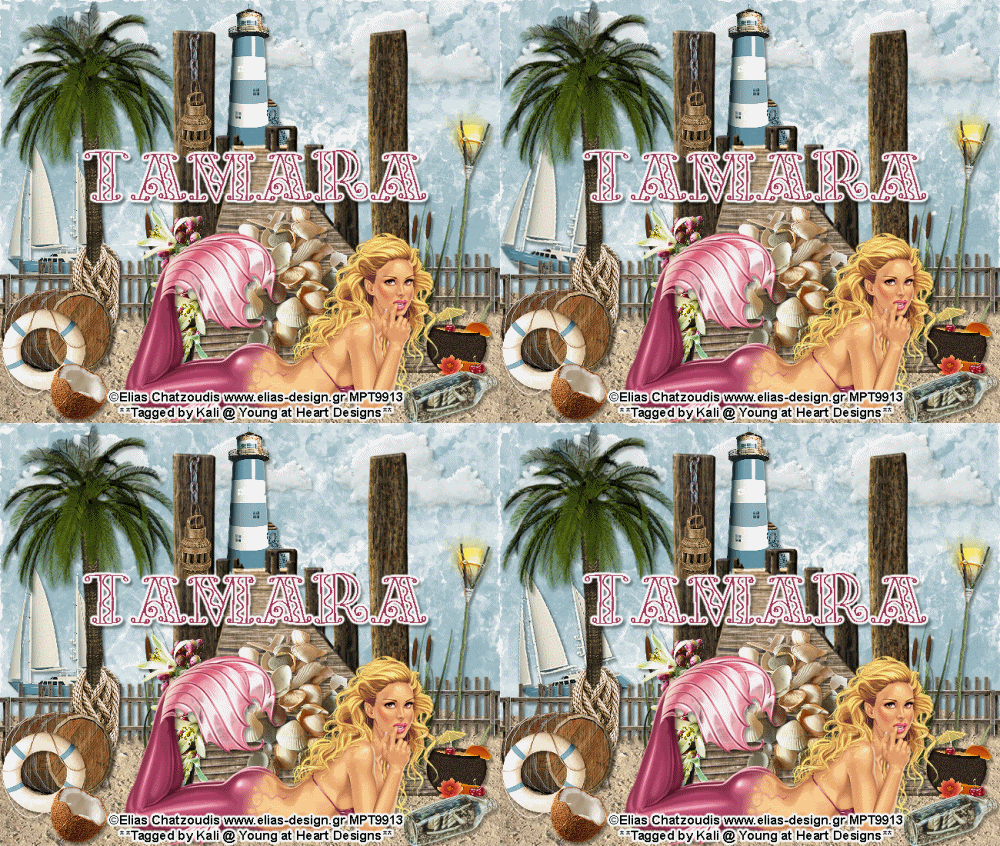
To do this tutorial you must have some knowledge of PSP and Animation Shop. This tut is very easy and not many steps.
This tut was written and copyright by Kali at Young at Heart Designs.
I used PSPX2 and Animation Shop to create this tut.
Supplies:
-Incrediable Kit by Just a Girl's Designs called "Sea Side" and can be found HERE.
-Awesome artwork by Elias Chatzoudis and his artwork can be found HERE. You must have permission to use his artwork and hold a license. Please do not use without purchasing the artwork.
-Font: KF Pizazz
-Plug-in>Eye Candy 4000>Gradient Glow
-Plug-in>Eye Candy 4000>Jiggle
I have added a drop shadow to pretty much every layer and I also sharpened all elements if I resized them so they maintained the same
quality as the original one.
1 Open new canvas 650x550.
2 Open your choice of paper and resize to the canvas size.
3 Open the sand element of choice from the kit.
4 Resize and position where desired.
5 If you choose the sand I did you will need to duplicate it and then move it over so the whole bottom is covered.
6 Open the dock element and position where desired.
7 Open your choice of tube.
8 Resize and position where desired.
10 Open desired elements from the kit.
11 Resize and position where desired.
Use my example for reference.
12 Get your text tool and font of choice.
13 Type out any desired wording.
14 Add copyrights.
15 If you are not doing the animation resize and save as a png.
If you are doing the animation, follow these steps:
16 Click on your background layer and duplicate it 3 times- giving you a total of 4.
17 Click on the 1st one and go to Effects>Plug-in>Eye Candy 4000>Jiggle.
18 Apply these settings to the layer:
Movement Type: Turbulence
Bubble Size: 80.49
Warp Amount: 3.10
Twist: 20
Seamless Tile Unchecked
Click Random Seed once.
19 Repeat Step #18 for all the background layers.
20 Now either click on the boat element or open the boat element.
21 Duplicate it 3 times giving you a total of 4.
22 Click on the second boat and go to Image>Free Rotate.
23 Apply these settings: Direction- Right Degrees- 10 and hit ok.
24 Click on the 4th boat and go to Image>Free Rotate.
25 Apply these settings: Direction- Left Degrees- 10 and hit ok.
26 Hide all background layers and boat layers except the 1st ones.
27 Copy merge and go to Animation Shop.
28 Paste as a new animation.
29 Back in PSP, hide the 1st ones and unhide the 2nd ones.
30 Copy merge and go to AS.
31 Right-click your frame and Select Paste After Current Frame.
32 Repeat this process until all layers have been pasted after current frame.
You should have a total of 4 frames.
33 In AS, select all frames and change the frame properties to 55.
34 Resize and save as gif.
You are all done!!!
Thanks for doing my tut,
Kali


No comments:
Post a Comment