Tuesday, July 28, 2009
Midnight Whispers Layout
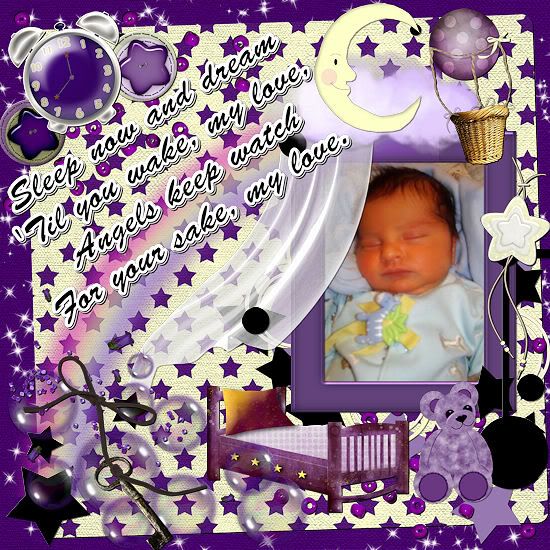
I used an awesome kit by Missy from Scraps With Attitude called "Midnight Whispers".
To purchase the kit click on the preview below.

To use the freebie quick page I created you can click HERE.
Thanks,
Kali
Sunday, July 26, 2009
Saturday, July 25, 2009
Friday, July 24, 2009
Ivory Ebony Layout
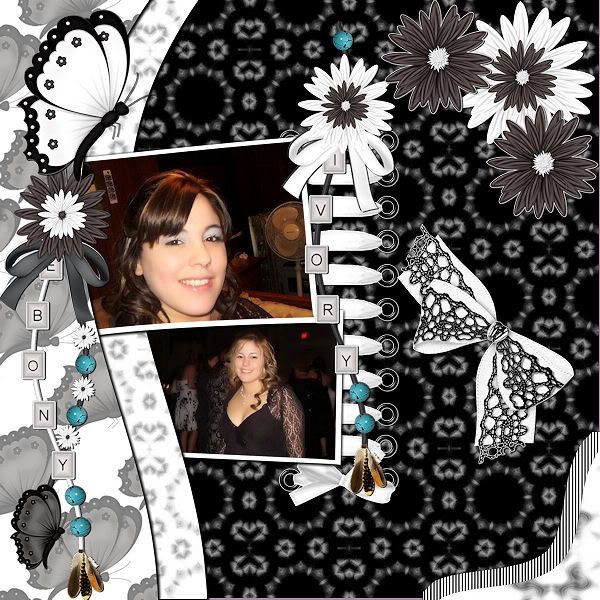
To see full size layout, click above.
If you would like to download this quick page as a freebie you can go to HERE.
I used Ebony and Ivory by Crystal Cottage Scraps at Scrap Heaven Boutique.
To purchase the kit please click the preview below.

Kali
Thursday, July 23, 2009
Wednesday, July 22, 2009
Tag I Made For My Friend Jaimi
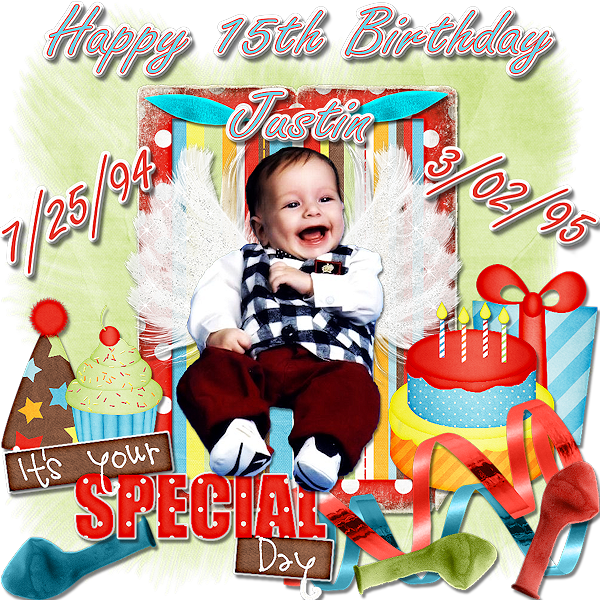
I made this for my friend Jaimi. Her son passed away from SIDS and her son's story really moved me. I have been talking to her for sometime now and we meet over the computer. Her son's birthday is July 25th (the day before my daughters) so I decided to make her a birthday tag. Let me know what you think. I love this little boy as if I knew him.
Thanks,
Kali
Tuesday, July 21, 2009
UPDATE EVERY ONE!!
So I have decided to put writing tuts on hold for awhile. Spending as much time on the computer as I have been between my tut site and my tagger site is causing some conflict at home and being a mommy to 3 children is making it difficult since 2 of my children are both in 3 different activities. I am constantly running. Although I love writing tuts it has become super difficult to keep up with it all. But I love tagging and making layouts so I have decided for the time being I am going to continue making tags and layouts so if there are any of you designers out that would love to keep on your CT Team as a tag maker or layout artist I would love too still! I would love continuing to make some awesome creations with your kits. Please let me know!!! I plan on writing tuts again once my life isnt as hectic at home and I have more time to do it.
Again, if you do not want to keep on your CT Team, I understand but please know I appreciate being a part of your team and hopefully one day soon I can join it again!!!
Thanks again,
Kali
Again, if you do not want to keep on your CT Team, I understand but please know I appreciate being a part of your team and hopefully one day soon I can join it again!!!
Thanks again,
Kali
Friday, July 17, 2009
Karma (Animated) Tut
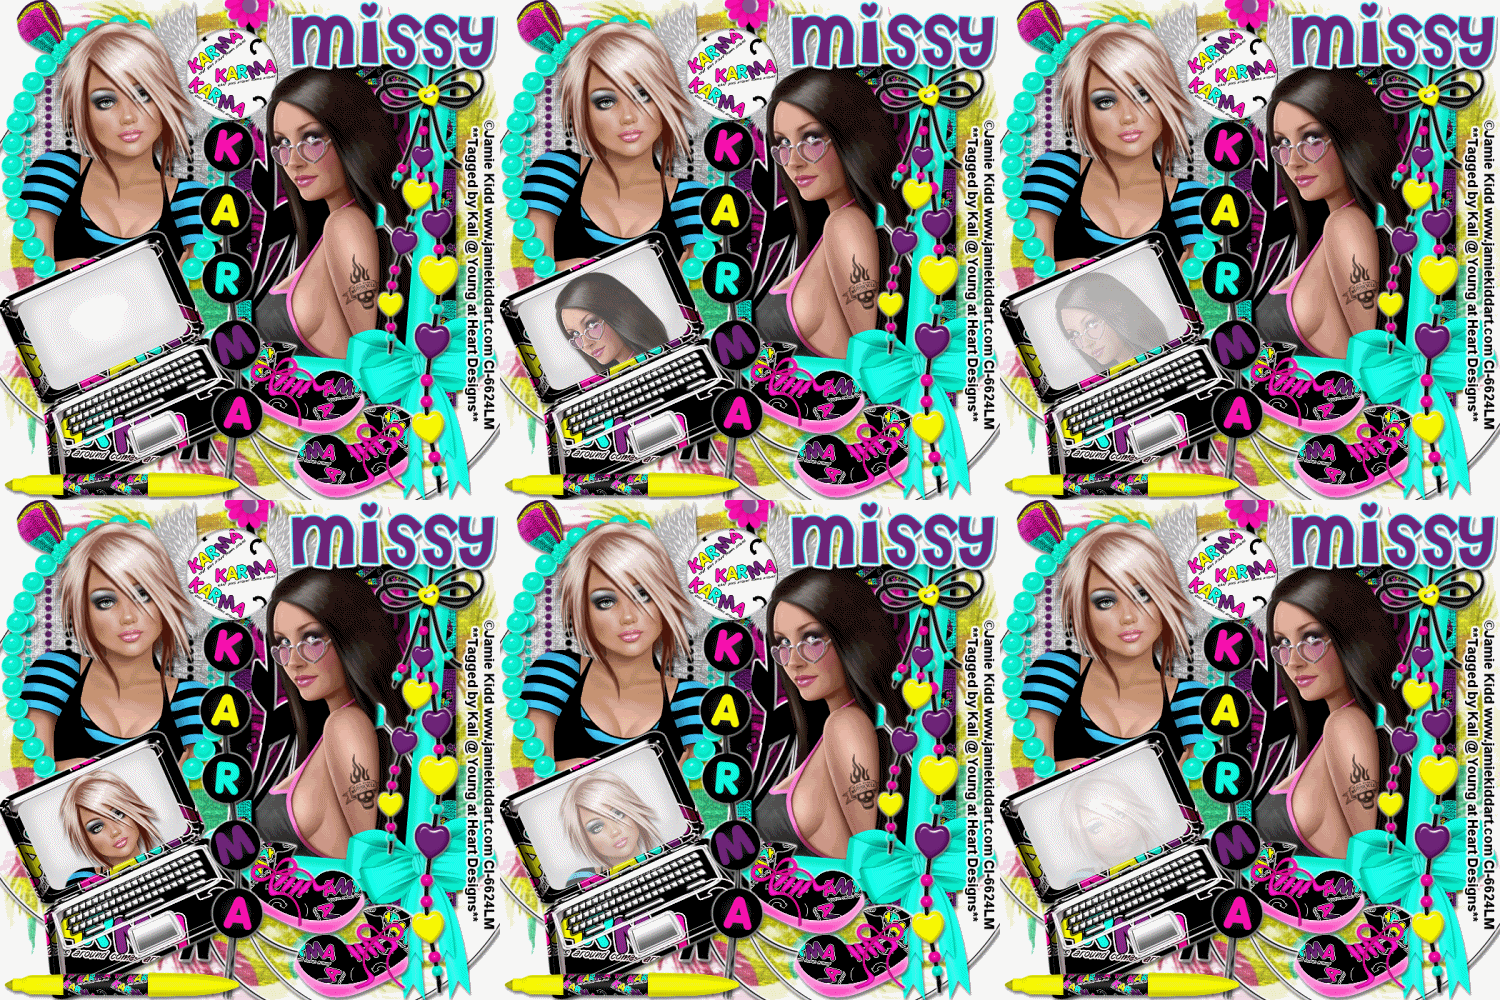
To do this tutorial you must have some knowledge of PSP and Animation Shop.
This tut was written and copyright by Kali at Young at Heart Designs.
I used PSPX2 and Animation Shop to create this tut.
Supplies:
-Awesome kit by Missy from SWA called "Karma" and can be found HERE.
-Tube of Choice I used the artwork of Jaime Kidd, you will need a proper license to use her work which you can get by visiting CILM - HERE.
-Mask of choice
-Font: Cheri
-Plug-in: Eye Candy 4000>Gradient Glow (Used for wording)
I have added a drop shadow to pretty much every layer and I also sharpened all elements if I resized them so they maintained the same
quality as the original one.
1 Open a new canvas 700x700.
2 Open your choice of frames the kit.
3 Open your choice of paper from the kit.
4 Resize to canvas size.
5 Click back on your frame layer.
6 Get your magic wand tool and click in the center of the opening.
7 Click on the newly added paper layer and go to Selections>Invert and then hit delete on your keyboard.
8 Repeat for the other frame.
9 Open your choice of tubes.
10 Resize and position where desired.
11 Open your choice of elements from the kit.
**Make sure you open the laptop if you are doing the animation.**
12 Resize and position where desired.
Use my example for reference.
13 Open your choice of mask and minimize it.
14 Go to your 1st layer and open your choice of paper.
15 Resize to canvas size.
16 Go to Layers>New Mask Layer>From Image.
17 In the drop down for Source select your mask and hit okay.
18 Go to Layers>Merge>Merge Group.
19 Resize mask layer if your desire.
20 Get your text tool and font of choice.
21 Type out desired wording.
22 Add gradient glow to the wording.
23 Add copyrights.
24 If you are not doing the animation, resize and save as png.
If you are doing the animation, follow these steps:
25 Go to your 1st layer and get your paint bucket tool.
26 Flood fill white.
27 Duplicate your tubes and resize them to be much smaller.
28 Click on the laptop and get your magic wand tool.
29 Click in the center of the laptop screen.
30 Click on your 1st duplicated tube and go to Selections>Invert and hit delete on your keyboard.
31 Repeat for the other duplicated tube.
32 Hide both duplicated tubes.
33 Copy merge and go to Animation Shop.
34 Paste as a new animation.
35 Duplicate this frame 7 times giving you a total of 8 frames.
36 Repeat Steps #: 33-35 again giving you 2 of the animations.
37 Back in PSP, copy the first duplicated tube only.
38Go to AS and paste as a new animation.
39 Go to Effects>Insert Image Transition.
40 In the pop-up box apply these settings to the duplicated tube:
Animation Frame, Canvas Color, Transition Length: 2.0 Secs, Frames per Second: 3 fps and in the drop down select Fade and hit ok.
40 Repeat Steps #:37-40 for the 2nd duplicated tube.
41 Now go to the original animation and select all frames but the 1st one.
42 Go to the 1st duplicated tube frames and select all and copy.
42 Go to the animation and right-click in the 2nd frame and select Paste>Into Selected Frame.
43 Repeat Steps #: 41-42 for the 2nd original animation and the 2nd duplicate tube frames.
42 So now you should have 2 original animations and close out the tube frame because we do not need them anymore.
43 Choose what tube you want showing 1st in the animation.
44 Once you have decided select all frames of the tube you want showing last and hit copy.
45 Go to the 1st tube you want showing and click on the very last frame.
46 Right-click and select Paste After Current Frame.
47 Now they are both combined into one animation.
48 Select All and change the frame properties to 25.
49 Resize and save as a gif.
You are all done!!!
Thanks for doing my tut,
Kali
Like OMG...Whatever... Tut
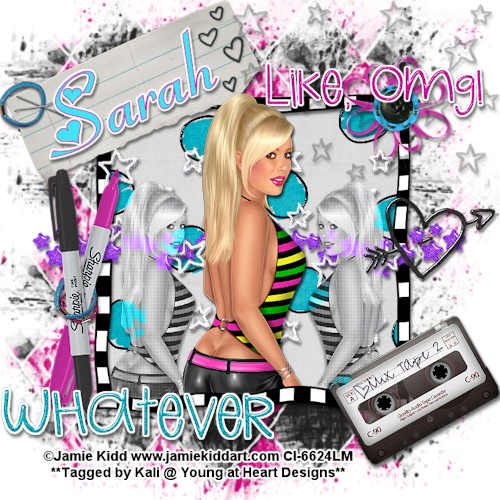
This tutorial was created by using PSPX2 and it requires some knowledge of PSP.
This is also copyrighted by Kali @ Young at Heart Designs.
Supplies:
-Awesome kit "Her Highschool Years" Super Mega by Designs by Sarah: HERE
-I used incredible artwork of Jaime Kidd. To use her work you must purchase it and hold an active license. Do not use her work without permission. To get the tube you can go to HERE.
-Mask of Choice
-Plug-in: Eye Candy 4000>Gradient Glow (Used for Wording)
-Plug-in: Pentacom>Color Dot
-Font: Filex Girls
I applied sharpening to all layers to keep their original quality.
1 Open new canvas 700x700.
2 open your choice of frame. I used frame10.
3 Get your choice of paper and open it.
4 Resize to canvas size.
5 Get your magic wand tool and click in the center of frame.
6 Go to Selections>Select All>Float>Defloat.
7 Click on your newly added paper and go to Selections>Invert.
8 Hit delete on your keyboard and move the paper layer below your frame layer.
9 Open your choice of tube.
10 Resize and position where desired.
11 Duplicate your tube once.
12 Resize to be much smaller than the original one.
13 Move over to the left side of your original tube.
14 Duplicate this tube and then mirror the image.
15 Get your eraser tool and erase any of the tubes that are sticking out past the frame.
16 You are going to apply the default settings of Pentcom plug-in>Color Dot to both duplicated tubes.
17 Change the layer properties to Luminance Legecy.
18 Add your choice of elements from the kit.
19 Open the Like OMG and the Whatever word arts.
20 Resize and position where desired.
21 Get your text tool and font of choice.
22 Type out choice of wording.
23 Add copyrights.
24 Resize and save as png.
I hope you enjoyed my tut!
Thanks,
Kali
Wednesday, July 15, 2009
Worlds of Wonder Under the Rainbow (Animated) Tut
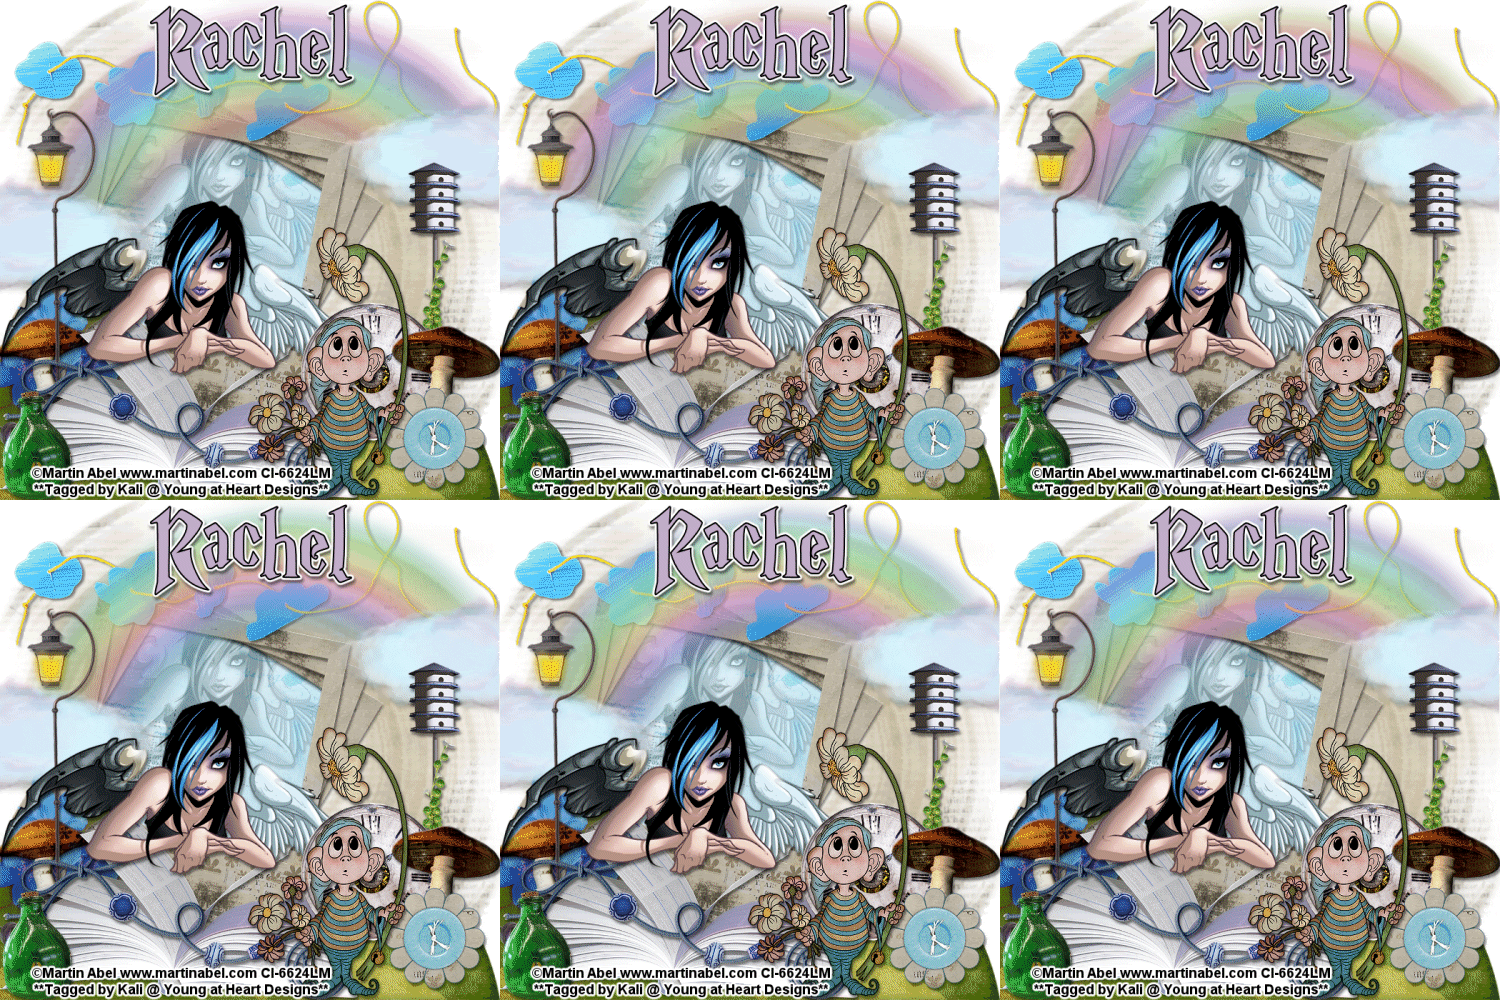
To do this tutorial you must have some knowledge of PSP and Animation Shop.
This tut was written and copyright by Kali at Young at Heart Designs.
I used PSPX2 and Animation Shop to create this tut.
Supplies:
-Awesome kit by Captivated Visions called "Somewhere Over the Rainbow" and can be found HERE.
-Tube of Choice I used the artwork of Martin Abel, you will need a proper license to use his work which you can get by visiting CILM - HERE.
-Mask #1 by Gina's Gems: HERE
-Font: Magic School One
-Plug-in: Eye Candy 4000>Gradient Glow (Used for wording)
I have added a drop shadow to pretty much every layer and I also sharpened all elements if I resized them so they maintained the same
quality as the original one.
1 Open new canvas 700x700.
2 Open the frame02 from the kit.
3 Resize and position where desired.
4 Get your magic wand tool and click in the opening of the frame.
5 Go to Selections>Modify>Expand and put 10.
6 Open your choice of paper from the kit and go to Selections>Invert.
7 Hit delete on your keyboard.
8 Move the newly added paper to below the frame layer.
9 Open your choice of tube.
10 Resize and position where desired.
11 Open your choice of elements from the kit- I used a ton!
(**If you are doing the animation- make sure you use the rainbow.**)
12 Now click back on to your frame layer.
13 Duplicate the frame layer once.
14 Go to Image>Free Rotate and select Direction- Right and Degrees- Free: 10.00.
15 Hit Okay.
16 Now duplicate that layer and repear the rotation steps.
17 Now duplicate your tube and move it to be just above the paper layer.
18 Resize to be a tad smaller than the original.
19 Now click on the paper layer and go to Selections>Select All>Float>Defloat.
20 Click on the duplicated tube layer and go to Selections>Invert and hit delete on your keyboard.
21 Change the layer properties to Luminance Legecy and the opacity to 35%.
22 Now go to the 1st layer and open your choice of paper.
23 Resize the paper to the canvas size.
24 Open the mask and minimize it.
25 Go to Layers>New Mask Layer>From Image.
26 In the drop down for Source select the mask and hit ok.
27 Go to Layers>Merge>Merge Group.
28 Resize the mask layer to be bigger.
29 Duplicate the mask layer.
30 Get your text tool and font of choice and type out desired wording.
31 Add a gradient glow to the wording.
32 Add copyrights.
33 If you are not doing the animation resize and save as a png.
If you are doing the animation, follow these steps:
34 Go to your 1st layer and get your paint bucket tool.
35 Flood fill white.
36 Now I need you to hide every layer above the rainbow layer- including the rainbow layer.
37 Copy merge and go to Animation Shop.
38 Paste as a new animation and minimize it.
39 Back in PSP, hide every layer that is below the rainbow layer- including the rainbow layer.
40 Unhide every layer above the rainbow layer.
41 Copy merge and go to Animation Shop.
42 Paste as a new animation and minimize it.
(You should have a total of 2 animations minimized.)
43 Back in PSP unhide the rainbow layer and copy it.
44 Go to Animation Shop and Paste as a new animation.
45 Still on the rainbow animation go to Effects>Insert Image Effect.
46 A pop-up box pops up. Under Effect select Rotate Colors.
47 Set the remaining settings to this: Effect Length: 2.0 and Frames per Second: 3 fps. Also make sure Animation Frame is selected.
48 Hit Okay.
(You should now have a total of 7 frames.)
49 Now go to your 1st animation of all layers below the rainbow layer you pasted and duplicate it til you have a total of 7.
50 Repeat for your 2nd animaiton of all layers above the rainbow layer.
51 Go back to your rainbow animation and select all.
52 Copy.
53 Go to your 1st animation and selection all.
54 Right-click on your 1st frame and select Paste into selected frame.
55 Line it up as it looked in PSP.
54 Now go to your 2nd animation and select all.
55 Copy.
56 Go back to your 1st animation that now includes all layers below the rainbow layer and the rainbow animation.
57 Right-click on the 1st frame and select Paste into selected frame.
58 Line it up as it looked in PSP.
59 Select all and change the frame properties to 55.
60 Resize and save as a gif.
You are all done!!
Thanks for doing my tut,
Kali
Hero Tut
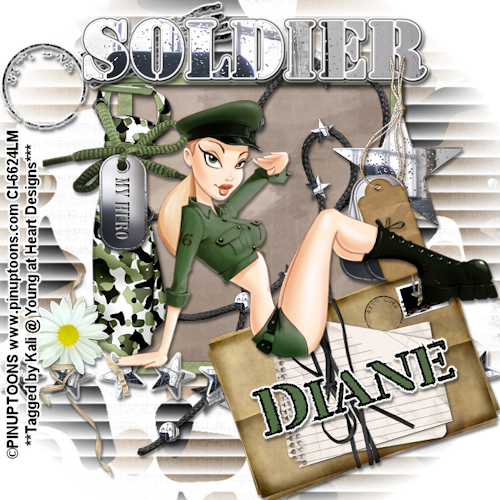
To do this tutorial you must have some knowledge of PSP. This tut is very easy and not many steps.
This tut was written and copyright by Kali at Young at Heart Designs.
I used PSPX2 to create this tut.
Supplies:
-Awesome kit by Candys Treats called "Hero" and can be found HERE.
-Incredible artwork by Pinup Toons and can be found HERE. You must purchase and have a valid license to use his work.
Please DON'T use his artwork without permission.
-Mask of choice
-Plug-in: Eye Candy 4000>Gradient Glow
-Font: Ver Army
1 Open your choice of frame.
2 Open your choice of paper from the kit.
3 Get your magic wand and click in the opening of the frame.
4 Click on the newly added paper and go to Selections>Invert and hit delete on your keyboard.
5 Open your choice of wordart.
6 Resize and position where desired.
7 Open your choice of tube.
8 Resize and position where desired.
Use my example for reference.
9 Go to your very 1st layer and open your choice of paper from the kit.
10 Resize to the canvas size.
11 Open the mask and minimize it.
12 Go to Layers>New Mask Layer>From Image.
13 Select the mask and hit ok.
14 Go to Layers>Merge>Merge Group and then resize the mask layer to be bigger.
15 Duplicate your mask layer.
16 Open your choice of elements from this wonderful kit.
17 Open the CT-Letters element.
18 Resize and position towards the bottom right of the canvas.
19 Get your text tool and font of choice and type out desired wording.
Type your wording over the CT-Letters element.
34 Add gradient glow to the wording.
35 Add copyrights.
36 Resize and save as png.
You are all done!!
I hope you like my tut!
Thanks,
Kali
Friday, July 10, 2009
And Many More... (Animated) Tut
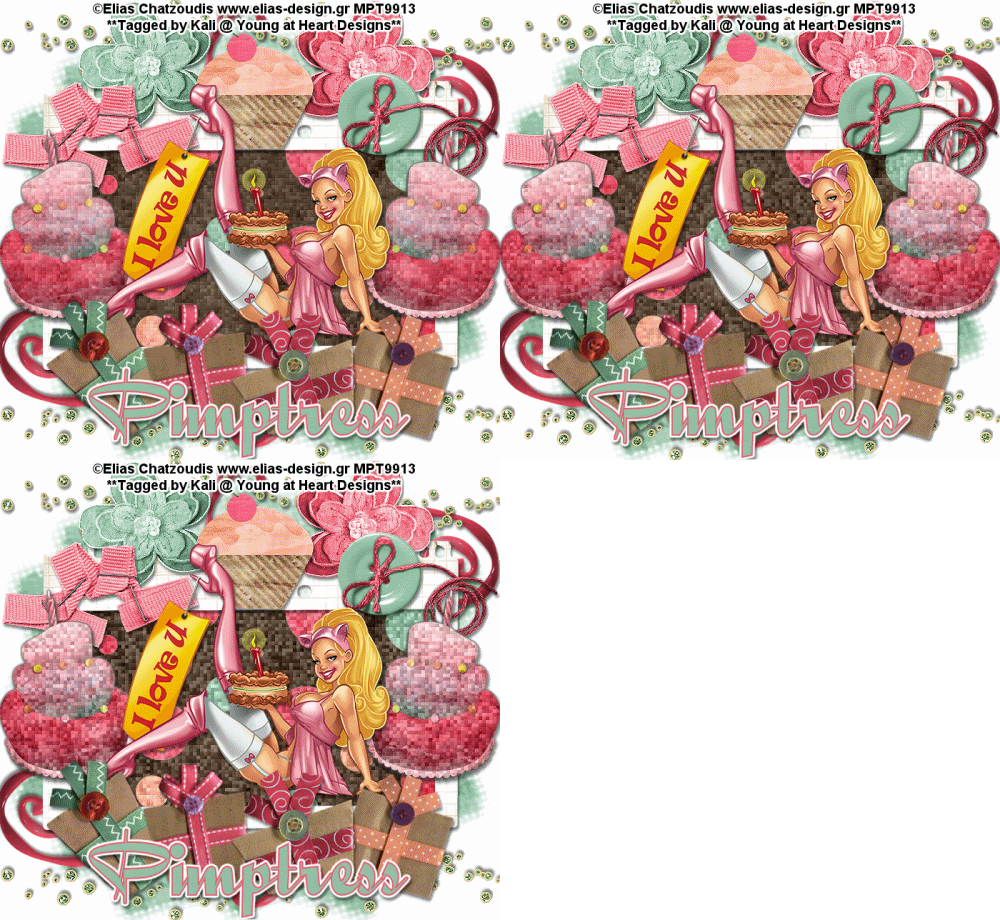
To do this tutorial you must have some knowledge of PSP and Animation Shop.
This tut was written and copyright by Kali at Young at Heart Designs.
I used PSPX2 and Animation Shop to create this tut.
Supplies:
-Wonderful Artwork by Elias Chatzoudis and can be found HERE. You must purchase and have a valid license to use his work.
Please DON'T use his artwork without permission.
-Awesome Kit by Pimp'd Designz Dezigns called "And Many More" and can be found HERE.
-Mask #180 by WSL: HERE
-Font: QuigleyWiggly
-Plug-in>Eye Candy 4000>Gradient Glow
-Plug-in>Xero>Fritillary
I have added a drop shadow to pretty much every layer and I also sharpened all elements if I resized them so they maintained the same
quality as the original one.
1 Open a new canvas 600x700.
2 Open frame-03.
3 Resize and position where desired.
Use my example for reference.
4 Get your magic wand tool and click in the center of the frame.
5 Go to Selections>Modify>Expand and change it to 10.
6 Open your choice of paper.
7 Go to Selections>Invert and hit delete on your keyboard.
8 Move the newly added paper layer to be below the frame layer.
9 Open your choice of tube.
10 Resize and position where desired.
11 Open your choice of elements from the kit.
12 Resize and position where desired.
13 Open the mask and minimize it.
14 Go to the very 1st layer and open your choice of paper from the kit.
15 Go to Layers>New Mask Layer>From Image.
16 In the drop down for Source select the Mask and hit ok.
17 Go to Layers>Merge>Merge Group.
18 Resize and make bigger.
19 Duplicate the mask layer and then merge together.
20 Get your text tool and font of choice.
21 Type out desired wording and add a gradient glow.
22 Add the copyrights.
23 If you are not doing the animation, resize and save as png.
If you are doing the animation, follow these steps:
24 Click on the background layer of the frame.
25 Duplicate it twice- giving you a total of 3.
26 Click on the original layer and go to Effects>Plug-in>Xero>Fritillary.
27 Apply these settings: 5-30-10-20.
28 Apply these settings to the duplicated layers:
5-30-10-30
5-30-10-40
29 Now click on the cake layers and repeat these steps for them.
30 Hide all duplicated layers- leaving only the original layers shown.
31 Copy merge and go to Animation Shop.
32 Paste as a new animation.
33 Back in PSP, hide the original layers and unhide the 1st duplicated layers.
34 Copy merge and go to AS.
35 Right-click on the frame and select Paste After Current Frame.
36 Back in PSP, hide the 1st set of duplicated layers and unhide the last set of duplicated layers.
37 Copy merge and go to AS.
38 Right-click on the current frame and select Paste After Current Frame.
39 Select all and change the frame properties to 55.
40 Resize and save as gif!
You are all done!!
Thanks,
Kali
Hollywood Stars (Animated) Tut
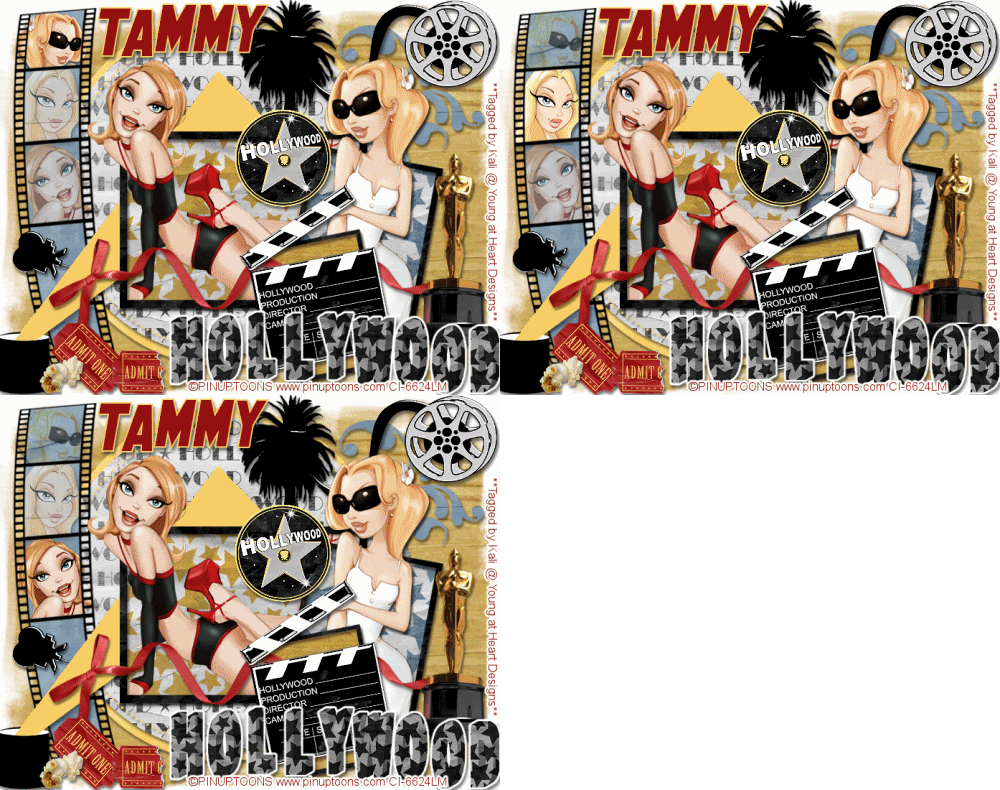
To see actual size, click the example.
To do this tutorial you must have some knowledge of PSP and Animation Shop.
This tut was written and copyright by Kali at Young at Heart Designs.
I used PSPX2 and Animation Shop to create this tut.
Supplies:
-Wonderful Artwork by Pinup Toons and can be found HERE . You must purchase and have a valid license to use his work.
Please DON'T use his artwork without permission.
-Incrediable Kit by TammyKat Dezigns called "Hollywood" and can be found HERE.
-Mask #3 by WSL: HERE
-Template #7 by Chica: HERE
-Font: SF Hollywood Hills Bold Italic
-Plug-in>Eye Candy 4000>Gradient Glow
I have added a drop shadow to pretty much every layer and I also sharpened all elements if I resized them so they maintained the same
quality as the original one.
1 Open template and delete the copyright layer.
2 Delete the wordart layers and the heart layers.
3 Click on the circle layer and open your choice of paper.
4 Resize to canvas size and go to Selections>Select All>Float>Defloat.
5 Click on the newly added paper and go to Selections>Invert and hit delete on your keyboard.
6 Delete the original circle layer.
7 Repeat Steps #:3-6 for all included layers in the template.
8 Open your choice of tube(s). I used a total of 3.
9 Resize and position where desired.
10 Open your desired elements from the kit.
11 Resize and position where desired.
12 Open the mask and minimize it.
13 Go to the very 1st layer and open your choice of paper.
14 Go to Layers>New Mask Layer>From Image.
15 In the drop down for Source select the mask.
16 Make sure Source luminance is selected and hit ok.
17 Go to Layers>Merge>Merge Group.
18 Resize the mask layer to be bigger.
19 Get your text tool and font of choice.
20 Type out any desired wording. I also used a gradient glow on the wording.
21 Add copyrights.
22 If you are not doing the animation resize and save as a png.
If you are doing the animation, follow these steps:
23 Go to the 1st layer and get your paint bucket tool.
24 Flood fill white.
25 Click on the the top tube you used for the filmstrip frame.
26 Duplicate it once- giving you 2 total.
27 Change the opacity for the duplicated tube to 50% and then hide the duplicated tube.
28 Repeat this for the other 2 tubes you used for the filmstrip frame except for these two hide the original tubes and keep the duplicated tubes shown.
29 Copy merge and go to Animation Shop.
30 Paste as a new animation.
31 Back in PSP, hide the top tube and unhide the top duplicated tube.
32 Hide the middle duplicated tube and unhide the original middle tube.
33 Copy merge and go to AS.
34 Right-click on your current frame and select Paste After Current Frame.
35 Back in PSP, hide the middle tube and unhide the middle duplicated tube.
36 Hide the bottom duplicated tube and unhide the original bottom tube
37 Copy merge and go to AS.
48 Right-click on your current frame and select Paste After Current Frame.
49 Select All and change frame properties to 55.
50 Resize and save as a gif and you are all done!!!
I hope you liked my tut!
Thanks,
Kali
Little Angel Sleeping Tut
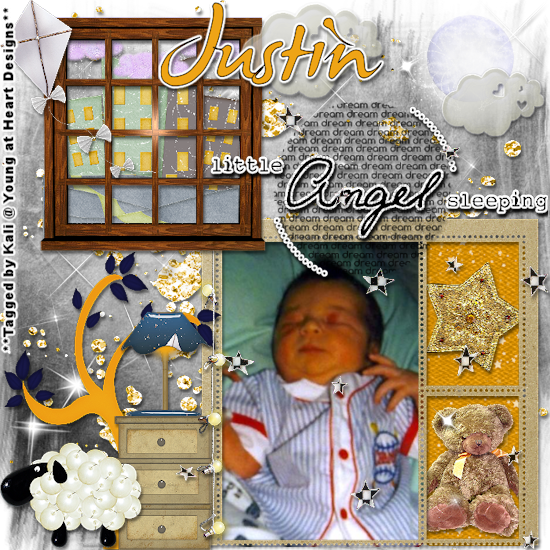
To see full size click on the example.
To do this tutorial you must have some knowledge of PSP.
This tut was written and copyright by Kali at Young at Heart Designs.
I used PSPX2 to create this tut.
Supplies:
-Incrediable Kit by Scrapping Mar called "Starry Night" and can be found HERE.
-Mask #117 by WSL: HERE
-Image of choice- the photo I used is copyright and you may not use it.
-Font: James Fajardo
-Plug-in>Eye Candy 4000>Gradient Glow
I have added a drop shadow to pretty much every layer and I also sharpened all elements if I resized them so they maintained the same
quality as the original one.
1 Open new canvas 600x700.
2 Open these elements from the kit: StarryNight_ScrappingMar14, StarryNight_ScrappingMar33, StarryNight_ScrappingMar31, StarryNight_ScrappingMar37,
StarryNight_ScrappingMar40, StarryNight_ScrappingMar39, StarryNight_ScrappingMar50, StarryNight_ScrappingMar52, StarryNight_ScrappingMar55,
StarryNight_ScrappingMar63, StarryNight_ScrappingMar66, StarryNight_ScrappingMar67, StarryNight_ScrappingMar70 and any other desired elements.
3 Resize and position where desired.
Use my example for reference.
4 Click on frame in the smaller openings and get your magic wand tool.
5 Click in the opening of the frames and then go to Selections>Modify>Expand and put 10.
6 Open your choice of paper and then go to Selections>Invert and hit delete on your keyboard.
7 Move the paper layers below the frames.
9 Resize and position where desired.
10 Open the mask and minimize it.
11 Go to the very 1st layer and open your choice of paper.
12 Go to Layers>New Mask Layer>From Image.
13 In the drop down for Source select the mask.
14 Make sure Source luminance is selected and hit ok.
15 Go to Layers>Merge>Merge Group.
16 Resize the mask layer to be bigger.
17 Get your text tool and font of choice.
18 Type out any desired wording. I also used a gradient glow on the wording.
19 Add copyrights.
20 Resize and save as a png.
I hope you liked my tut!
Thanks,
Kali
Thursday, July 9, 2009
Dreaming of Paris (Animated) Tut
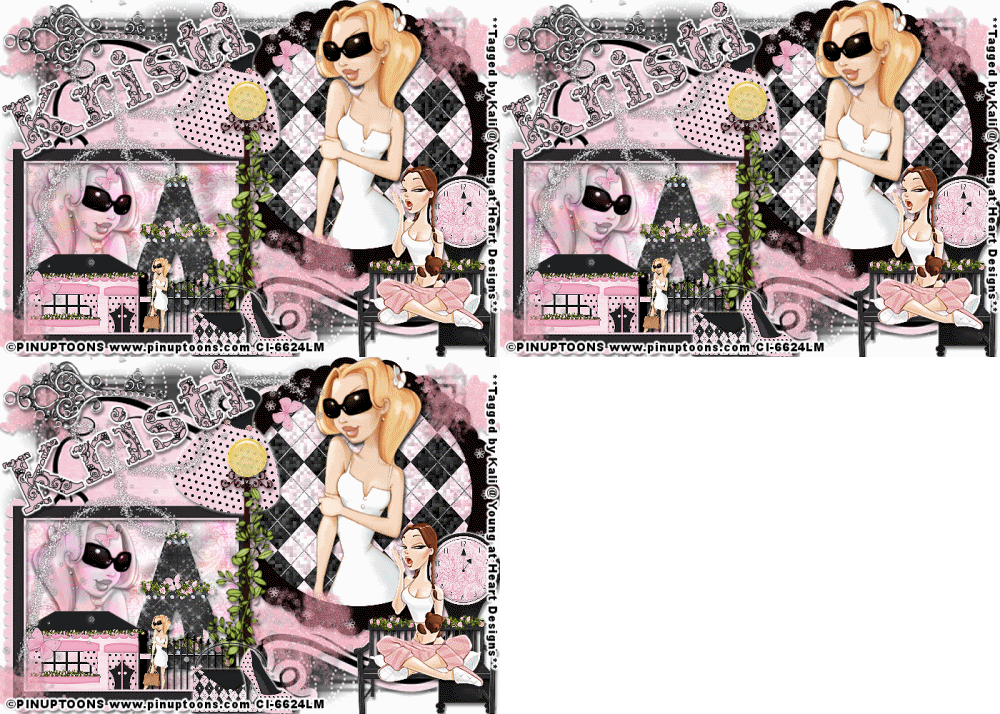
To actual size of tag, click on the example.
To do this tutorial you must have some knowledge of PSP and Animation Shop.
This tut was written and copyright by Kali at Young at Heart Designs.
I used PSPX2 and Animation Shop to create this tut.
Supplies:
-Wonderful Artwork by Pinup Toons and can be found HERE . You must purchase and have a valid license to use his work.
Please DON'T use his artwork without permission.
-Incredible Kit by Kristi w. called "Paris Chic" and can be found HERE.
-Mask of choice
-Font: JI Hidden Vines
-Plug-in>Eye Candy 4000>Gradient Glow
-Plug-in>Eye Candy>HSB Noise
-Plug-in>Xero>Fritilary
-Plug-in>Alien Skin Xenofex 2>Constellation
I have added a drop shadow to pretty much every layer and I also sharpened all elements if I resized them so they maintained the same
quality as the original one.
1 Open new canvas 700x500.
2 Open the kristiw_parischic_frame2 and kristiw_icingonthecake_scallopframe from the kit.
3 Resize and position where desired.
Use my example for reference.
4 Click on frame1 and get your magic wand tool.
5 Click in the opening of the frames and then go to Selections>Modify>Expand and put 10.
6 Open your choice of paper and then go to Selections>Invert and hit delete on your keyboard.
7 Move the paper layers below the frames.
8 Open your choice of tube(s). I used a total of 2.
9 Resize and position where desired.
10 Open your desired elements from the kit.
11 Resize and position where desired.
12 Open the mask and minimize it.
13 Go to the very 1st layer and open your choice of paper.
14 Go to Layers>New Mask Layer>From Image.
15 In the drop down for Source select the mask.
16 Make sure Source luminance is selected and hit ok.
17 Go to Layers>Merge>Merge Group.
18 Resize the mask layer to be bigger.
19 Get your text tool and font of choice.
20 Type out any desired wording. I also used a gradient glow on the wording.
21 Add copyrights.
22 If you are not doing the animation resize and save as a png.
If you are doing the animation, follow these steps:
23 Go to the 1st layer and get your paint bucket tool.
24 Flood fill white.
25 Click on the background paper for the square frame.
26 Duplicate it twice.
27 Click on the original layer and go to Effects>Plug-in>Eye Candy>HSB Noise.
28 Leave the settings at default but hit random once and then ok.
29 Repeat for the other 2 background layers.
30 Hide both duplicated layers.
31 Click on the background paper for the circle frame.
32 Duplicate it twice.
33 Click on the original layer and go to Effects>Plug-in>Xero>Fritilary.
34 Apply these settings: 5-30-10-50
35 Apply these settings to the 2 duplicated layers:
5-30-10-60
5-30-10-40
36 Hide both duplicated layers.
37 Click on the Tower layer and duplicate twice.
38 Click on the original layer and go to Effects>Plug-in>Alien Skin Xenofex 2>Constellation.
39 Leave at default settings but change the color to keep original and hit random once.
40 Hit okay and repeat for the duplicated layers.
41 Hide duplicated layers.
42 Copy merge and go to Animation Shop.
43 Paste as a new animation.
44 Back in PSP, hide the original merged layer and unhide the 1st duplicated layer.
45 Copy merge and go to AS.
46 Right-click on your current frame and select Paste After Current Frame.
47 Back in PSP, hide the 1st duplicated merged layer and unhide the 2nd duplicated layer.
48 Right-click on your current frame and select Paste After Current Frame.
49 Select All and change frame properties to 75.
50 Resize and save as a gif and you are all done!!!
I hope you liked my tut!
Thanks,
Kali
Misfit Poision (Animated) Tut
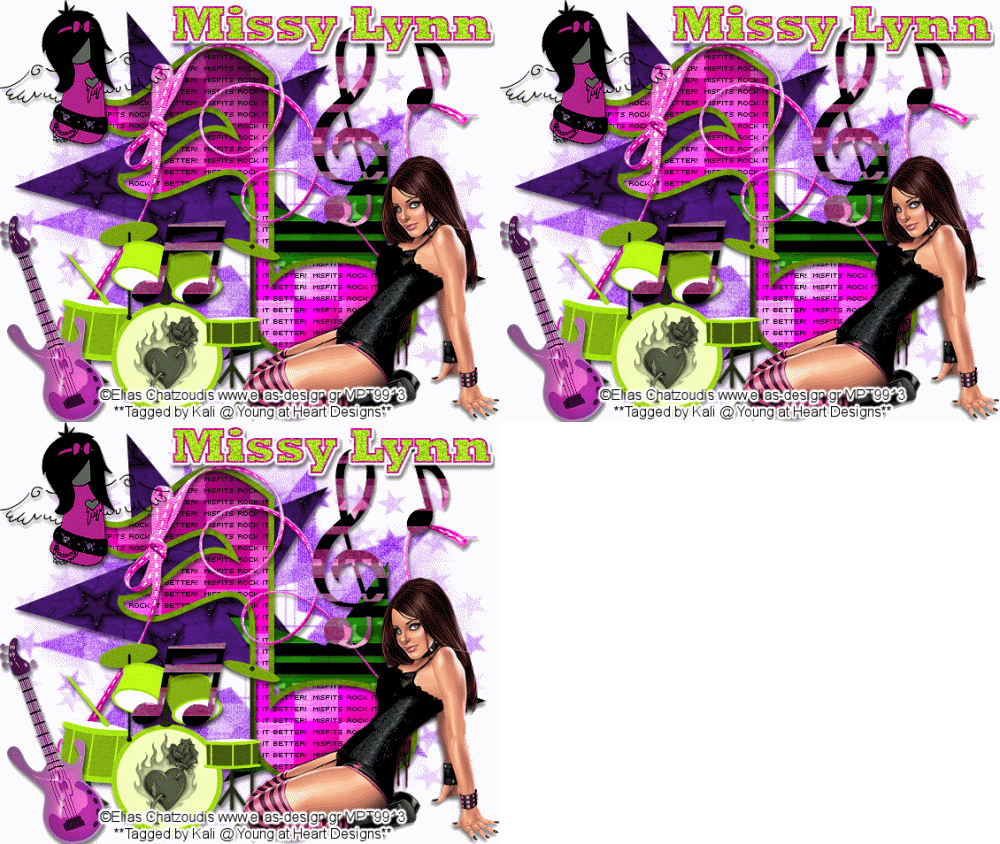
To see the actual size of tag, click on the example.
To do this tutorial you must have some knowledge of PSP and Animation Shop.
This tut was written and copyright by Kali at Young at Heart Designs.
I used PSPX2 and Animation Shop to create this tut.
Supplies:
-Awesome kit by Missy Lynn's Sraps called "Poisioned Rock" and can be found HERE.
-Incredible artwork by Elias Chatzoudis and can be found HERE. You must purchase and have a valid license to use his work.
Please DON'T use his artwork without permission.
-Template #43 by Kristin from Wicked Scrapz: HERE
-Mask: HERE
-Plug-in: Eye Candy 4000>Gradient Glow
-Plug-in: Greg's Factory>Pool Shadow
-Plug-in: DSB Flux>Bright Noise
-Font: Rockwell Extra Bold
1 Open template and delete the copyright layer.
2 Click on Star 1 layer.
3 Open your choice of paper from the kit.
4 Resize to canvas size.
5 Click back on the Star 1 layer.
6 Go to Selections>Select All>Float>Defloat.
7 Click on the newly added paper and go to Selections>Invert and hit delete on your keyboard.
8 Delete the original Star 1 layer.
9 Repeat the Steps #5-8 for all included layers in the template.
10 Open your choice of tube.
11 Open any desired elements from the kit.
12 Resize and position where desired.
13 Go to your very 1st layer and open your choice of paper from the kit.
14 Resize to the canvas size.
15 Open the mask and minimize it.
16 Go to Layers>New Mask Layer>From Image.
17 Select the mask and hit ok.
18 Go to Layers>Merge>Merge Group and then resize the mask layer to be bigger.
19 Duplicate the Mask layer and then merge both mask layers together.
20 Get your text tool and font of choice and type out desired wording.
21 Add noise and a gradient glow to the wording.
22 Add copyrights.
23 If you are not doing the animation resize and save as png or jpeg.
If you are doing the animation, follow these steps:
24 Click on your mask layer and duplicate it twice.
25 Click on the original mask layer and go to Effects>Plug-in>DSB FLUX>Bright Noise.
26 Apply these settings: Intensity: 45 Direction: Mix and hit ok.
27 Apply these same settings to the other 2 mask layers.
28 Hide the 2 duplicated mask layers.
29 Click on the BIG Music Note background. (The layer underneath the "Misfits Rock It" Wording)
30 Duplicate this layer twice.
31 Click on the original music note background and go to Effects>Plug-in>Greg's Factory Output II>Pool Shadow.
32 Apply these settings: 50-50-50-50-50-50-160-59
33 Apply these settings to the 2 duplicated layers:
50-50-50-50-50-50-210-106
50-50-50-50-50-50-255-0
34 Hide both duplicate layers.
35 Copy merge and go to Animation Shop.
36 Paste as a new animation.
37 Back in PSP, hide both original layers and unhide the 1st duplicate layers for both mask layer and music note background layer.
38 Copy merge and go to AS.
39 Right-click on the frame and select Paste After Current Frame.
40 Back in PSP, hide both layers and unhide the last duplicated layers.
41 Copy merge and go to AS.
42 Right-click on the frame and select Paste After Current Frame.
43 Select all and change the frame properties to 55.
44 Resize and save as gif.
You are all done!!
Thanks,
Kali
Face It, You Want Me (Animated) Tut

To do this tutorial you must have some knowledge of PSP and Animation Shop.
This tut was written and copyright by Kali at Young at Heart Designs.
I used PSPX2 and Animation Shop to create this tut.
Supplies:
-Awesome kit by Candys Treats called "Opposites Attract" and can be found HERE.
-Incredible artwork by Ismael Rac and can be found HERE. You must purchase and have a valid license to use his work.
Please DON'T use his artwork without permission.
-Template #3 by Beth from the Creative Misfit Creations Template Challenge: HERE
-Mask #192 by WSL: HERE
-Plug-in: Eye Candy 4000>Gradient Glow
-Plug-in: Penta.com>Jeans
-Font: Mistral
1 Open template and delete the copyright layer.
2 Click on LT Gray Vert Line 2.
3 Open your choice of paper from the kit.
4 Resize to canvas size.
5 Click back on the LT Gray Vert Line 2.
6 Go to Selections>Select All>Float>Defloat.
7 Click on the newly added paper and go to Selections>Invert and hit delete on your keyboard.
8 Delete the original LT Gray Vert Line 2 layer.
9 Repeat the Steps #5-8 for all included layers in the template.
10 Click on the wordart layer.
11 Resize to be a little bigger.
12 Add gradient glow to it.
13 Open your choice of tube.
14 Resize and position where desired.
Use my example for reference.
15 Duplicate your tube twice.
16 Move the duplicated tubes to be above the small frame rectangles.
17 Make sure only of each is in one of each small frame rectangle.
18 Click on the top small frame rectangle and go to Selections>Select All>Float>Defloat.
19 Click on the top duplicate tube and go to Selections>Invert and hit delete on your keyboard.
20 Go to Selections>Select None.
21 Repeat for the 2nd duplicated tube and the bottom small frame rectangle.
22 Now change the layer properties for both to luminance legacy.
23 **ONLY DO THIS STEP IF YOU ARE NOT DOING THE ANIMATION** Click on the bottom duplicated tube and go to Effects>Plug-in>Penta.com>Jeans.
24 Apply default settings and hit ok.
25 Open any desired elements from the kit.
26 Resize and position where desired.
27 Go to your very 1st layer and open your choice of paper from the kit.
28 Resize to the canvas size.
29 Open the mask and minimize it.
30 Go to Layers>New Mask Layer>From Image.
31 Select the mask and hit ok.
32 Go to Layers>Merge>Merge Group and then resize the mask layer to be bigger.
33 Get your text tool and font of choice and type out desired wording.
34 Add gradient glow to the wording.
35 Add copyrights.
36 If you are not doing the animation resize and save as png or jpeg.
If you are doing the animation, follow these steps:
37 Click on the top duplicated tube and duplicate again.
38 Move the duplicated tube down to the bottom small frame rectangle.
39 Line it up just like the other tube.
40 Go to Effects>Plug-in>Penta.com>Jeans and apply the default settings.
41 Hide this layer.
42 Now click on the original bottom tube and duplicate again.
43 Move this new layer up to the top small frame rectangle and line it up just like the original one.
44 Hide this newly added layers.
45 Copy merge and go to Animation Shop.
46 Paste as a new animation.
47 Back in PSP, hide both duplicated tube layers that are seen and unhide the 2 that are hidden.
48 Copy merge and go to AS.
49 Right-click on the frame and select Paste After Current Frame.
50 You should have 2 frames and select all.
51 Change the frame properties to 100.
52 Resize and save as gif.
You are all done!!
I hope you like my tut!
Thanks,
Kali
Tuesday, July 7, 2009
Big Top Circus (Animated) Tut
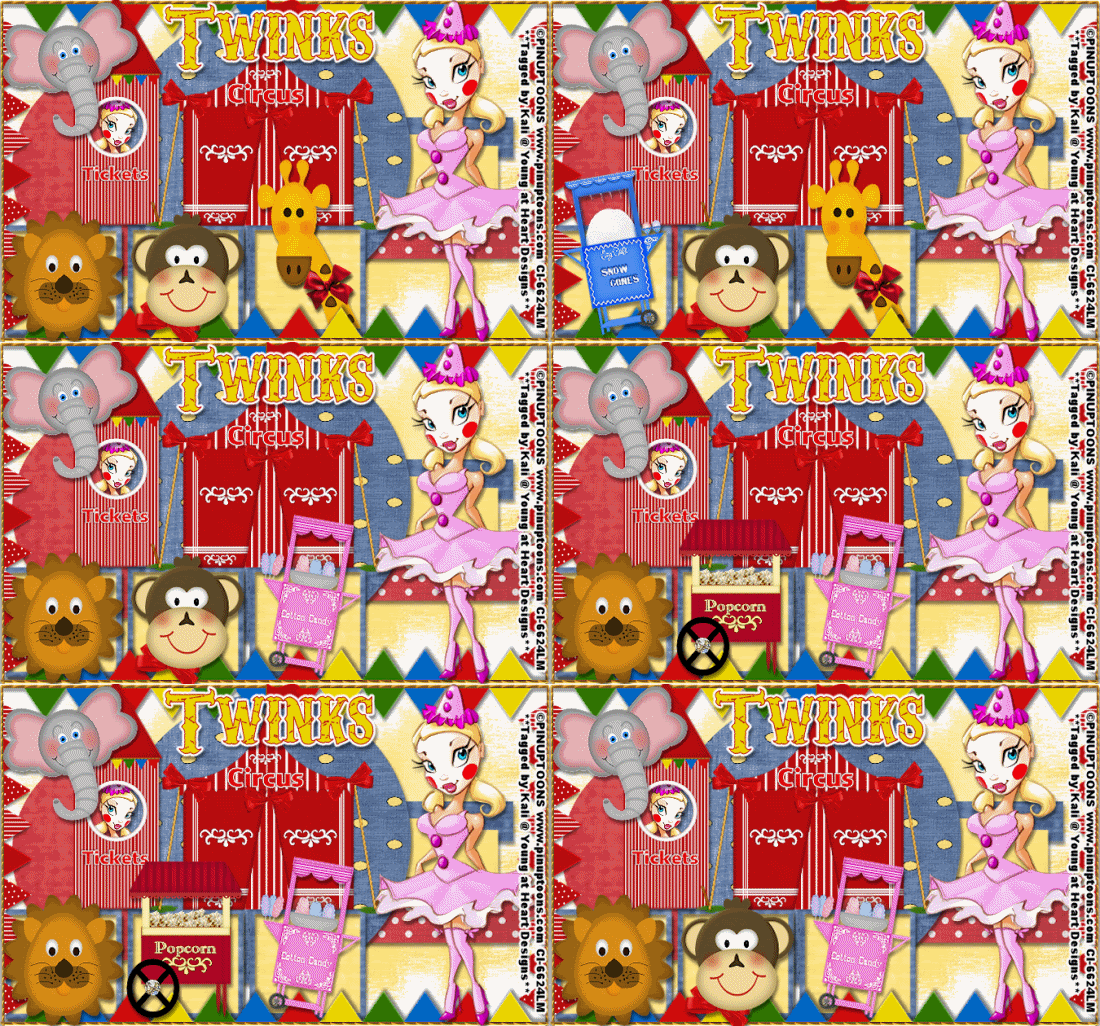
To see full size of tag, click on the example.
To do this tutorial you must have some knowledge of PSP and Animation Shop. This tut is very easy and not many steps.
This tut was written and copyright by Kali at Young at Heart Designs.
I used PSPX2 and Animation Shop to create this tut.
Supplies:
-Tube of Choice I used the artwork of Pinuptoons, you will need a proper license to use his work which you can get by visiting CILM - HERE.
-Mask #197 by Vix: HERE
-Template #2 by Sara and can be found HERE.
-Awesome Circus Elements by Twinks Twaddles and can be found and downloaded HERE.
-Paper Pack: HERE (If you created these papers, please let me know so I can give proper credit.)
-Font: Carnivalee Freakshow
-Plug-in: Eye Candy 4000>Gradient Glow (Used for wording)
I have added a drop shadow to pretty much every layer and I also sharpened all elements if I resized them so they maintained the same
quality as the original one.
1 Open template and delete the copyright and Heart layers.
2 Add a new raster layer and move this to the very bottom making it the 1st layer.
3 Get your paint bucket tool and flood fill white.
4 Click on the rectangle 1 layer and open your choice of paper.
5 Click back on rectangle 1 layer and go to Selections>Select All>Float>Defloat.
6 Click on the newly added paper and go to Selections>Invert and hit delete on your keyboard.
7 Delete the original rectangle 1 layer.
6 Repeat Steps #:4-7 for all included layers in the template.
7 Open the snow cones machine, popcorn machine, cotton candy machine, giraffe, monkey and lion elements.
8 Resize and position where desired.
Use my example for reference. But try to set up the way I did in order for you to be able to figure out my animation steps.
9 Open any other circus elements from Twinks site that you want to use.
10 Resize and position where desired.
11 Go to your very first layer and open your choice of paper.
12 Move this newly added paper layer to the bottom making it the 1st layer.
13 Go to Layers>New Mask Layer>From Image.
14 In the drop down window for Source select the mask.
15 Hit ok.
16 Go to Layers>Merge>Merge Group.
17 Resize the mask layer to make it bigger.
18 Get your text tool and font of choice.
19 Type out any desired wording. I added a gradient glow to my wording as well.
20 Add copyrights.
21 If you are not doing the animation resize and save as a png.
If you are doing the animation, follow these steps:
22 It is very hard to explain but take a look at my example and you will be able to figure out how to do the animation.
23 Anytime you uhide an animal or machine make sure you copy merge and paste into Animation Shop.
I ended up with 8 frames.
24 Select All and change the frame properties to 85.
24 Resize and save as gif.
You are all done!!!
Thanks for doing my tut,
Kali
Sunday, July 5, 2009
Walk the Plank (Animated) Tut
Boy Version
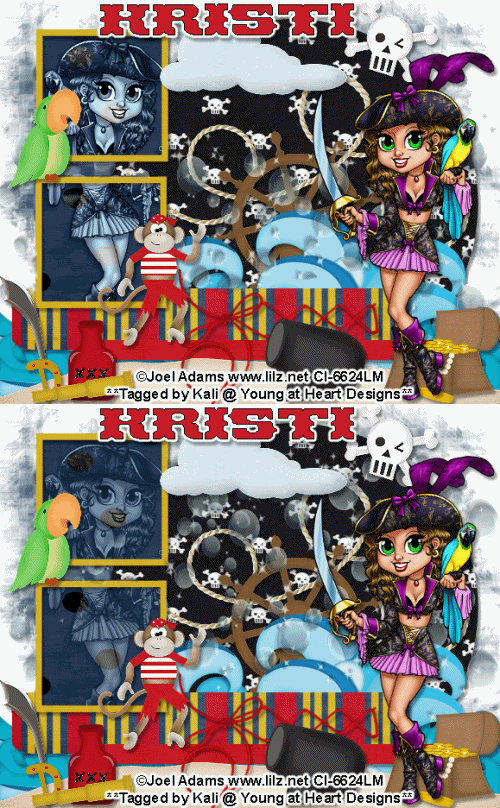
Girl Version
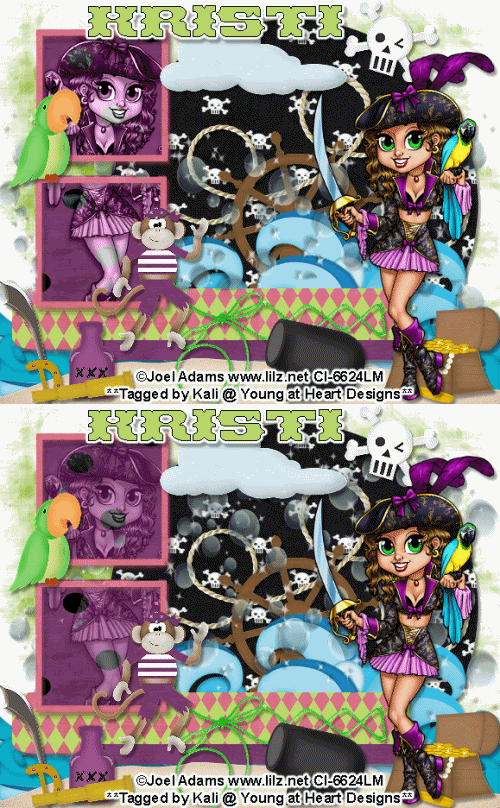
To do this tutorial you must have some knowledge of PSP and Animation Shop.
This tut was written and copyright by Kali at Young at Heart Designs.
I used PSPX2 and Animation Shop to create this tut.
Supplies:
-IAdorable Kit by Kristi W. at Scrappin Divaz Designz called "Walk the Plank" and can be found HERE.
-Awesome artwork by Joel Adams and her artwork can be found HERE. You must have permission to use her artwork and hold a license. Please do not use without purchasing the artwork.
-Font: Pirates Gold
-Plug-in>Eye Candy 4000>Gradient Glow
-Mask #297 by WSL: HERE
-Templated #1 by Sara's Sinful Creations: HERE
I have added a drop shadow to pretty much every layer and I also sharpened all elements if I resized them so they maintained the same
quality as the original one.
1 Open new template.
2 Delete the copyright layer.
3 Click on the Circle layer.
4 Open your choice of paper and resize to canvas size.
5 Click back on the Circle Layer and go to Selections>Select All>Float>Defloat.
6 Click on the newly added paper layer and go to Selections>Invert and hit delete on your keyboard.
7 Delete the original Circle layer.
8 Repeat Steps #: 3-7 for all included layers in the template.
9 Open the water element from the kit.
10 Resize to the width of the canvas.
11 Mirror it so you can see the waves good.
12 Now duplicate it and then mirror again.
13 Move the duplicated layer down a bit.
14 Duplicate it one more time and mirror it.
15 Move this duplicated layer down a little bit that way the bottom of the canvas is waves.
16 Merge all the water layers together and move this layer under the Rectangle 1 layer.
17 Add the sand element at the bottom of the canvas.
18 Open your choice of tube.
19 Resize and position where desired.
20 Duplicate the tube and move the duplicated tube under the frame layer and just above the squares.
21 Get your eraser tool and erase any of the tube that is sticking out past the frames.
22 For both the duplicated tube change the layer properties to Luminance Legecy.
23 Open desired elements from the kit.
24 Resize and position where desired.
Use my example for reference.
25 Click on your water layer and open the bubbles element from the kit.
26 Resize and position where desired.
27 Duplicate the bubbles how many times you want. What I did was duplicated it 10 times and some I resized to be smaller and some I mirrored.
This way it looks like a bunch of bubbles.
28 Get your eraser tool and erase any bubbles that you don't want showing in certain places.
29 Get your text tool and font of choice.
30 Type out any desired wording. Add gradient glow to the wording too.
31 Add copyrights.
32 If you are not doing the animation resize and save as a png.
If you are doing the animation, follow these steps:
33 Unhide the background layer.
34 Duplicate the tube again.
35 On the newly duplicated tube change the opacity to 50%.
36 Click on the bubbles layer.
37 Duplicate it and then flip the image.
38 Position to look a little higher than the first set of bubbles.
39 Again, get your eraser tool and erase any bubbles you do not want.
40 Copy merge and go to Animation Shop.
41 Paste as a new animation.
42 Back in PSP, hide the 1st ones and unhide the 2nd ones.
43 Copy merge and go to AS.
44 Right-click your frame and Select Paste After Current Frame.
45 In AS, select all frames and change the frame properties to 75.
46 Resize and save as gif.
You are all done!!!
Thanks for doing my tut,
Kali

Girl Version

To do this tutorial you must have some knowledge of PSP and Animation Shop.
This tut was written and copyright by Kali at Young at Heart Designs.
I used PSPX2 and Animation Shop to create this tut.
Supplies:
-IAdorable Kit by Kristi W. at Scrappin Divaz Designz called "Walk the Plank" and can be found HERE.
-Awesome artwork by Joel Adams and her artwork can be found HERE. You must have permission to use her artwork and hold a license. Please do not use without purchasing the artwork.
-Font: Pirates Gold
-Plug-in>Eye Candy 4000>Gradient Glow
-Mask #297 by WSL: HERE
-Templated #1 by Sara's Sinful Creations: HERE
I have added a drop shadow to pretty much every layer and I also sharpened all elements if I resized them so they maintained the same
quality as the original one.
1 Open new template.
2 Delete the copyright layer.
3 Click on the Circle layer.
4 Open your choice of paper and resize to canvas size.
5 Click back on the Circle Layer and go to Selections>Select All>Float>Defloat.
6 Click on the newly added paper layer and go to Selections>Invert and hit delete on your keyboard.
7 Delete the original Circle layer.
8 Repeat Steps #: 3-7 for all included layers in the template.
9 Open the water element from the kit.
10 Resize to the width of the canvas.
11 Mirror it so you can see the waves good.
12 Now duplicate it and then mirror again.
13 Move the duplicated layer down a bit.
14 Duplicate it one more time and mirror it.
15 Move this duplicated layer down a little bit that way the bottom of the canvas is waves.
16 Merge all the water layers together and move this layer under the Rectangle 1 layer.
17 Add the sand element at the bottom of the canvas.
18 Open your choice of tube.
19 Resize and position where desired.
20 Duplicate the tube and move the duplicated tube under the frame layer and just above the squares.
21 Get your eraser tool and erase any of the tube that is sticking out past the frames.
22 For both the duplicated tube change the layer properties to Luminance Legecy.
23 Open desired elements from the kit.
24 Resize and position where desired.
Use my example for reference.
25 Click on your water layer and open the bubbles element from the kit.
26 Resize and position where desired.
27 Duplicate the bubbles how many times you want. What I did was duplicated it 10 times and some I resized to be smaller and some I mirrored.
This way it looks like a bunch of bubbles.
28 Get your eraser tool and erase any bubbles that you don't want showing in certain places.
29 Get your text tool and font of choice.
30 Type out any desired wording. Add gradient glow to the wording too.
31 Add copyrights.
32 If you are not doing the animation resize and save as a png.
If you are doing the animation, follow these steps:
33 Unhide the background layer.
34 Duplicate the tube again.
35 On the newly duplicated tube change the opacity to 50%.
36 Click on the bubbles layer.
37 Duplicate it and then flip the image.
38 Position to look a little higher than the first set of bubbles.
39 Again, get your eraser tool and erase any bubbles you do not want.
40 Copy merge and go to Animation Shop.
41 Paste as a new animation.
42 Back in PSP, hide the 1st ones and unhide the 2nd ones.
43 Copy merge and go to AS.
44 Right-click your frame and Select Paste After Current Frame.
45 In AS, select all frames and change the frame properties to 75.
46 Resize and save as gif.
You are all done!!!
Thanks for doing my tut,
Kali
Seaside (Animated) Tut
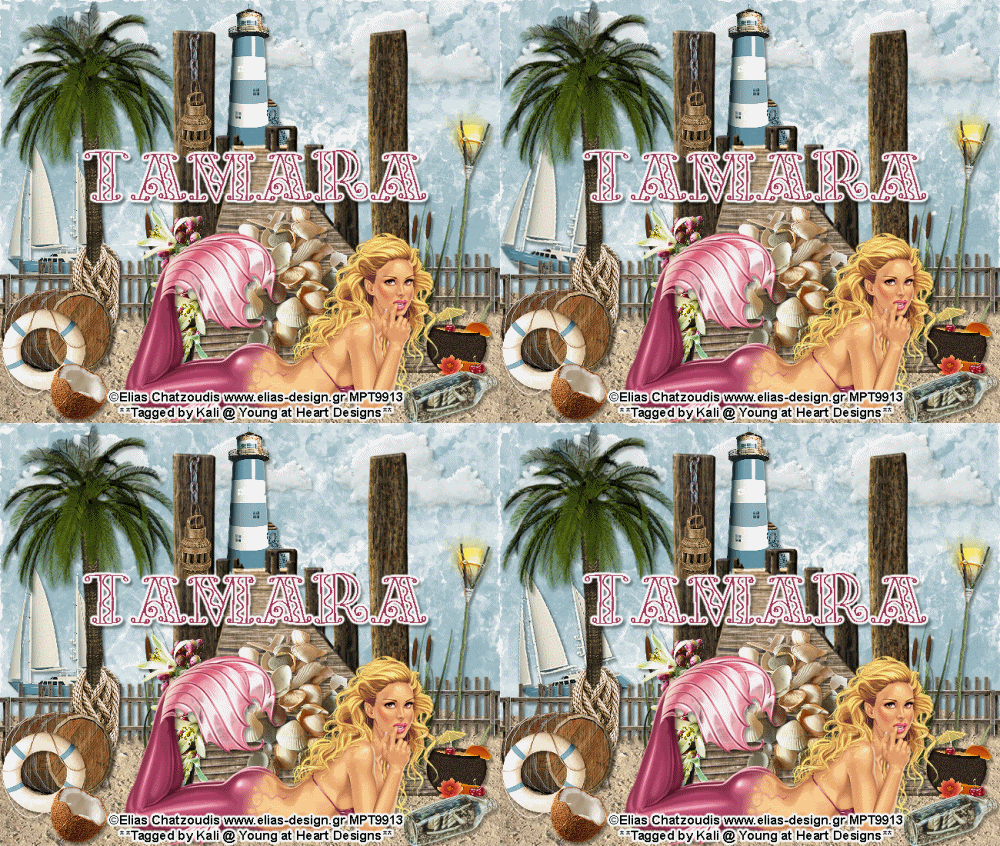
To do this tutorial you must have some knowledge of PSP and Animation Shop. This tut is very easy and not many steps.
This tut was written and copyright by Kali at Young at Heart Designs.
I used PSPX2 and Animation Shop to create this tut.
Supplies:
-Incrediable Kit by Just a Girl's Designs called "Sea Side" and can be found HERE.
-Awesome artwork by Elias Chatzoudis and his artwork can be found HERE. You must have permission to use his artwork and hold a license. Please do not use without purchasing the artwork.
-Font: KF Pizazz
-Plug-in>Eye Candy 4000>Gradient Glow
-Plug-in>Eye Candy 4000>Jiggle
I have added a drop shadow to pretty much every layer and I also sharpened all elements if I resized them so they maintained the same
quality as the original one.
1 Open new canvas 650x550.
2 Open your choice of paper and resize to the canvas size.
3 Open the sand element of choice from the kit.
4 Resize and position where desired.
5 If you choose the sand I did you will need to duplicate it and then move it over so the whole bottom is covered.
6 Open the dock element and position where desired.
7 Open your choice of tube.
8 Resize and position where desired.
10 Open desired elements from the kit.
11 Resize and position where desired.
Use my example for reference.
12 Get your text tool and font of choice.
13 Type out any desired wording.
14 Add copyrights.
15 If you are not doing the animation resize and save as a png.
If you are doing the animation, follow these steps:
16 Click on your background layer and duplicate it 3 times- giving you a total of 4.
17 Click on the 1st one and go to Effects>Plug-in>Eye Candy 4000>Jiggle.
18 Apply these settings to the layer:
Movement Type: Turbulence
Bubble Size: 80.49
Warp Amount: 3.10
Twist: 20
Seamless Tile Unchecked
Click Random Seed once.
19 Repeat Step #18 for all the background layers.
20 Now either click on the boat element or open the boat element.
21 Duplicate it 3 times giving you a total of 4.
22 Click on the second boat and go to Image>Free Rotate.
23 Apply these settings: Direction- Right Degrees- 10 and hit ok.
24 Click on the 4th boat and go to Image>Free Rotate.
25 Apply these settings: Direction- Left Degrees- 10 and hit ok.
26 Hide all background layers and boat layers except the 1st ones.
27 Copy merge and go to Animation Shop.
28 Paste as a new animation.
29 Back in PSP, hide the 1st ones and unhide the 2nd ones.
30 Copy merge and go to AS.
31 Right-click your frame and Select Paste After Current Frame.
32 Repeat this process until all layers have been pasted after current frame.
You should have a total of 4 frames.
33 In AS, select all frames and change the frame properties to 55.
34 Resize and save as gif.
You are all done!!!
Thanks for doing my tut,
Kali
Rocker Chick Tut
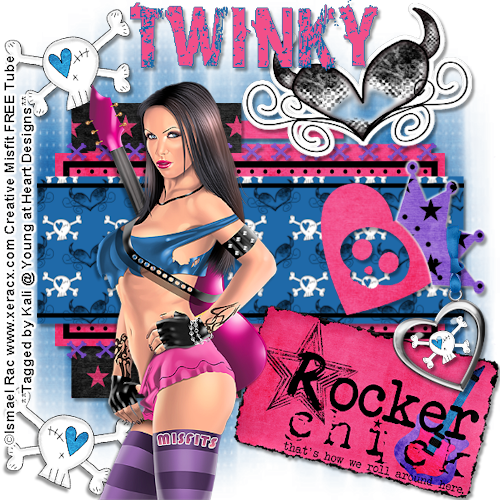
To do this tutorial you must have some knowledge of PSP. This tut is very easy and not many steps.
This tut was written and copyright by Kali at Young at Heart Designs.
I used PSPX2 to create this tut.
Supplies:
-Incrediable Kit by Twinky Dezines called "Girlz Rock" and can be found HERE.
-Awesome artwork by Isamel Rac and this is a free tube made for the Creative Misfit Forum which can be found HERE. You must have permission to use his artwork. Please do not use without permission.
-Font: VTKS Distress
-Template by Aiya for the Creative Misfits Creations Template Challange #2: HERE
-Mask #5 by Ginas Gem: HERE
I have added a drop shadow to pretty much every layer and I also sharpened all elements if I resized them so they maintained the same
quality as the original one.
1 Open template and delete the copyright and background layer.
2 Click on the Thin Rectangles layer.
3 Open your choice of paper and click back on the Thin Rectangles layer.
4 Go to Selections>Select All>Float>Defloat.
5 Click on the newly added paper and go to Selections>Invert and hit delete on your keyboard.
6 Delete the original Thin Rectangles layer.
7 Repeat Steps #:2-6 for all included layers in the template..
8 Open your choice of tube.
9 Resize and position where desired.
10 Open desired elements from the kit.
11 Resize and position where desired.
Use my example for reference.
12 Go to your very first layer and open your choice of paper.
13 Move this layer to the bottom- making it the 1st layer.
14 Open the mask and minimize it.
15 Go to Layers>New Mask Layer>From Image.
16 In the drop down for Source select the mask and hit ok.
17 Go to Layers>Merge>Merge Group.
18 Resize the mask layer to be bigger.
19 Duplicate the mask layer and then go to Image>Mirror.
20 Then go to Image>Flip.
21 Merge the mask layers and then duplicate again.
22 Get your text tool and font of choice.
23 Type out any desired wording.
24 Add copyrights.
25 Resize and save as a png.
You are all done!!!
Thanks for doing my tut,
Kali
Saturday, July 4, 2009
Down at the Pond (Animated) Tut
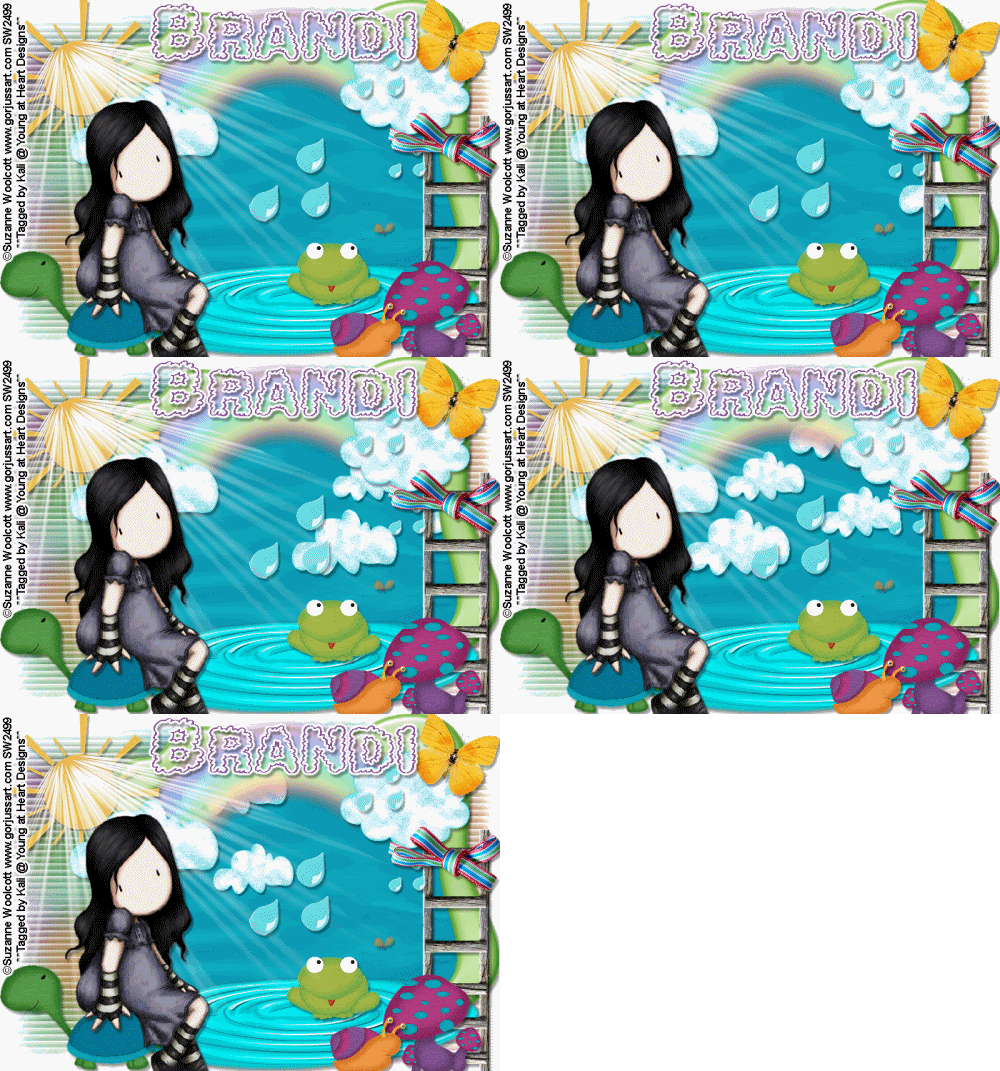
To see actual size of tag- click on the example.
To do this tutorial you must have some knowledge of PSP and Animation Shop. This tut is very easy and not many steps.
This tut was written and copyright by Kali at Young at Heart Designs.
I used PSPX2 and Animation Shop to create this tut.
Supplies:
-Wonderful Artwork by Gorjuss and can be found HERE. You must purchase and have a valid license to use her work.
Please DON'T use her artwork without permission.
-Incrediable Kit by Grunge & Glitter Scraps called "At the Pond" and can be found HERE. It is part of the Starving Artist Collab.
-Mask: HERE
-Font: AlphaClouds
I have added a drop shadow to pretty much every layer and I also sharpened all elements if I resized them so they maintained the same
quality as the original one.
1 Open new canvas 700x500. Flood fill white.
2 Open the Frame3 from the kit.
3 Resize and position where desired.
Use my example for reference.
4 Get your magic wand tool and click in the opening of the frame.
5 Go to Selections>Modify>Expand>5.
6 Open your choice of paper and go to Selections>Invert. Hit delete ony our keyboard.
7 Open your choice of tube.
8 Resize and position where desired.
Use my example for reference.
9 Open your desired elements from the kit.
10 Resize and position where desired.
11 Get your text tool and font of choice.
12 Type out any desired wording.
13 Go to your very 1st layer and open the mask.
14 Minimize mask.
15 Open your choice of paper.
16 Go to Layers>New Mask Layer>From Image.
17 In the drop down for Source select the mask and hit ok.
18 Go to Layers>Merge>Merge Group.
19 Resize the mask layer to be bigger and duplicate it twice to make it more visible.
20 Add copyrights.
21 If you are not doing the animation resize and save as a png or jpeg.
If you are doing the animation, follow these steps:
22 Open your cloud of choice from the kit.
22 Position where desired.
23 Paste and resize several making it look as a sky full of clouds.
24 Merge all the cloud layers.
25 Move this layer to be right above the paper layer you used as the background for the frame.
26 Reposition this layer to be all the way over to the right of the canvas where you barely see the clouds in the frame area.
27 Duplicate this layer and move the duplicated layer over a little bit to the left. Hold the shift key and it will keep it steady.
28 Now duplicate this new layer and repeat.
29 Keep doing this until you have moved the clouds all the way over to the left of the canvas.
30 Now get your eraser tool and erase any of the cloud layers that stick out past the frame layer so they are only confined in the frame area.
31 Hide all cloud layers and copy merge.
32 Go to Animations Shop and paste as a new animation.
33 Back in PSP, unhide the 1st cloud layer.
34 Copy merge and go to Animation Shop.
35 Right-click on your frame and select Paste After Current Frame.
36 Back in PSP, hide the 1st cloud layer and unhide the 2nd cloud layer.
37 Copy merge and go to AS.
38 Right-click on the current frame and select Paste After Current Frame.
39 Repeat this process until you have unhidden all the cloud layers.
40 Select all, change the frame properties to 85 and resize.
41 Save as a gif.
You are all done!!!
Thanks for doing my tut,
Kali
Thursday, July 2, 2009
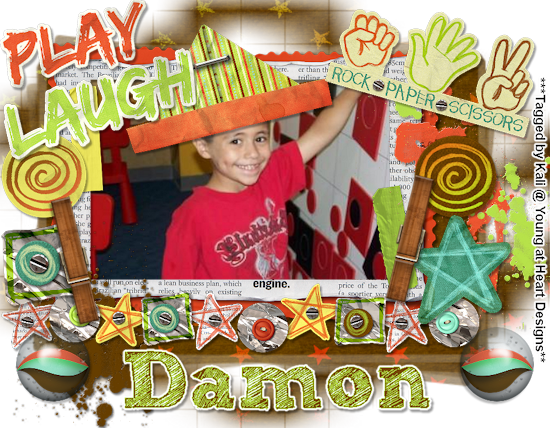
Rock Paper Scissors Tut
To do this tutorial you must have some knowledge of PSP. This tut is very easy and not many steps.
This tut was written and copyright by Kali at Young at Heart Designs.
I used PSPX2 to create this tut.
Supplies:
-Incrediable Kit by Lliella Designs with Sweet Shoppe Designs called "Rollicking" and can be found HERE.
-Image of choice- I used a photo of my son and it is copyrighted so please do not use it.
-Mask of choice
-Plug-in>Eye Candy 4000>Gradient Glow
-Font: Sketch Block
I have added a drop shadow to pretty much every layer and I also sharpened all elements if I resized them so they maintained the same
quality as the original one.
1 Open new canvas 700x700.
2 Open the Frame2 from the kit.
3 Resize and position where desired.
Use my example as a reference.
4 Open these elements from the kit as well:
border, circle, clotherspin, Play wordart, Laught wordart, marble4, paint1, paint2, paperhat1, paperstar2, rps paper, stacksquare1
5 Open any other desired elements from the kit.
6 Resize and position where desired.
7 Open your choice of photo.
8 Resize and position under the frame layer.
9 Get your eraser tool and erase any of the photo sticking out past the frame.
10 Open you mask and minimize it.
11 Open your choice of paper.
12 Go to Layers>New Mask Layer>From Image.
13 In the drop down for Source select your mask and hit ok.
14 Go to Layers>Merge>Merge Group.
15 Resize the mask layer to be bigger.
16 Get your text tool and font of choice.
17 Type out any desired wording.
18 Add a gradient glow- width 3, color white and settings set on FAT to the wording.
19 Add copyrights.
20 Resize and save as a png.
You are all done!!!
Thanks for doing my tut,
Kali
American Spirit Tut
To do this tutorial you must have some knowledge of PSP. This tut is very easy and not many steps.
This tut was written and copyright by Kali at Young at Heart Designs.
I used PSPX2 to create this tut.
Supplies:
-Incrediable Kit by Traci Reed with Sweet Shoppe Designs called "American Spirit" and can be found HERE.
-Image of choice- I used a photo of my son and this is copyright so please do not use it!
-Plug-in>Eye Candy 4000>Gradient Glow
I have added a drop shadow to pretty much every layer and I also sharpened all elements if I resized them so they maintained the same
quality as the original one.
1 Open new canvas 700x700.
2 Open the Frame1 from the kit.
3 Resize and position where desired.
Use my example as a reference.
4 Open these elements from the kit as well:
banner2, button2, feltstar, feltstar2, firecracker1, firecracker2, frame2, frame3, glitterspray, pompom1, ribbon1, ribbon2, ribbon3, word-pride
5 Open any other desired elements from the kit.
6 Resize and position where desired.
7 Click on your circle frame and get your magic wand tool.
8 Click on one of the circles of the frame.
9 Open your choice of paper and go to Selections>Invert and hit delete on your keyboard.
10 Repeat this for the other 2 circles.
10 Open your choice of photo.
12 Resize and position under the rectangle frame layer.
13 Get your text tool and font of choice.
14 Type out any desired wording.
15 Add a gradient glow- width 3, color white and settings set on FAT to the wording.
16 Add copyrights.
17 Resize and save as a png.
You are all done!!!
Thanks for doing my tut,
Kali
Summer Fun (Animated) Tut
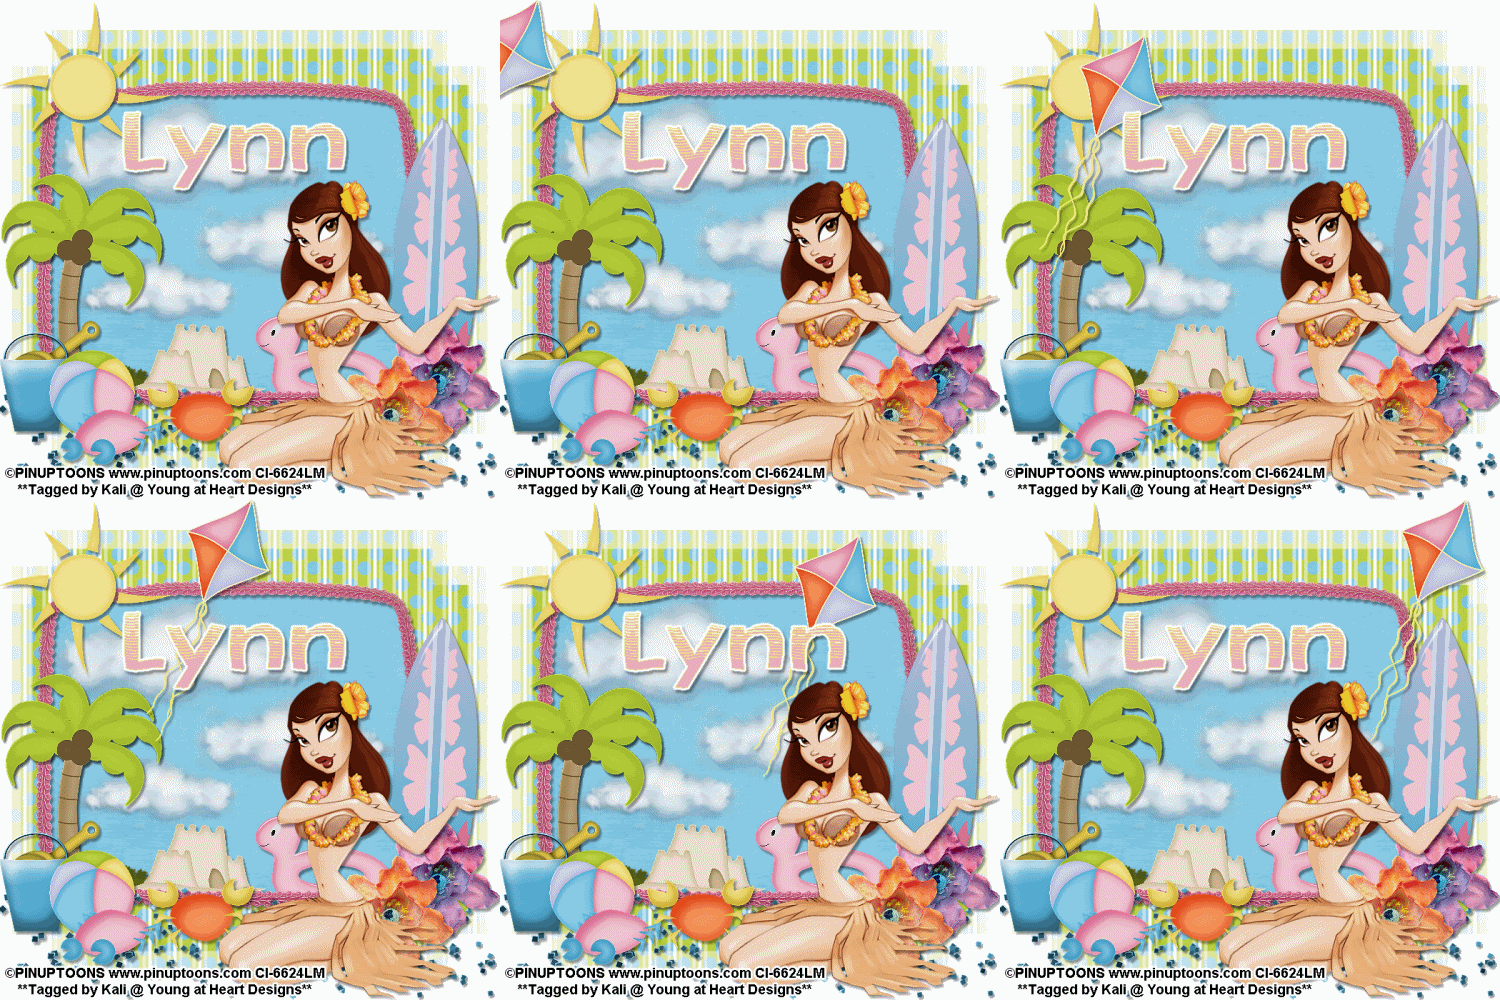
To do this tutorial you must have some knowledge of PSP and Animation Shop.
This tut was written and copyright by Kali at Young at Heart Designs.
I used PSPX2 and Animation Shop to create this tut.
Supplies:
-Incrediable Kit by Lynn with Moo Designs called "Fun and Fancy Free" and can be found HERE.
-Beautiful artwork by Pinup Toons and his artwork can be found HERE. You must have permission to use his artwork and hold a license. Please do not use without purchasing the artwork.
-Mask #299 by WSL: HERE
-Rainbow Coffi Cloud Tubes: HERE
-Plug-in: Eye Candy 4000>Gradient Glow
-Font: Austrailian Sunrise
I have added a drop shadow to pretty much every layer and I also sharpened all elements if I resized them so they maintained the same
quality as the original one.
1 Open new canvas 700x700.
2 Flood Fill White.
2 Open the moo_funandfancyfree_frame1 from the kit.
3 Resize and position where desired.
Use my example as a reference.
4 Open these elements from the kit as well:
glitter, beachball, beachbucket, beachshovel, crab1, crab2, flower1, flower2, kite, palmtree, sandcastle, sun, surfboard2, and waterfloat.
5 Open any other desired elements from the kit and the supplied cloud tubes.
6 Resize and position where desired.
7 Open your choice of paper.
8 Resize and position under the frame layer.
9 Get your eraser tool and erase any of the paper that are sticking out past the frame.
10 Open your choice of tube.
11 Resize and position where desired.
12 Open the mask and minimize it.
13 Go to your 1st layer and open your choice of paper.
14 Go to Layers>New Mask Layer>From Image.
15 In the drop down for Source select the mask and hit ok.
16 Go to Layers>Merge>Merge Group.
17 Get your text tool and font of choice.
18 Type out any desired wording.
19 Add a gradient glow- width 3, color white and settings set on FAT to the wording.
20 Add copyrights.
21 If you are not doing the animation resize and save as a png.
If you are doing the animation, follow these steps:
22 Place the kit element from the kit at the upper left hand side of the canvas.
23 Make it look as if only half of it is on the canvas.
24 Duplicate this layer and move the duplicated layer over a little bit and move it a little down to make it look as if it is floating in the air.
25 Duplicate the layer again and move the newly duplicated layer over a little bit and move it back up.
26 Repeat these steps until you no longer see the kite anymore. I ended up having a total of 5 kite layers.
27 Rename these kite1, kite2 and so on.
28 Hide all kite layers.
29 Copy merge and go to Animation Shop.
30 Paste as a new animation.
31 Back in PSP, unhide the kite1 layer.
32 Copy merge and go to AS.
33 Right-click the current frame and select Paste After Current Frame.
34 Back in PSP, unhide the kite2 layer.
35 Copy merge and go to AS.
36 Right-click the current frame and select Paste After Current Frame.
37 Repeat this until you no longer see the kite on the canvas. I ended up with a total of 6 frames.
38 Click on the 1st frame and change the frame properties to 100.
39 Select all the remaining frames and change the frame properties to 75.
40 Resize and save as a gif and you are all done!!!
I hope you enjoyed my tut!
Thanks,
Kali
You are all done!!!
Thanks for doing my tut,
Kali
I Will Never Forget Tut
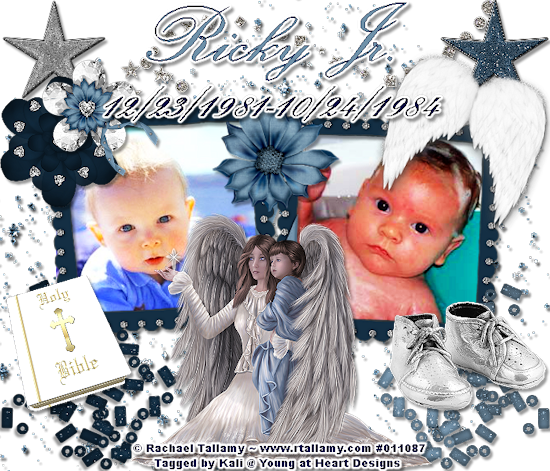
To see tag full size please click on the actual tag.
To do this tutorial you must have some knowledge of PSP. This tut is very easy and not many steps.
This tut was written and copyright by Kali at Young at Heart Designs.
I used PSPX2 to create this tut.
Supplies:
-Incrediable Kit by Designs by Ali called "I Will Never Forget" and can be found HERE.
- Beautiful artwork by Rachel Tallamy and her artwork can be found HERE. You must have permission to use her artwork and hold a license. Please do not use without purchasing the artwork.
-Image of choice- Please do not use the ones I used- they are copyright!
-Plug-in: Eye Candy 4000>Gradient Glow
-Font: Exmouth
I have added a drop shadow to pretty much every layer and I also sharpened all elements if I resized them so they maintained the same
quality as the original one.
1 Open new canvas 700x600.
2 Open the DBA Frame 2 from the kit.
3 Resize and position where desired.
Use my example as a reference.
4 Open these elements from the kit as well:
Angel Wings 1, Bible 1, Baby Shoes, Flower 14, Gem Flower 1, Glitter Splash 2, Glitter Trail 1, Scattered Mess 1
Scattered Mess 2, Star 2, and Star 3.
5 Open any other desired elements from the kit.
6 Resize and position where desired.
7 Open your choice of photos.
8 Resize and position under the frame layer.
9 Get your eraser tool and erase any of the photos that are sticking out past the frame.
10 Open your choice of tube.
11 Resize and position where desired.
12 Get your text tool and font of choice.
13 Type out any desired wording.
14 Add a gradient glow- width 3, color white and settings set on FAT to the wording.
15 Add copyrights.
16 Resize and save as a png.
You are all done!!!
Thanks for doing my tut,
Kali
Wednesday, July 1, 2009
Red White & Blue Tut
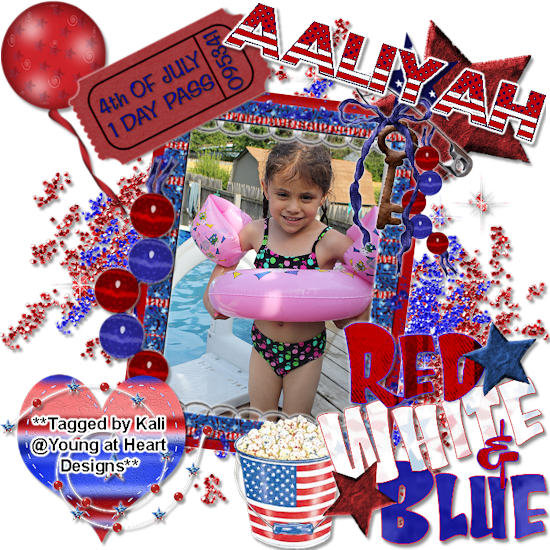
To do this tutorial you must have some knowledge of PSP. This tut is very easy and not many steps.
This tut was written and copyright by Kali at Young at Heart Designs.
I used PSPX2 to create this tut.
Supplies:
-Incrediable Kit by Gothic Inspirations called "Red White & Blue" and can be found HERE.
-Plug-in: Eye Candy 4000>Gradient Glow
-Image of Choice- I used a photo of my daughter and this is copyright so please do not use it.
-Font: USStarsNStripes
I have added a drop shadow to pretty much every layer and I also sharpened all elements if I resized them so they maintained the same
quality as the original one.
1 Open new canvas 700x700.
2 Open the Frame2 from the kit.
3 Resize and position where desired.
Use my example as a reference.
4 Open these elements from the kit as well:
Balloon, Beads, ClusterPin, GlitterSprayRed&Blue, HeartPatriotic, Pass4th, Popcorn, Stars1, SwirlyDesigner2
5 Open any other desired elements from the kit.
6 Resize and position where desired.
7 Open the WordArt4 from the kit.
8 Resize and positon to the bottom right hand side.
9 Add a small gradient glow to any elements of your choice.
10 Open your choice of photo.
12 Resize and position under the frame layer.
13 Get your text tool and font of choice.
14 Type out any desired wording.
15 Add a gradient glow- width 3, color white and settings set on FAT to the wording.
16 Add copyrights.
17 Resize and save as a png.
You are all done!!!
Thanks for doing my tut,
Kali
Kali Got an Award!!!

Thank you Kristi for the wonderful award this truly means alot to me.
We would like to pass this award on to the following wonderful ladies.
They truly are special and do beautiful work.
Jessica-http://gothicinspirations.blogspot.com/?zx=2f9ee3a77dba70c4
Tamara-http://normsbaby.blogspot.com/
Rachel-http://blog.captivatedvisions.co.uk/
Stina-http://designedbystina.blogspot.com/
Missy-http://divineintentionz.blogspot.com/?zx=ba9291ca945c723
Cake Icing (Animated) Tut
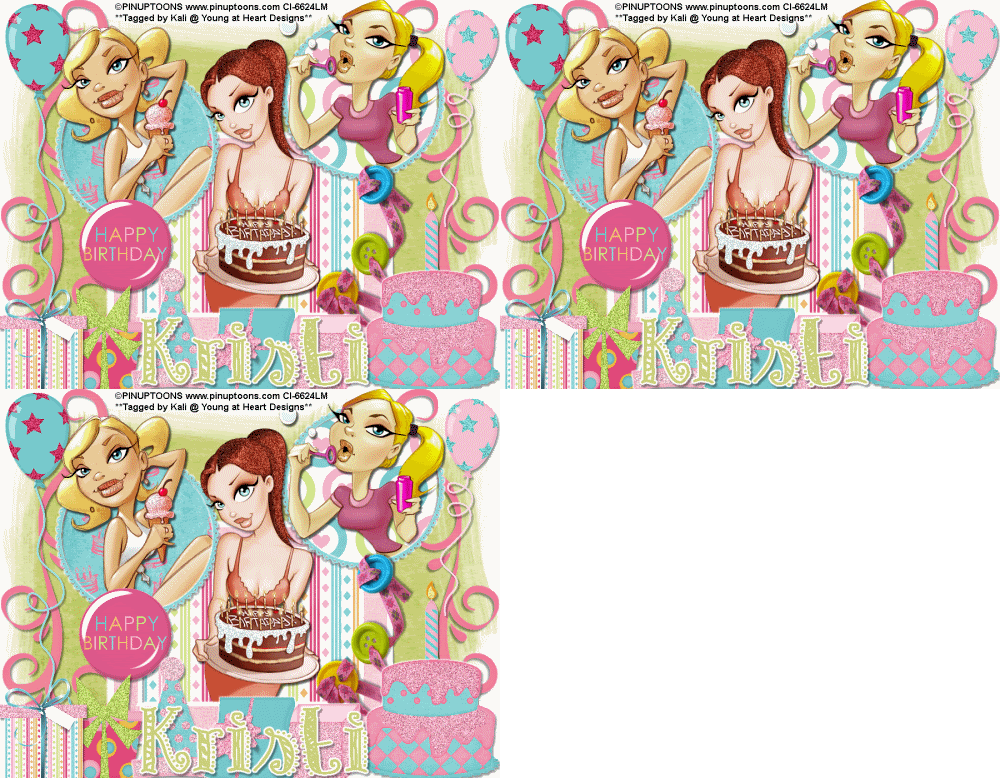
To See the Actual Size- Please click in the Tag!!
To do this tutorial you must have some knowledge of PSP and Animation Shop.
This tut was written and copyright by Kali at Young at Heart Designs.
I used PSPX2 and Animation Shop to create this tut.
Supplies:
-Wonderful Artwork by Pinup Toons and can be found HERE . You must purchase and have a valid license to use his work.
Please DON'T use his artwork without permission.
-Incrediable Kit by Kristi w. called "Icing on the Cake" and can be found HERE.
-Mask #117 by WSL: HERE
-Font: Patterns & Dots
-Plug-in>Eye Candy 4000>Gradient Glow
-Plug-in>DSB Flux>Bright Noise
I have added a drop shadow to pretty much every layer and I also sharpened all elements if I resized them so they maintained the same
quality as the original one.
1 Open new canvas 900x700- we will resize later.
2 Open the kristiw_icingonthecake_frame1 and kristiw_icingonthecake_frame2 from the kit.
3 Resize and position where desired. I also duplicate frame2 to make 2 of them.
Use my example for reference.
4 Click on frame1 and get your magic wand tool.
5 Click in the opening of the frame and then go to Selections>Modify>Expand and put 4.
6 Open your choice of paper and then go to Selections>Invert and hit delete on your keyboard.
7 Move the paper layer below the frame.
8 Open your choice of tube(s). I used a total of 3.
9 Resize and position where desired.
10 Open your desired elements from the kit.
11 Resize and position where desired.
12 Open the mask and minimize it.
13 Go to the very 1st layer and open your choice of paper.
14 Go to Layers>New Mask Layer>From Image.
15 In the drop down for Source select the mask.
16 Make sure Source luminance is selected and hit ok.
17 Go to Layers>Merge>Merge Group.
18 Resize the mask layer to be bigger.
19 Get your text tool and font of choice.
20 Type out any desired wording. I also used a gradient glow on the wording.
21 Add copyrights.
22 If you are not doing the animation resize and save as a png.
If you are doing the animation, follow these steps:
23 Go to the 1st layer and get your paint bucket tool.
24 Flood fill white.
25 Go to Layers>Merge>Merge Visible.
26 Get your magic wand tool.
27 Click on anything you want to animate. Hold down the shift key as you click so you can select more than one area.
28 Duplicate your merged layer twice giving you 3 total.
29 Click back on the original merged layer.
30 Go to Effects>Plug-ins>DSB Flux>Bright Noise.
31 Change it to 55 and make sure Mix is selected and apply.
32 Repeat Steps #:30-31 for both the duplicated merged layers.
33 Hide both duplicated layers.
34 Copy merge and go to Animation Shop.
35 Paste as a new animation.
36 Back in PSP, hide the original merged layer and unhide the 1st duplicated layer.
37 Copy merge and go to AS.
38 Right-click on your current frame and select Paste After Current Frame.
39 Back in PSP, hide the 1st duplicated merged layer and unhide the 2nd duplicated layer.
40 Right-click on your current frame and select Paste After Current Frame.
41 Select All and resize.
42 Save as a gif and you are all done!!!
I hope you liked my tut!
Thanks,
Kali
Summer Meadow Tutorial By Sher
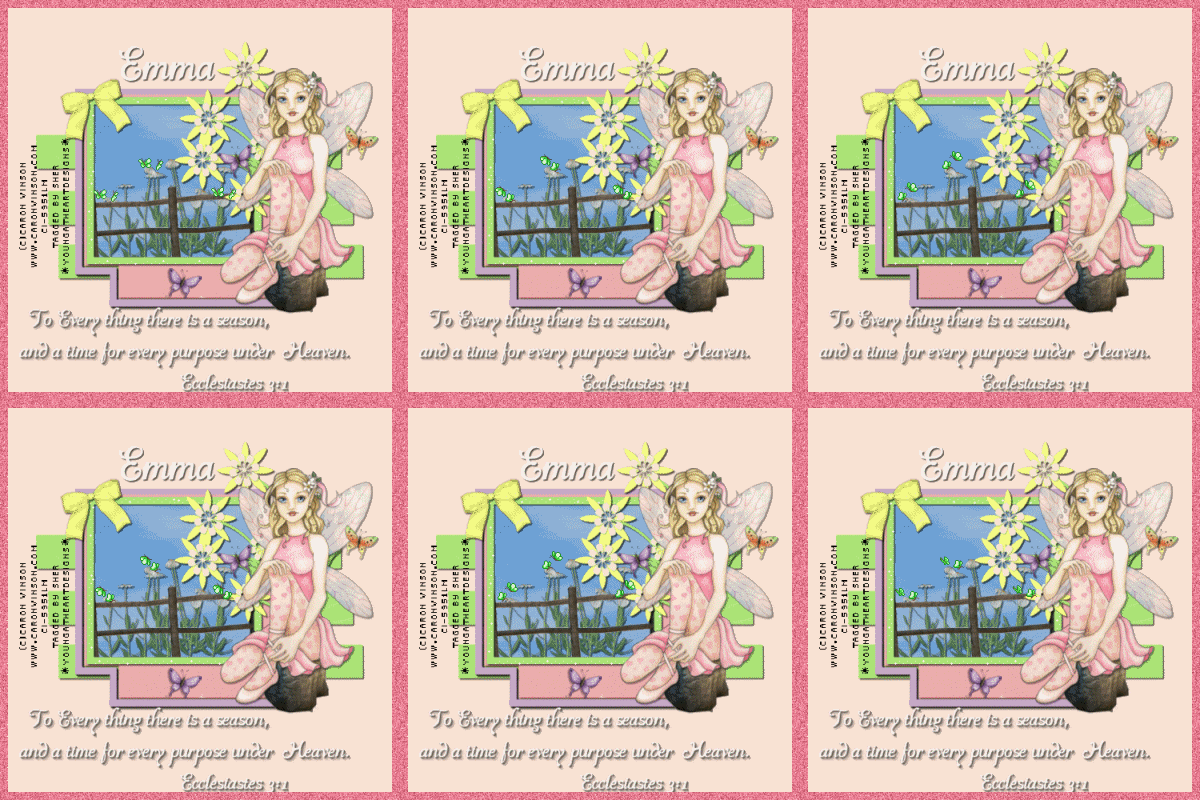 This Tutorial was written by me on July 1, 2009 . Any similarities is purely coincidental. You must have a working Knowledge of psp and animation shop t0 do this tutorial.
Today I'm using the beautiful work of Caron Vinson. You must have a license to use her tubes. You can get her beautiful tubes and the license Here
The scrap kit was designed by Sensual Posers , Thanks Emma for the Beautiful Kit!You can get this Beautiful kit from her store Here
The template I'm using was made by Lorna you can get it Here
The font I'm using is al heavenly you can get it Here
The animations are in my supplies Here
Filter I used is Alien skin xenofex 2 (Little Puffy Clouds)
You can get Here
dsb flux Here
Ok lets get going! :)
Open the template in psp , copy and close original.
Delete the copyright layer, and the dotted line layers.
Go to Image and resize the canvas to 600x600 and flood fill this layer with color of choice
or use the one I chose #fbe2d4
Select the Grey line layer in you pallet and go to selections, select all,
float, defloat, Open a paper of choice and copy and paste it as a new layer,
go to selections, invert, hit delete on your keyboard and select none.
Select the black rectangle layer in your pallet, go to selections, select all, float , defloat, open a paper of choice , copy and paste as a new layer, invert, hit delete on your keyboard, select none.
Go to effects , plug ins alien skin xenofex 2 and select little puffy clouds and apply to this layer.
Click on the frame layer and using your magic wand click inside the dark Grey part, and copy and paste a paper of choice , selections, invert, hit delete on your keyboard, select none.
Click on this frame Layer again, using the magic wand click on the inside frame part, open a paper of choice and copy and paste it as a new layer, selections, invert, hit delete on your keyboard, select none.
Click back on this frame layer again and using magic wand click on the outside
frame , choose a color from your tube, I used #c6a8cg and flood fill with this color, select none.
Open Your tube up in psp and select the layer with the two butterflies, copy and paste as a new layer, resizing to 80% and placing where desires or see my tag for placement.
Copy and paste the butterfly layer from your tube and place it where desired.
Add any other elements you want from the kit and resize and place where desired.
I used bow 5, flower 25, the fence , the stump, and the daisys.
I placed them all on a seperate layer an d gave them a drop shadow
Add text and place where desired.
I chose to use the text from scripture.
For everything there is a season
And a time for every purpose under Heaven
Ecclesiastes 3:11
Re size all layers to 500x500
click on Top layer, select all, modify, contract by 15, invert, add a new raster layer and flood fill this with a color from tube, selections, select none.
click on this new layer and go to effects, plugins, deflux, bright noise, using intensity 28 mix ok
Repeat it once more.
Add copyrights
If you don't plan on animating this tag , merge all layers and your done.
If you plan on animating lets go!
In animation shop open the animations and minimize for now
In psp close off the girl tube, the bow, the stump,and the flower, go to edit, copy special copy merge , take to animation shop and paste as a new animation, copy this layer 7 times.
Back to psp close off the layers you have opened, and open the ones you have closed. This time only the girl tube layer , the stump layer, the flower layer and the bow layer should be open. Go to edit, copy special , copy merge and take to animation shop , paste this as a new animation and
copy it 6 times so you have 7 layers, go to edit , select all, copy , and paste this into your original animation and postioning it where it needs to go.
Maximize the star 1 animation and select all , copy,
Click on your tag animation and select all and paste the star 1 which is vertical, around the vertical side of inside frame. repeat this 3 more times on the vertical sides. Open the star 2 and repeat this on the horizontal sides of the inside frame.
On the tag animation go to edit, select all , copy and click on the last frame and select it , copy after selected frames. You should have 14 frames now. Click on last frame of this animation and copy and paste after current frame so you have 15.
Maximize the butterflies animation and edit, select all, copy into selected frames. Repeat this step to the numbers of butterflies you want. I did this 3 times total.
Once you have done all this Run your animation and if you like what
you have created, save as a gif and your done.
Thanks for trying my Tutorial!
Huggies
Sher
Subscribe to:
Posts (Atom)

