INSERT ALTERNATIVE TEXT FOR YOUR HEADER IMAGE HERE

Sunday, May 31, 2009

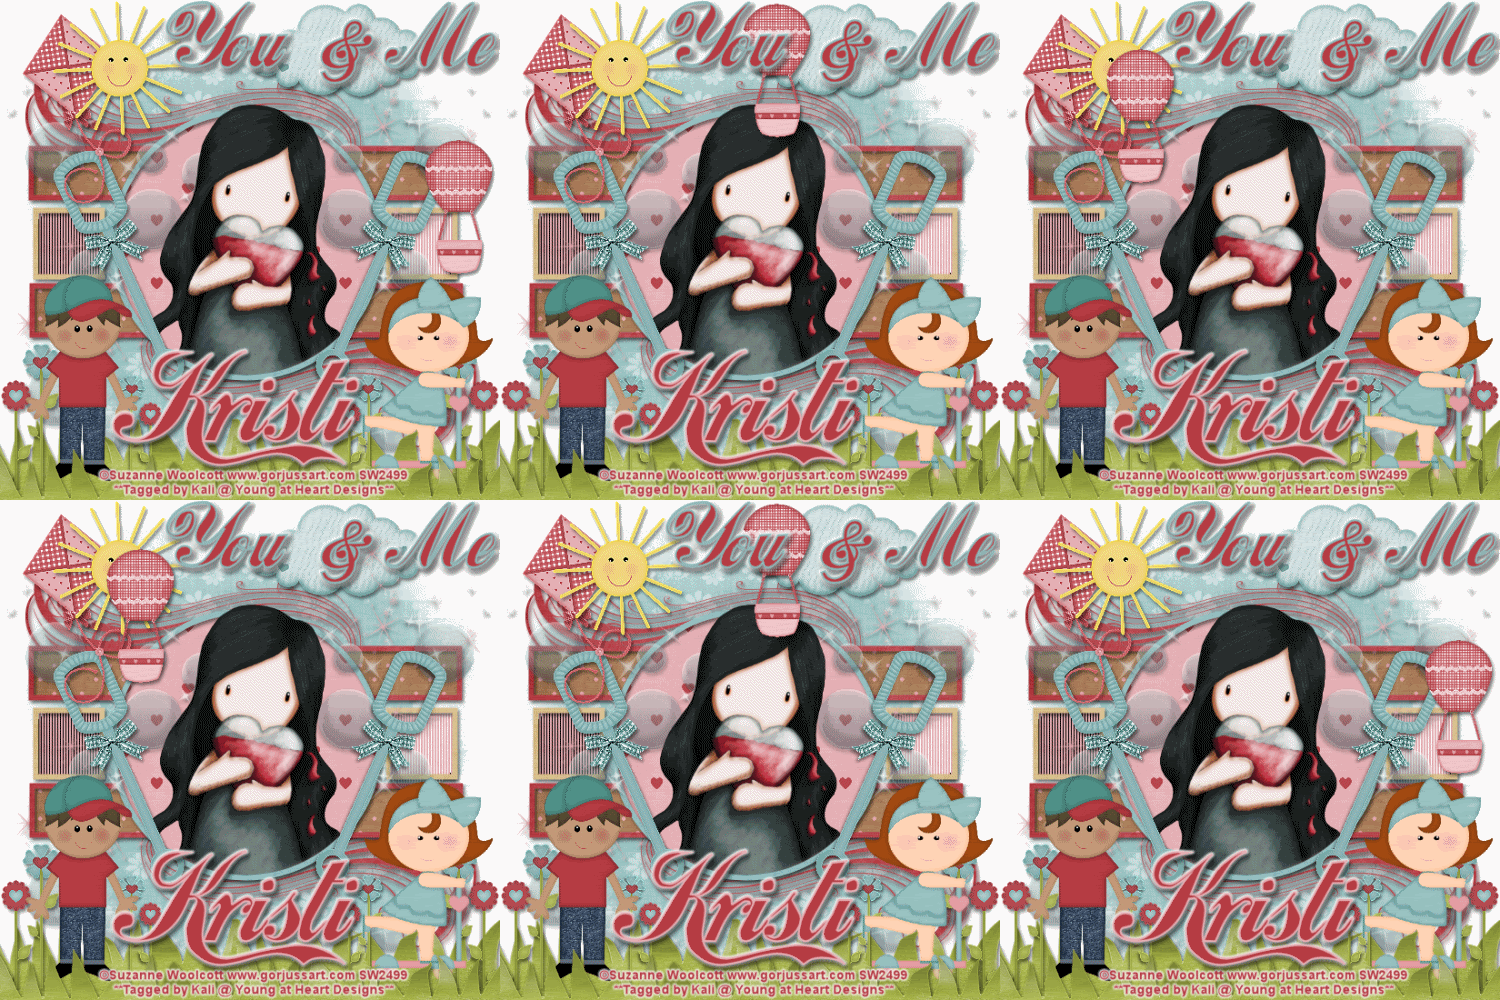
You & Me (Animated) Tut

Photobucket

To do this tutorial you must have some knowledge of PSP and Animation Shop.

This Tag was made using PSPX2 and Animation Shop. This tutorial is also copyrighted by Young at Heart Designs.
Im using the beautiful work of Suzanne Woolcott. If you wish to use her work you must have a license to use her work before using her tubes.
To purchase her tubes and receive a license go to HERE.
The adorbale kit I used is "You and Me" by Kristi W. at ScrappinDivaz Designz and it can be found HERE.

Supplies:
Template #43 by Melissaz Creationz:HERE
Mask #32 by BabesDesignz: HERE
Wordart: HERE
Font: Coca Cola ii
Plug-in: Tramages>Tow The Line
Plug-in: Eye Candy 4000>Gradient Glow

I used shadow settings V3,H2, O50, B5, Color Black on ALL elements, layers, text and the tube except for the mask layer.
I also sharpened every element and tube I had to resize to get the quality like the original size.

1 Open template and delete the copyright.
2 Click on 2nd layer.
3 Open, copy and paste your choice of paper. Resize to the canvas size.
4 Click back on the 2nd layer and go to Selections>Select All>Float>Defloat.
5 Click on the newly added paper.
6 Go to Selections>Invert and hit delete on your keyboard.
7 Go to selections>Select None and delete the original layer.
8 Repeat Steps 2-7 for all included layers with your choice of papers.
I used: kristiw_youandme_p1, kristiw_youandme_p2, kristiw_youandme_p3, kristiw_youandme_p4,
kristiw_youandme_p7, kristiw_youandme_p10
9 Click on the squares layers and go to Effects>Plug-ins>Tramages>Tow The Line
10 Do these settings: 25,58.31,9 and click ok.
11 Open, copy and paste as a new layer your choice of tube.
12 Resize and position the tube under above the circle layer but below the circle frame.
13 Duplicate the tube and move the duplicated tube above the frame.
14 Now get your eraser tool and erase of the each the tubes that are sticking out past the frame.
(Use my example as a reference. I did not erase the top of the tube.)
15 Open, copy and paste as a new layer your choice of grass supplied in the kit.
16 Resize to the desired size and position it where desired.
(Use my example as a reference. I position it pretty low at the bottom of the canvas.
17 Open, copy and paste as new layers any desired elements.
18 Now click on your grass layer and duplicate it.
19 Move the duplicated under all the newly added element layers so it sits behind them.
20 Move the duplicated up a little so it looks as if the elements are sitting in the grass.
(Again, use my example as a reference.)
21 Go to the bottom layer and paste your desired choice of paper.
I used: kristiw_youandme_p12
22 Now open your mask and minimize it.
23 Now go to Layers>New Mask Layer>From Image.
24 In the Source Drop down window select BabesDesignz_Mask32.
25 Make sure Source luminance and Inver mask data are selected. Click ok.
26 Go to Layers>Merge>Merge Group.
27 Resize the mask layer to be a little bigger.
28 Get your text tool and type out your name.
I used colors: foreground: #e6afb4
background: #b63d44
I used the font size: 55 and added a gradient glow- width 3 and color white.
29 Add your copyrights.
30 If you are not doing the animation, open, copy and paste your wordart that I supplied you.
31 Now resize and save as jpeg.

If you are doing the animation follow these steps:

32 Okay, open, copy and paste as a new layer the kristiw_youandme_balloon from the kit.
33 Position it over to the right side of the canvas and about half way down.
(Use my example for reference.)
34 Now duplicate it and move the duplicated balloon a little up and a little over.
35 Keep duplicating until you have the balloon all the way over to the other side of the canvas.
The last balloon should be directly across from the very first and original balloon.
36 Now rename all the balloon layers as balloon1, balloon2 and so on.
(I ended up with a total of 10 balloon layers.)
37 Now hide all the balloon layers except balloon1.
38 Open, copy and paste as a new layer the wordart supplied.Make sure this is the top layer so the balloons are behind it.
39 Copy merge and go to Animation Shop. Paste as a new animation.
40 Back in PSP, hide the balloon1 and unhide the balloon2.
41 Copy merge and go to Animation Shop.
42 Right-click on your frame and select Paste After Current Frame.
43 Now repeat these steps until all your balloons have been pasted after current frame.
(If you had 10 balloon layers, you should have 10 frames.)
44 Still in Animation Shop select all and go to Animation>Frame Properties and change it to 55.
45 Now still copy.
46 Minimize the animation.
47 Now paste as a new animation which will paste your animation and you will have a total of 2 animations.
48 Select All and Go to Animation>Reverse Frames.
49 Now I need to you to copy all the frames.
50 Once you have copied go to you last frame of your original animation and click on it so the last frame is the only one selected.
51 Right-click and select paste after current frame. If you originally had 10 frames now you should have 20.
52 Save as a gif and you are all done!!!

I hope you enjoyed my tut!! Send me the results!!

Thanks,
Kali

Thursday, May 28, 2009

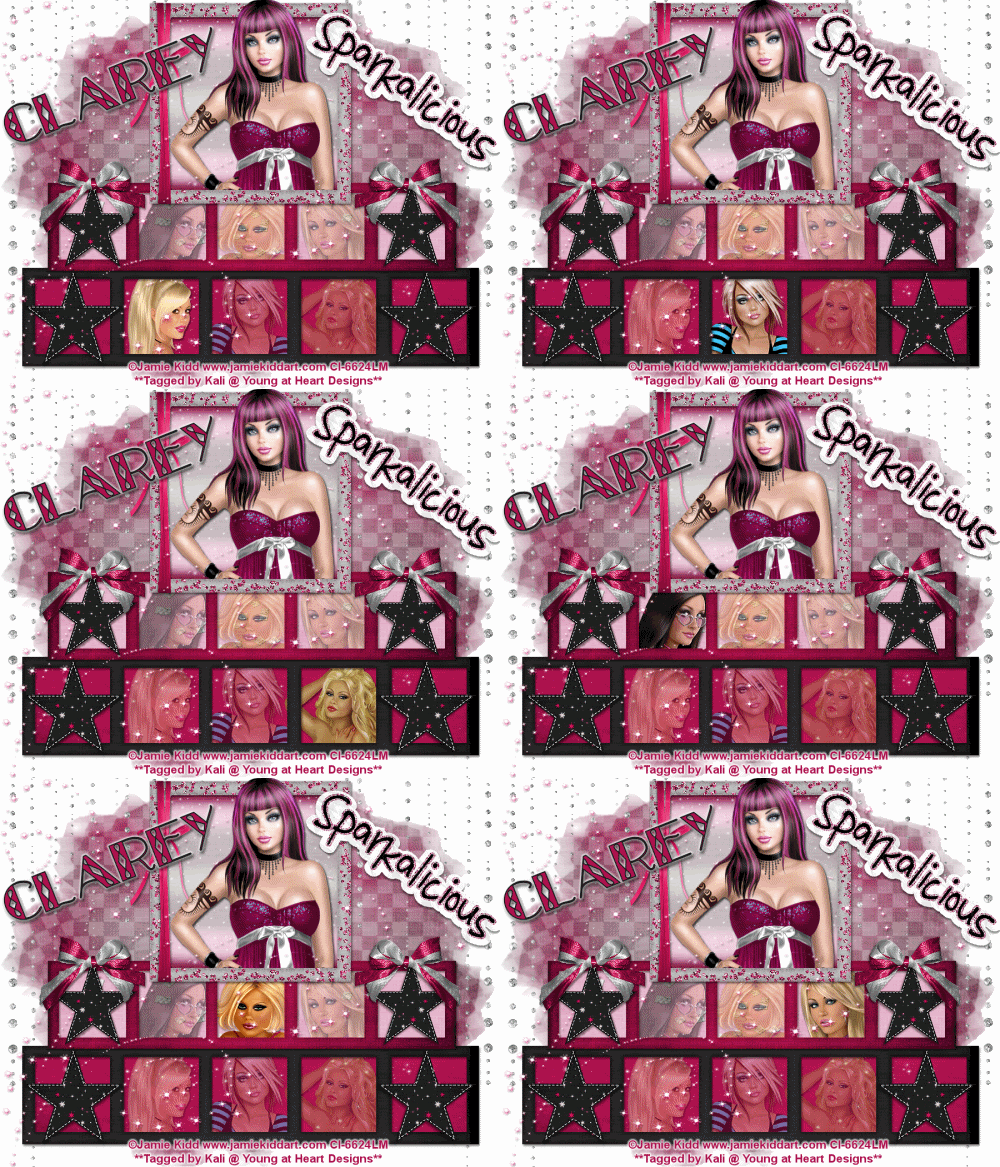
Sparkalicious (Animated) Tut

Photobucket

To do this tutorial you must have some knowledge of PSP and Animation Shop.

This Tag was made using PSPX2 and Animation Shop. This tutorial is also copyrighted by Young at Heart Designs.
Im using the Beautiful work of Jamie Kidd. If you wish to use hers work you must have a license to use her work before using her tubes.
To purchase her tubes and receive a license go to HERE.
The adorbale kit I used is called "Sparkalicious" by Clarey Designz and it can be found HERE.


Supplies:
WSL_Mask218 by Chelle: HERE
Font: GlitzyJewel

I used shadow settings V3,H2, O50, B5, Color Black on ALL elements, layers, text and the tube except for the mask layer.
I also sharpened every element and tube I had to resize to get the quality like the original size. To learn how to sharpen please refer to the end of this tutorial.

1 open new canvas 900x700 (we will resize later)
2 Open, copy and paste a new layers clarey_sparkalicious_wrappedframe1, clarey_sparkalicious_sticker, clarey_sparkalicious_longframe1, and clarey_sparkalicious_longframe2.
3 Resize and place where desired.
Use my example for reference.
4 Now click on the black frame and paste a paper of choice. Resize to the canvas size.
5 Select the inside of each Frame with your Magic Wand
6 Selections > Modify > Expand by 5 and click on your paper.
7 Selections > Invert
8 Delete
9 KEEP SELECTED!!
10 Now paste three tubes of your choice each as a new layer in the 3 middle openings.
11 Resize as necessary
12 Position within Frames to your liking.
13 Then press delete, and deselect.
14 Repeat Steps: 4-13 for the pinkish frame.
15 Repeat Steps: 4-8 for the big, top frame.
16 Paste your main tube as new layer and resize as necessary.
17 Position in the top Frame.
18 Paste a paper of choice as new layer. Resize to the canvas size.
19 Layers > Arrange > Send to Bottom.
20 Layers > New Mask Layer > From Image.
21 Locate WSL_Mask218 and click okay.
22 Then go to Layers > Merge > Merge Group. Resize the mask layer to be a little bigger.
23 Open, copy and paste as new layers any elements you desire.
I used a lot of elements so use my example as a reference.
24 Select your Text Tool again and another font of choice.
25 Type out your name.
26 Finally, add your © copyright, licence and watermark, resize, then save as a png and you're done!

If you are going to do the animation, follow these steps:

27 Go to your first layer and get your paint bucket tool.
28 Flood fill white.
29 Activate the in the Frame. This is where it is going to get confusing.
30 Rename to Tube1, Tube2, Tube3 and so on for each original tube.
You should end up with a total of 6. (Tube1-Tube6)
31 Now duplicate each tube once giving you 2 of each tube.
32 Rename the duplicates Copy Tube1, Copy Tube2 and so on til they are all renamed.
33 Reduce the opacity of each Copy to 50.
34 Hide all layers but for Tube1, Copy Tube2, Copy Tube3, Copy Tube4, Copy Tube5 and Copy Tube6.
35 Edit > Copy Merged
36 Open Animation Shop
37 Edit > Paste as New Animation
38 Back to PSP Hide last layers and unhide Tube2, Copy Tube1, Copy Tube3, Copy Tube4, Copy Tube5 and Copy Tube6.
39 Edit > Copy Merged
40 In Animation Shop Edit > Paste after Current Frame
41 Back to PSP Hide last layers again and unhide Tube3, Copy Tube1, Copy Tube2, Copy Tube4, Copy Tube5 and Copy Tube6.
42 Edit > Copy Merged
43 In Animation Shop Edit > Paste after Current Frame.
44 Back to PSP Hide last layers again and unhide Tube4, Copy Tube1, Copy Tube2, Copy Tube3, Copy Tube5 and Copy Tube6.
45 Edit > Copy Merged
46 In Animation Shop Edit > Paste after Current Frame.
47 Back to PSP Hide last layers again and unhide Tube5, Copy Tube1, Copy Tube2, Copy Tube3, Copy Tube4 and Copy Tube6.
48 Edit > Copy Merged
49 In Animation Shop Edit > Paste after Current Frame.
50 Back to PSP Hide last layers again and unhide Tube6, Copy Tube1, Copy Tube2, Copy Tube3, Copy Tube4 and Copy Tube5.
51 Edit > Copy Merged
52 In Animation Shop Edit > Paste after Current Frame.
You should end up with a total of 6 frames.
53 Now you can edit your Frame Properties to 75, then save as a GIF and you're done!

Thanks for doing my tut. Send me the results!!

Thanks,
Kali
Wednesday, May 27, 2009

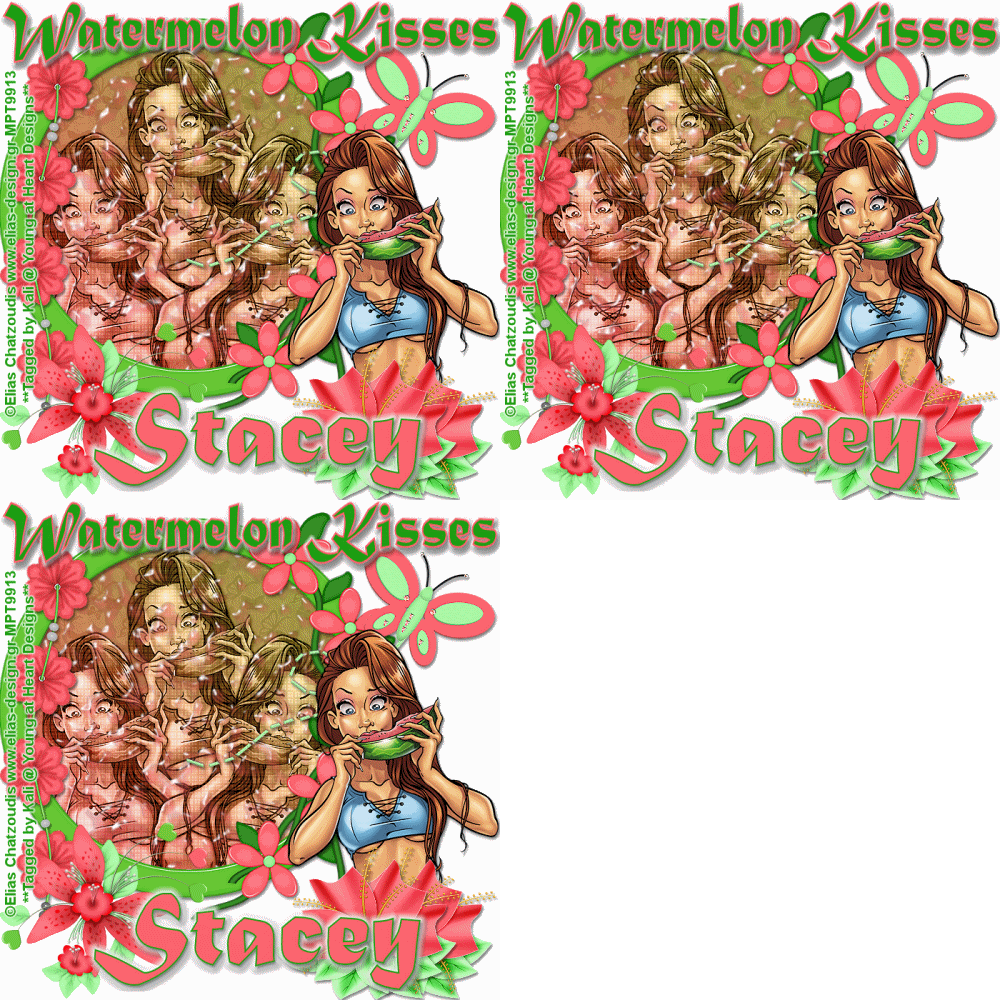
Watermelon Kisses (Animated) Tut

Photobucket

To do this tutorial you must have some knowledge of PSP and Animation Shop.

This Tag was made using PSPX2 and Animation Shop. This tutorial is also copyrighted by Young at Heart Designs.
Im using the awesome work of Elias Chatzoudis. If you wish to use his work you must have a license to use his work before using his tubes.
To purchase his tubes and receive a license go to HERE.
The adorbale kit I used is "Watermelon Kisses" by Stacey's Designs and it can be found HERE.


Supplies:
Plug-in: Eye Candy 4000->Gradient Glow
Plug-in: Eye Candy 4000->Water Drops
Plug-in: Penta.com->Dot & Cross
Font: Matura MT Script Capitals


I used shadow settings V3,H2, O50, B5, Color Black on ALL elements, layers, text and the tube except for the mask layer.
I also sharpened every element and tube I had to resize to get the quality like the original size.

1 Open a new canvas 700x700.
2 Open, copy and paste as a new layer the T Flower Frame Round 2.
3 Resize and position where desired.
4 Now open, copy and paste as a new layer your choice of paper. Resize.
I used: T Paper 5.
5 Move this below the frame layer.
6 Get your eraser tool. Erase any of the paper sticking out of the frame.
7 Open, copy and paste as a new layer your choice of tube.
8 Resize and position where desired. Use my example as a reference.
9 Duplicate your tube and move it below the frame layer.
10 Position the duplicated tube in the center of the frame.
11 Go to Effects->Penta.com->Dot and Cross.
12 Use these settings: 72, 10, 2
13 Now duplicate this duplicated tube twice.
14 Move these 2 tubes down a little bit and move each to the opposite of the original duplicated tube.
Use my example as a reference.
15 Get your eraser tool again and for each of the tubes in the frame, erase any that is sticking out of the frame.
16 Open, copy and paste as new layers any desired elements.
I used: T Decorated Flower, T Flower 2, T Flower String 2, and T Trailing Butterfly 2.
17 Get your text tool and font choice and type out "Watermelon Kisses" at the top of the canvas.
I used colors: foreground- #ff626d
background- #209f14
I used a gradient glow- width 5 and color white on the wordart.
18 With your text tool still open type out your desired text.
I used colors: foreground- #209f14
background- #ff626d
I used font size 36 and I added a gradient glow- width 1- and color white.
19 Add copyrights.
20 If you are not doing the animation, resize and save as a png.

If you are doing the animation, follow these steps:

21 Go to your first layer and get the paint bucket tool. Flood fill white.
22 Merge together the duplicated tubes in the frame.
23 Once you have all the tubes in the frame merged, merge them with the paper layer.
24 Duplicate the merged layer twice giving you 3 total.
25 Rename the layers merged1, merged2 and merged3.
26 Go to merged1 and go to Effects->Plug-ins->Eye Candy 4000->Water Drops.
27 Use these settings: Drop Size: 17.23
Coverage: 50
Edge Darkening: 40
Opacity: 70
Tinting: 24
Refraction: 16
I did the liquid color the same as the background color as my font for the name.
28 Hit Random Seed once and then click ok.
29 Go to merged2 and leave all the settings the same. Just hit Random Seed once and then click ok.
30 Go to merged3 and repeat step 29.
31 Now hide merged2 and merged3.
32 Copy merge and go to Animation Shop.
33 Paste as a new animation.
34Back into PSP and hide merged1 and unhide merged2.
35 Copy merge and go to Animation Shop.
36 Right-click on your frame and paste after current frame.
37 Back into PSP and hide merged2 and unhide merged3.
38 Right-click on your current frame and paste after current frame.
39Select all and go to Animation->Frame Properties and put
40 Resize to desired size and save as gif.

You are all done!

Thanks,
Kali

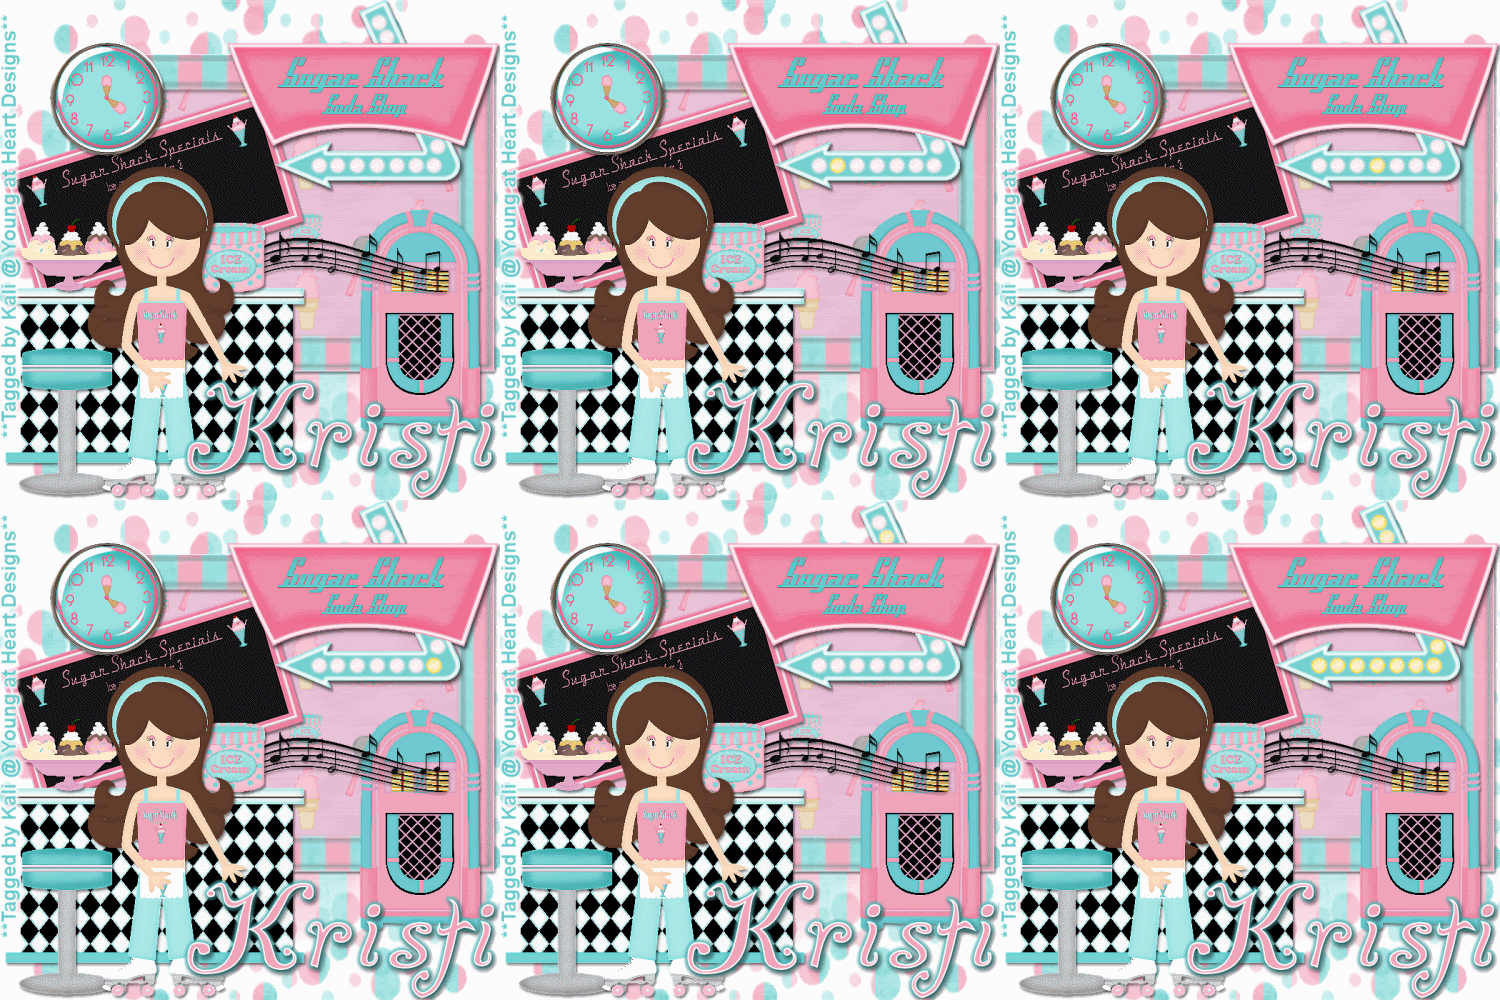
Sugar Shack (Animated) Tut

Photobucket

To do this tutorial you must have some knowledge of PSP and Animation Shop.

This is also copyrighted by Young at Heart Designs.

The adorbale kit I used is called "Sugar Shack" by Kristi W. at ScrappinDivaz Designz and it can be found HERE.

Supplies:
Mask #17 by BabesDesignz: HERE
Font: A Yummy Apology
Animation: HERE
Plug-in: Eye Candy 4000->Gradient Glow

1 Open a new canvas 700x700.
2 Open, copy and paste as a new layer the kristiw_sugarshack_frame1.
3 Resize and postion where desired. Use my example for reference.
4 Now open, copy and paste your choice of paper. Resize to canvas size.
I used: kristiw_sugarshack_p12
5 Click back on your frame layer and get your magic tool.
6 Click in the center of the frame to get those marching ants.
7 Now go to Selections->Modify->Expand and put 10.
8 Click on your paper layer you just added and go to Selections->Invert.
9 Hit delete on your keyboard and then go to Selections->Select None.
10 Now move this layer below your frame layer.
11 Now go to your very 1st layer and open, copy and paste as a new layer your choice of paper.
I used: kristiw_sugarshack_p6 and resize to the canvas size.
12 Making sure you are still on your newly added paper layer open your mask and minimize it.
13 Now go to Layers->New Mask Layer->From Image.
14 In the drop down window for Source select BabesDesignz_Mask17.
15 Make sure both Source luminance and invert mask data are selected. Hit ok.
16 Now go to the layer palette and right-click on the mask layer thumbnail.
17 Select Merge->Merge Group.
18 Duplicate your mask layer and then right click again and select Merge->Merge Down.
19 Now this is the really fun part. Open, copy and paste as new layers all the elements you desire.
Use my example as a reference. I use too many elements to list.
20 Now get your text tool and desired font. Type out desired text.
I used the colors: foreground-#ffffff
background-#f3a5bb
I used font size 48 and also added a gradient glow of a width 5 and color #71cad2.
21 Add your copyrights.
22 If you are not doing the animation resize and save as a png.

If you are going to do the animation, follow these steps:

23 Go to your first layer and get your paint bucket tool. Flood fill white.
24 Now open, copy and paste as a new layer the kristiw_sugarshack_dinersign1 (if you havent already)
25 Resize the sign to about 27%. You need it close to this in order for the animation to match up good.
26 Now once you have done this all you need to copy merge and go to Animation Shop.
27 Paste as a new animation and then you need to duplicate the frame 11 times giving you 12 total.
28 Open the supplied animation and select all. Then copy.
29 Click on your frames again and select all.
30 But now I need you deselect the 1st frame so only the last 11 are selected.
31 Go to your second frame.
32 Right-click and select Paste->Into Selected Frame.
33 Now paste the animation to line up with the light bulbs on the sign.
34 Now go to Animation->Resize Animation and resize to desired size.
35 Go to Animation->Frame Properties and put 35.
36 Now save as a gif and you are all done!!!

Thanks for doing my tut!
I hope you enjoyed it!

Thanks,
Kali

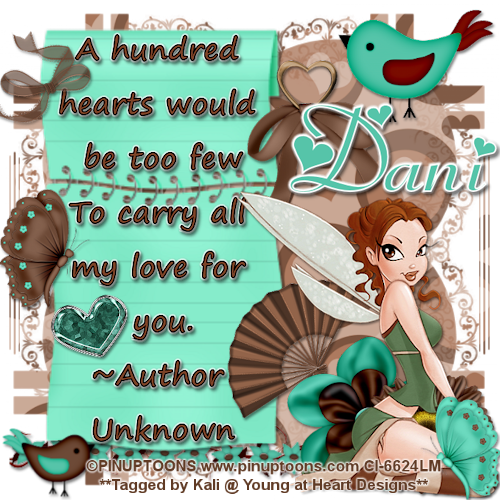
My Love For You Tut

Photobucket

To do this tutorial you must have some knowledge of PSP.

This Tag was made using PSPX2. This tutorial is also copyrighted by Young at Heart Designs.
Im using the awesome work of Pinup Toons. If you wish to use his work you must have a license to use his work before using his tubes.
To purchase his tubes and receive a license go to HERE.
The adorbale kit I used is "So into Love" by Danielle Scraps and it can be found HERE.


Supplies:
Mask #5 by BabesDesignz and can be found HERE.
Wordart: HERE
Plug-in: Eye Candy 4000->Gradient Glow
Font: Fiolex Girls

1 Open a new canvas 700x700.
2 Open, copy and paste as a new layer the notebook paper 1 from the kit.
3 Resize and position where desired. Use my example for reference.
4 Open the supplied wordart.
5 Resize and position where desired. Again, use my example for reference.
6 Go to your first layer and open the mask.
7 Minimize the mask.
8 Open, copy and paste as a new layer your choice of paper.
I used: paper 13
9 Still on your new layer go to Layers->New Mask Layer->From Image
10 In the drop down window for source select BabesDesignz_Mask5.
11 Make sure Source luminance and invert mask data are both checked and hit ok.
12 Now go to the layer pallete and right-click your mask layer thumbnail.
13 Select Merge->Merge Group.
14 Duplicate your mask layer and then right-click the mask layer.
15 Select Merge->Merge Down.
16 Open, copy and paste as a new layer your choice of tube.
17 Resize and position where desired.
18 Now open, copy and paste as new layers any choice of elements.
I used: bird1, bird3, brown bow 3, butterfly 2, butterfly 3, fan 1, flower 3,
gerber daisy 3, heart 3, heart in ribbon 3, and line of flowers 3.
19 Get your text tool and type out your choice of text.
I used the colors: foreground-#ffffff
background-#56c4a9
20 Add your copyrights.
21 Resize and save as a png and you are all done!!!

I hope you enjoyed my tut! Send me your results!!

Thanks,
Kali
Tuesday, May 26, 2009

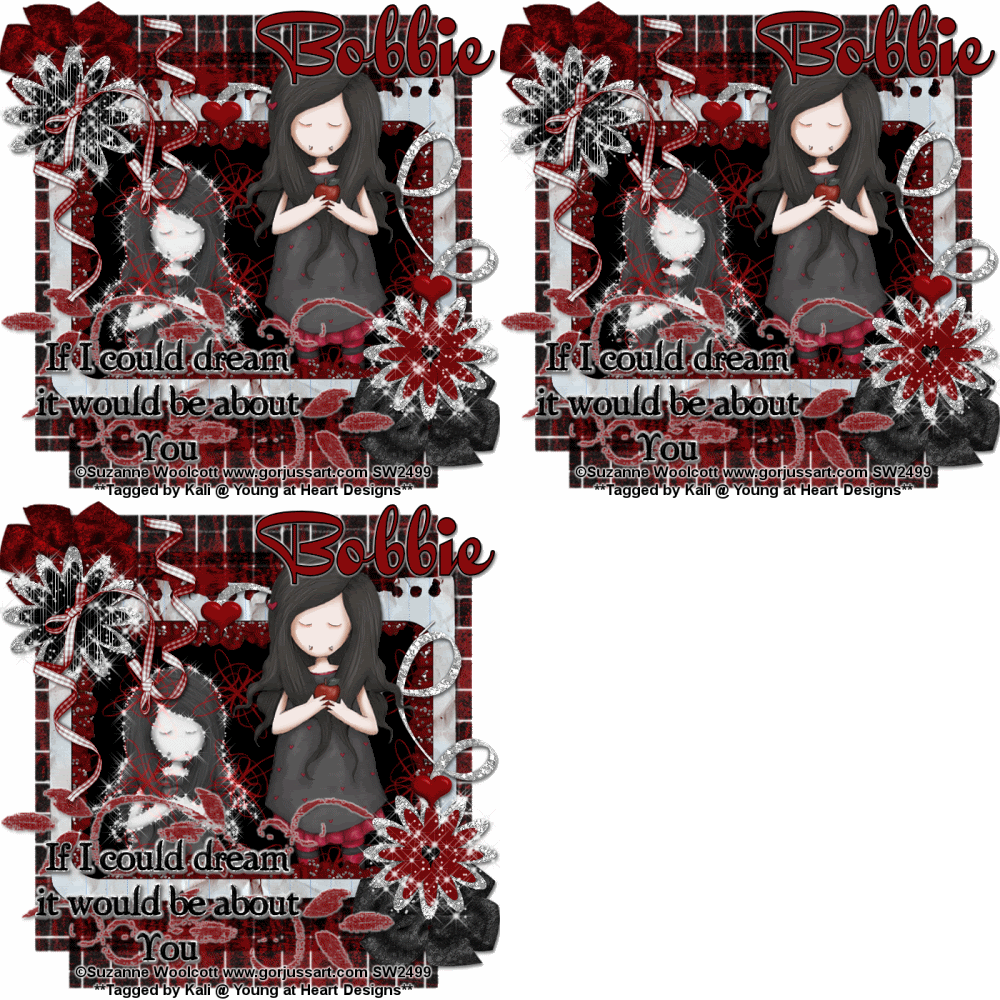
If I Could Dream (Animated) Tut

Photobucket

To do this tutorial you must have some knowledge of PSP and Animation Shop.


This Tag was made using PSPX2 and Animation Shop. This tutorial is also copyrighted by Young at Heart Designs.
Im using the beautiful work of Suzanne Woolcott. If you wish to use her work you must have a license to use her work before using her tubes.
To purchase her tubes and receive a license go to HERE.
The adorbale kit I used is "Cullen Obsessed" by Bobbie Seacrist and it can be found HERE.

Supplies:
Mask #33 by Babes Designz and can be found HERE.
Font: QuigleyWiggly
Plug-in: Eye Candy 4000->Gradient Glow
Plug-in: Alien Skin Xenofex 2->Constellation

1 Open new canvas 700x700.
2 Open the frame3 element from the kit.
3 Resize and position where desired.
4 Now get your magic wand tool and click in the center of the frame.
5 Once the marching ants are moving around the inner part of the frame go to Selections->Modify->Expand
6 Put 10 and click ok.
7 Open, copy and paste your choice of paper.
I used: paper2
8 Go to Selections->Invert and then hit delete on your keyboard.
9 Move the paper layer below the frame.
10 Open, copy and paste as new layer your choice of tube.
11 Resize and position where desired.
Use my example as a reference.
12 Now duplicate your tube and move the duplicated one below the frame.
13 Get your eraser tool and erase any of the tube sticking out of the frame for both tube layers.
Do not erase the top part of the tube so it looks like the tube is sitting in the frame but popping out.
Use my tag for reference.
14 Now go to your very first layer and open your mask.
15 Minimize it and then open, copy and paste your choice of paper.
I used: paper11
16 Still on the new paper layer go to Layers->New Mask Layer->From Image
17 Now in the drop down window for Source select BabesDesignz_Mask33
18 Make sure both Source luminance and Invert mask data are selected. Hit ok.
19 Go to the layer palette and right-click on the mask layer thumbnail and select->Merge->Merge Group.
20 Now open, copy and paste as a new layer your tube again.
21 Resize to much smaller than the original one and move to the left of the frame.
Use my example for a reference.
22 Change the layer properties to Luminance Legecy.
23 Open, copy and paste as a new layer your choice of wordart from kit.
24 Resize and position towards the bottom left side. I added a gradient glow- size 3 and color white to the wordart.
25 Open, copy and paste as new layers your choice of elements from the kit.
I used: bow3, bow4, dream, flower1, flower2, ribbon1 and ribbon2.
26 Get your text tool and type out your desired text.
I used colors: foreground-#000000
background-#87080b
I also used font size 36. I even added a gradient glow- size 3 and color white.
27 Add your copy rights.
28 If you are not going to do the animation, resize and save as a png.
You are all done!!!

If you are going to do the animation, follow these steps:

29 Go to your very first layer and get your paint bucket tool.
30 Flood fill white.
31 Got to your smaller tube that you adjusted the layer properties too.
32 Duplicate this tube layer twice giving you 3 total.
33 Rename them tube1, tube2, and tube3.
34 Got to flower1 and duplicate it twice giving you a total of 3.
35 Rename flower1, flower2, and flower3.
36 Go to flower2 layer and duplicate it twice giving you 3 total.
37 Rename redflower1, redflower2, and redflower3.
38 Now go back to your tube1.
39 Go to Effects->Plug-ins->Alien Skin Xenofex 2->Constellation
Use these settings: Star Size: 5.82
Size Varation: 94
Edge Star Density: 50
Overall Star Density: 0
Overdrive: 89
Twinkle Amount: 92
Twinkle Rotation: 45
Keep Original Image
Click Random Seed and then hit Okay.
40 Repeat this for both tube2 and tube3.
41 Now hide both tube2 and tube3.
42 Now go to flower1.
43 Go to Effects->Plug-ins->Alien Skin Xenofex 2->Constellation
Use these settings: Star Size: 8.16
Size Varation: 91
Edge Star Density: 1
Overall Star Density: 24
Overdrive: 89
Twinkle Amount: 100
Twinkle Rotation: 45
Keep Original Image
Click Random Seed and then hit okay.
44 Repeat this for both flower2, flower3, redflower1, redflower2 and redflower3.
45 Hide flower2, flower3, redflower2 and redflower3.
46Copy merge and go to Animation Shop.
47 Paste as a new animation.
48 Back into PSP and hide tube1, flower1 and redflower1.
49 Unhide tube2, flower2 and redflower2.
50 Copy merge and go back to Animation Shop.
51 Right-click on your frame and select Paste->Paster after current frame.
52 Back into PSP and hide tube2, flower2 and redflower2.
53 Unhide tube3, flower3, and redflower3.
54 Copy merge and go back to Animation Shop.
55Right-click on current frame and select Paste->Paste after current frame.
56 Still in AS and select all.
57 Go to Animation->Frame Properties and change it to 55.
58 Go to Animation->Resize Animation and resize to desired size.
59 Save as a gif and you are all done!!!

I hope you enjoyed my tut! Send me your results!!

Thanks,
Kali

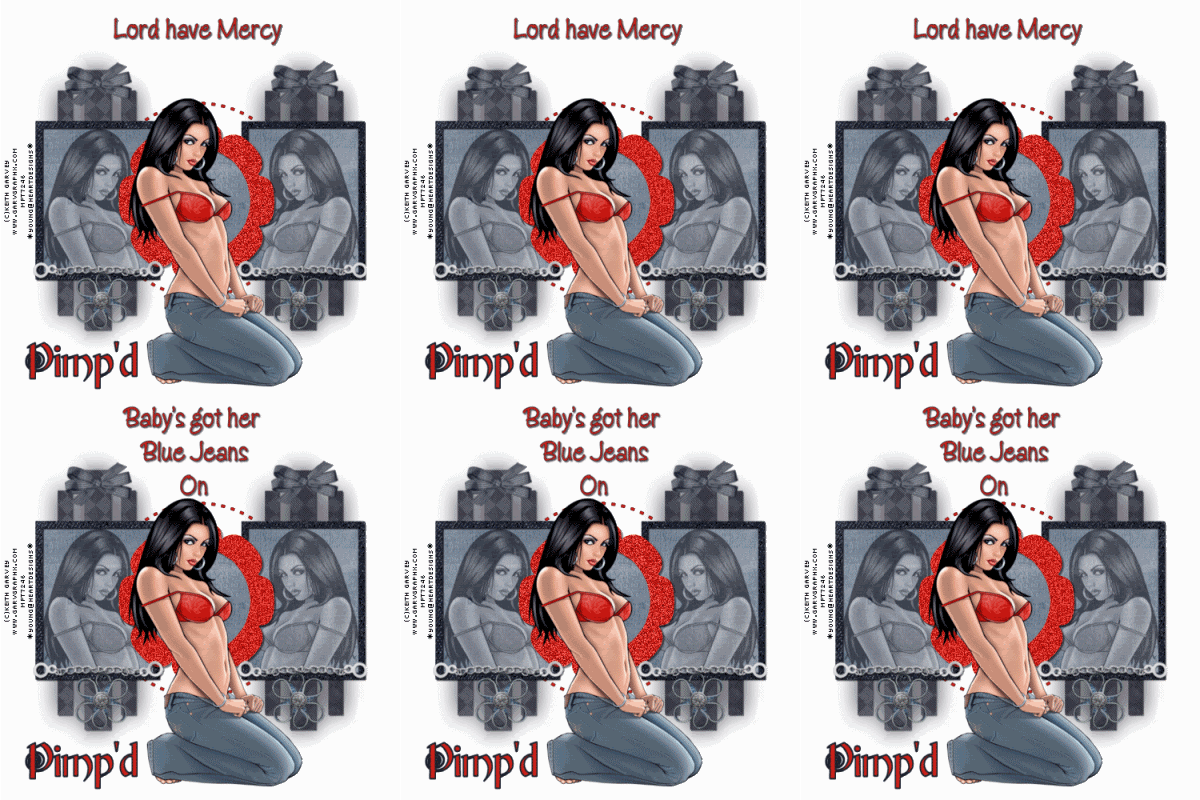
Baby's got her Blue Jeans On (Animated Tutorial)


This tag is made using Pspx2 and Animation Shop, providing you have basic
knowledge of these two programs you shouldnt have to much trouble.

This tutorial was written by Me on May 26, 2009
Any similarities is purely coincidence.

This is a simple guide to a cute tutorial, you can use any kit or any tube of
Your choice and still have great results.

I'm using the beautiful work of Keith Garvey, In order for you to use his tubes you
must purchase then and get the proper licenses Here

The scrap kit I used is called Baby 's got her Blue jeans on from Pimd'd Designz
you can purchase it in this store Here

The template I used is template 15 from Babe Here

Filters used
Dsb-flux Here
Penta.com Here

OK let get going!

1.Open template in psp
copy and close original
Delete the copy write layer
go to image and re size canvas to 700x700
2. In Pallet select rectangle layer
* go to selections ~select all~ float ~defloat ~ copy and paste paper of choice
selections~modify ~smooth by 10~ invert~ hit delete on keyboard
select none. * Delete the template layer and rename new layer Rectangle layer.
Duplicate this layer 2 times so u have 3 layers
On Middle layer go to adjust ~blur~gaussion blur~radius 2o
then go to top layer and merge down two times so you got one.

3. Select frame fill layer and repeat the instructions between the **
delete the template layer and rename new layer Frame fill layer.

4.Select frame layer and repeat again instructions between the **
delete the template layer and rename new layer Frame layer 1

5. Select circle layer in the pallet and repeat again the instructions between the **
delete the template layer and rename new layer circle layer.

6. Open Main tube of choice in psp
Select flower layer in pallet
select all~float~ defloat~ select a color from tube and flood fill this layer with it.
select none. rename this Flower 1

7. Select squared dot line layer in pallet
select all ~ float ~defloat ~ open a new canvas and flood fill with color of choice
copy and paste this layer ~invert~hit delete on keyboard.
select none . Delete template layer and rename new layer dot circle.

8. Copy and paste elements of choice.

9. Add you choice of main tube , see my tag for placement.
rename this Main tube.
Then select frame fill layer in pallet
select all~float ~defloat~ add tube again ~ invert ~hit delete on keyboard
rename this layer tube 1
repeat for other frame name it tube 2
go to effects~photo effects~sepia toning
do this to both tube 1 and tube 2
lower opacity to 75 on both.

Add drop shadows of choice to your elements .

if your not going to animate this tag then you can re size this to 500x500
add your copyright name and choice of text. merge all layers ,Save and your done. If you are then don't merge yet and keep going.

Animation

1. Click on Flower 1 layer and duplicate it two times
rename the two new ones flower 2 and flower 3
click back on flower 1
go to effects~plugins~dsb flux~ bright noise~ intensity 40~ ok
click on flower 2 layer and repeat using intensity 50-ok
click on flower 3 and repeat using intensity 60~ok

2. Click on frame layer and duplicate it 2 times
rename the two new ones frame 2 and 3
click on frame 1
go to effects~plugins~dsb flux~ bright noise~intensity 40~ok
click on frame layer 2 and repeat using intensity 50~0k
click on frame layer 3 and repeat using intensity 60~ok


Ready set go!

In psp close off flower layer 2 and 3 and frame layer 2 and 3
edit ~copy special~ copy merge
Take to As and paste as a new layer
Back to psp
open flower layer 2 and frame layer 2 and close off flower layer 1 and frame layer 1
edit ~copy special~copy merged
take to animation shop and paste after current frame
Back to psp
Open flower layer 3 and frame layer 3 and close of flower layer 2 and frame layer 2
edit~copy special~copy merged.
take to animation shop and paste after current frame.

You should now have 3 frames in animation shop

go to view and zoom out by 1 and then go to windows and cascade
go to edit~select all~copy ~click on 3rd frame and copy after frame
you should now have 6 frames.
go to edit ~select all ~copy~click on frame 6 and copy after frame
you should now have 12 frames
go to edit ~select all~ copy~ click on frame 12 and copy after frame
you should now have 24 frames.

Back to psp
write out Lord have mercy
copy and paste in AS as a new animation
duplicate it 23 times so you have 24 frames
go to edit~select all ~ copy
click back on first frame in tag and using shift key and scroll select frames 1-12 the using scroll button scroll back to one, make sure all 12 frames are selected and paste into selected frame.

Back to psp
Write out Baby's got her blue jeans on
copy and paste into AS as a new animation.
duplicate it 23 times, so you have 24 frames
go to edit~select all~copy
click on frame 13 and using shift key and scroll , select frames 13-24 and using scroll
button scroll back to 13 make sure 13-24 are selected and paste into selected frame

view animation and if you are happy with it save and your done!

I hope you enjoyed doing my tutorial !
Huggies
Sher


Monday, May 25, 2009

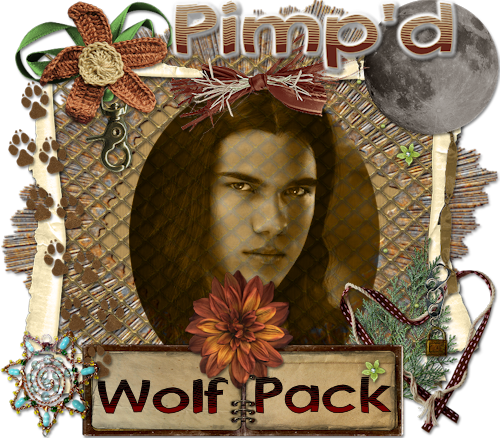
The Wolf Pack Tut

Photobucket

To do this tutorial you must have some knowledge of PSP.

The awesome kit I used is called "The Saga : Wolf Pack" by Pimp'd Designz and can be found HERE.

Supplies:
Plug-in->Eye Candy 4000->Gradient Glow
Font: Australian Sunrise
Image of choice.

I used shadow settings V3,H2, O50, B5, Color Black on ALL elements, layers, text and the tube except for the mask layer.
I also sharpened every element and tube I had to resize to get the quality like the original size.


1 Open a new canvas 800x700 (Don't worry we will resize later)
2 Open, copy and paste as new layer frame-04.
3 Open, copy and paste your choice of image and move this under the frame layer.
4 Change the image layer properties to Luminance Legecy and opacity to 84%.
5 Now click oon the frame layer and open, copy and paste as a new layer the memory-book.
6 Resize and position where desired. Use my example as a reference.
7 Now get your text tool and type out "Wolf" on one side and "Pack" on the other side.
8 Go to your very 1st layer and open, copy and paste as a new layer the mesh.
9 Resize and position where desired. Use my example as a reference.
10 Now go to the first layer again and open, copy and paste as a new layer the pimpd-jasper-prev.
11 Resize and position where desired. Again use my example as a reference.
18 Open, copy and paste as new layers your choice of elements. See my example for reference.
19 Get your text tool and type desired text.
I used colors: foreground- #c5a978
background- #62251a
I also used a gradient glow on the text with the color white and glow width 5.
20 Add your copyrights.
21 Resize to desired size.
22 Save as a png and you are all done!!!


Thanks so much for doing my tut and send me the results!!!

Thanks,
Kali

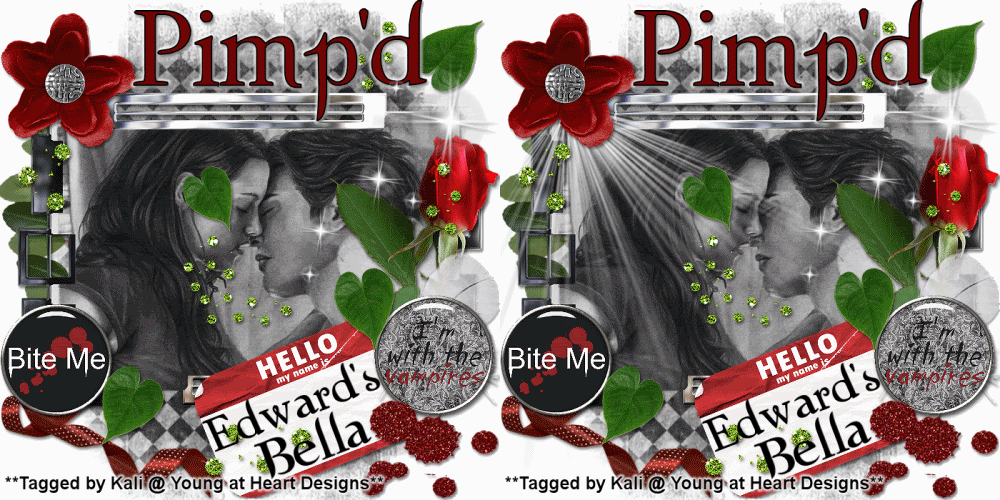
Bite Me (Animated) Tut

Photobucket

To do this tutorial you must have some knowledge of PSP and Animation Shop.

The awesome kit I used is called "Twi-Hard" by Pimp'd Designz and can be found HERE.

Supplies:
Mask #32 by Babes Designz and can be found HERE.
Wordart: HERE
Plug-in->Eye Candy 4000->Gradient Glow
Font: Twilight
Image of choice.

I used shadow settings V3,H2, O50, B5, Color Black on ALL elements, layers, text and the tube except for the mask layer.
I also sharpened every element and tube I had to resize to get the quality like the original size.


1 Open a new canvas 700x700 (Don't worry we will resize later)
2 Open, copy and paste as new layer frame-01.
3 Open, copy and paste your choice of image and move this under the frame layer.
4 Click on the frame layer again and get your magic wand tool. Click in the frame to get those marching ants.
5 Go to Selections->Modify->Expand. Put 10 and click ok.
6 Now move your image above the frame.
7 Go to Selections->Invert and then hit delete on your keyboard.
8 Now move image below the frame again.
9 Now go to your very first layer and open your mask. Minimize it.
10 Now open, copy and paste as a new layer your choice of paper. Resize to the size of the canvas.
I used: pp06
11 Go to Layers->New Mask Layer-> From Image.
12 Now in the source window drop down box select BabesDesignz_Mask32.
13 Make sure both Source luminance and invert mask data are selected. Hit okay.
14 Right-click on your mask layer thumbnail and select Merge->Merge Group.
15 Open, copy and paste as a new layer ray-of-light and resize to desired size and position it to the left corner of the frame.
16 Open, copy and paste as a new layer name-tag. Resize and position to desired location.
17 Open, copy and paste as a new layer the supplied wordart and position the wordart on top of the name-tag.
18 Open, copy and paste as new layers your choice of elements. See my example for reference.
19 Get your text tool and type desired text.
I used colors: foreground- #000000
background- #740000
I also used a gradient glow on the text with the color white and glow width 5.
20 Add your copyrights.
21 If you are not going to do the animation save as a png and you are all done!!!

If you are going to do the animation please follow these steps:

22 Go to your very 1st layer and get your paint bucket tool and flood fill white.
20 Copy merge and go to Animation Shop and paste as a new animation.
21 Go back to PSP and hide the ray-of-light layer.
22 Copy merge and go to Animation Shop.
23 Right click on your frame and select paste after current frame.
24 Now select all and go to Animation->Frame Properties and change this to 75.
25 Now go back to Animation and go to Resize Animation and resize to 500.
26 Save as a gif and you are all done!!!

Thanks so much for doing my tut and send me the results!!!

Thanks,
Kali

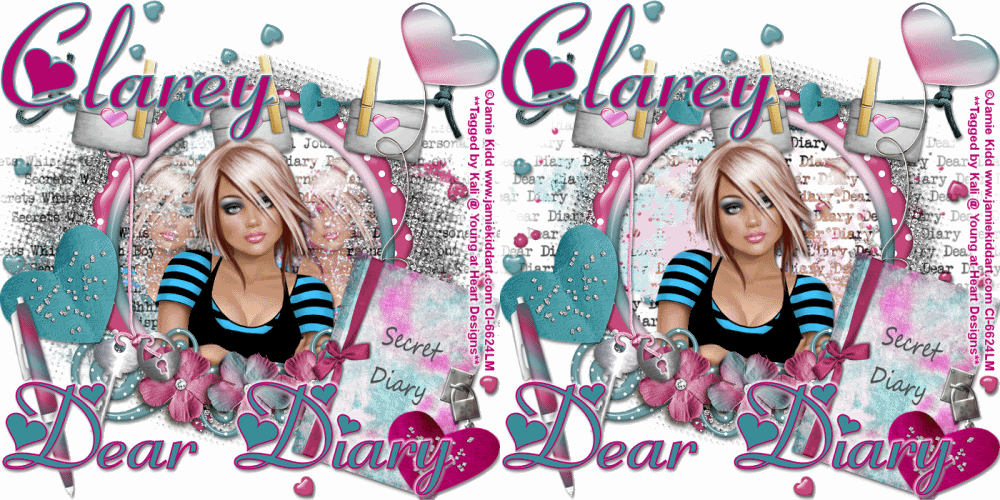
Dear Diary (Animated) Tut

Photobucket

To do this tutorial you must have some knowledge of PSP and Animation Shop.

This Tag was made using PSPX2 and Animation Shop. This tutorial is also copyrighted by Young at Heart Designs.
Im using the Beautiful work of Jamie Kidd. If you wish to use her work you must have a license to use her work before using her tubes.
To purchase her tubes and receive a license go to HERE.
The awesome kit I used is called "Dear Diary" by Clarey Designz and it can be found HERE.


Supplies:
Wordart: HERE
Plug-in->Eye Candy 4000->Gradient Glow
Font: Fiolex Girls

I used shadow settings V3,H2, O50, B5, Color Black on ALL elements, layers, text and the tube except for the mask layer.
I also sharpened every element and tube I had to resize to get the quality like the original size.


1 Open a new canvas 700x700 (Don't worry we will resize later)
2 Open a frame of choice.
The frame I used was a freebie that went along with this kit.
3 Open, copy and paste as new layers both clarey_deardiary_wordart1 and clarey_deardiary_wordart2.
(If you are not doing the animation pick on of these wordarts instead of both)
4 Move both below the frame layer and resize to make them a little bigger so it is sticking out of the frame.
5 Hide one of the wordarts.
6 Now open, copy and paste as a new layer your tube of choice.
7 Position it in the center of the frame. Resize to desired size.
8 Now duplicate it and move one below the frame.
9 Get your eraser tool and erase on both layers any that is sticking out of the frame.
10 Now I need you to duplicate the tube once and resize to much smaller and move to the left of your tube in the frame.
(Use my example for reference.)
11 Then duplicate the smaller tube and mirror it so there is a small tube to the right of the frame too.
12 Now for both smaller tubes (left and right) change your layer properties from normal to lighten.
(You can find this by the layer palette. It is by the bar where you can change the opacity.)
13 Now open, copy and paste as new layers your choice of elements.
I used: clarey_deardiary_diary2
clarey_deardiary_envelopestring1
clarey_deardiary_glitteredheart1
clarey_deardiary_glitteredheart2
clarey_deardiary_heartonwire2
clarey_deardiary_keyandpadlock1
clarey_deardiary_pen3
clarey_deardiary_spiralledhearts
clarey_deardiary_spiralledhearts2
Resize and position where desired.
14 Get your text tool and type out desired text.
I used the colors: foreground-#3a8f99
background-#b6006b
I also used text size 48. I also added a gradient glow of white and width size 5.
15 Open, copy and paste as a new layer your wordart that I supplied.
16 Position the wordart in your desired position. I put mine at the bottom to the left.
17 Add copyrights.
18 If you are not doing the animation, resize to 500x500 and save as a png.
You are all done!!!

If you are doing the animation follow these steps:

19 Go to your very 1st layer and get your paint bucket tool and flood fill white.
20 Make sure on of your wordart layers you added towards the begining is still hid.
21 Copy merge and paste as a new animation is Animation Shop.
22 Go back to PSP and hide the current wordart layer and unhide the other one.
23 Copy merge and go to Animation Shop and right click on your frame and select paste after current frame.
24 Now select all and go to Animation->Frame Properties and change this to 75.
25 Now go back to Animation and go to Resize Animation and resize to 500.
26 Save as a gif and you are all done!!!

Thanks so much for doing my tut and send me the results!!!

Thanks,
Kali

Friday, May 22, 2009

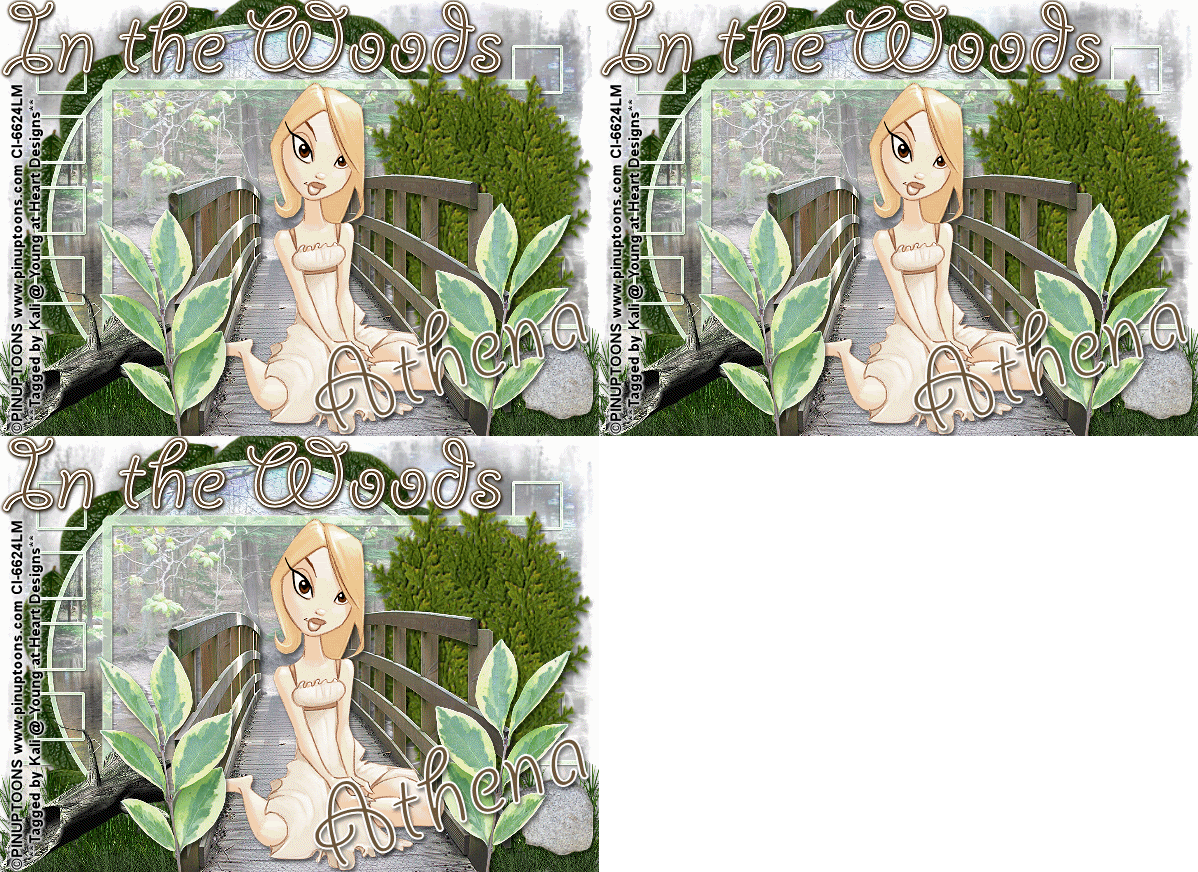
In the Woods (Animated) Tut

Photobucket

To do this tutorial you must have some knowledge of PSP and Animation Shop.

This Tag was made using PSPX2 and Animation Shop. This tutorial is also copyrighted by Young at Heart Designs.
Im using the Beautiful work of Pinup Toons. If you wish to use swork you must have a license to use his work before using his tubes.
To purchase his tubes and receive a license go to HERE.
The awesome kit I used is called "In the Woods" by Athena Designs and it can be found HERE.


Supplies:
Templated #15 by Scrapity Srap Tutorials and can be found HERE.
Mask and Wordart: HERE
(If this is your mask please let me know so I can give proper credit)
Font: Giddyup Std
Plug-in: Eye Candy 4000->HSB Noise

I used shadow settings V3,H2, O50, B5, Color Black on ALL elements, layers, text and the tube except for the mask layer.
I also sharpened every element and tube I had to resize to get the quality like the original size.

1 Open template and hit Shift+D to duplicate it.
2 Delete original template.
3 Delete copyrights and delete the layers that had the 4 squares.
4 Click on Raster 2. Open, copy and paste as a new layer a paper of choice.
I used: Athena_ITW_Paper10-TS (Resize the paper to the size of the canvas)
5 Now click on Raster 2 again and go to Selections->Select All->Float->Defloat.
6 click on your paper layer and go to Selections->Invert and then hit delete on your keyboard.
7 Now go to Selections->Select None and delete the original raster layer.
8 Now repeat the Steps #: 4-7 for all the other layers except raster 5 and copy of raster 5.
I used papers: Athena_ITW_Paper8_TS
Athena_ITW_Paper6_TS
Athena_ITW_Paper5_TS

9 Now open the mask and minimize it.
10 Open, copy and paste another choice of paper and resize to canvas size.
I used Athena_ITW_Paper1_TS
11 Go to Layers->New Mask Layer->From Image
12 In the drop down window for Source Window select jill-mask29
Make sure Source luminance is checked and hit ok.
13 Right click on the mask layer thumbnail and select Merge->Merge Group
14 Duplicate the mask layer and then select Merge->Merge Down
15 Open, copy and paste as a new layer the ATHENA_ITW_Frame2_TS and resize and position on under the big circle.
See my tag for reference.
16 Open, copy and paste as new layers any elements of choice.
Resize and position where desired.
17 Open, copy and paste as a new layer the wordart. Position where desired.
18 Get your text tool and choice of font. Type out your choice of wording.
I used the colors: foreground- #ffffff
background- #70593d
19 Add your copyrights.
20 If you are not doing the animation, save as.
All Done!!!

If you are doing the animation, follow these steps:

21 Click on your mask layer and duplicate it twice giving you a total of 3.
22 Rename each to something easy such as mask1, mask2 and mask3.
23 Click on your mask1 layer and go to Effects->Plug-ins->Eye Candy 4000->HSB Noise
24 Now apply these settings:
Hue Variation: 25
Saturation Variation: 30
Brightness Variation: 40
Opacity Variation: 0
Lump Width: 42.00
Lump Height: 42.00
Pattern: Smooth Lumps
Seamless Tile: Checked

Then click Random Seed once and hit ok.
25 Now repeat these steps for mask2 and mask3.
26 once you are done doing the plug-in hide mask2 and mask3.
27 Copy merge and go to AS and paste as a new animation.
28 Back in PSP and hide mask1 and unhide mask2 and copy merge.
29 Go to AS and right click on your frame and select paste after current frame.
30 Back in PSP and hide mask2 and unhide mask3 and copy merge.
31 Go to AS and right click on your 2nd frame and select paste after current frame.
32 Still in AS select all and go to Animation->Frame Properties and change it to 35.
33 Save as a gif and you are all done!!

I hope you liked my tutorial!! Send me your results!!!

Thanks,
Kali

Thursday, May 21, 2009

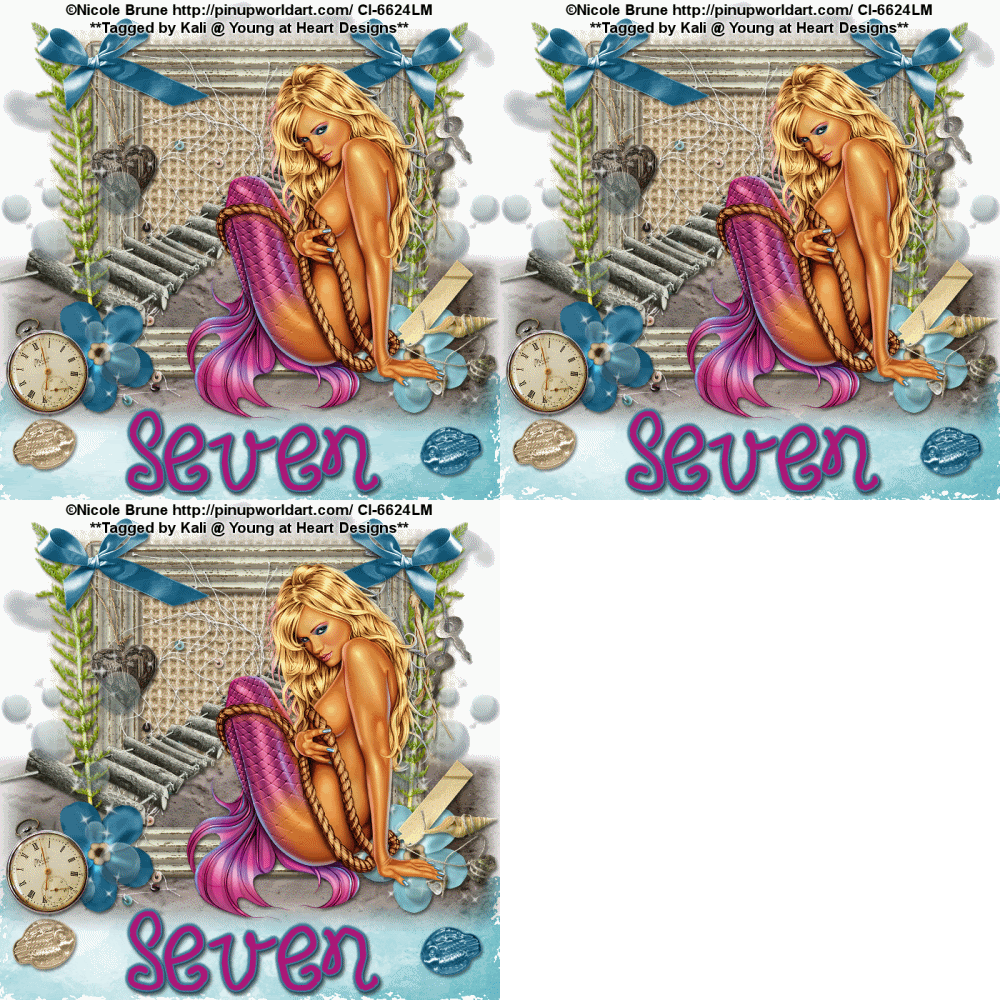
One Day at the Sea Shore (Animated) Tut

Photobucket

To do this tutorial you must have some knowledge of PSP and Animation Shop.

This Tag was made using PSPX2 and Animation Shop. This tutorial is also copyrighted by Young at Heart Designs.
Im using the Beautiful work of Nicole Brune. If you wish to use her work you must have a license to use her work before using her tubes.
To purchase her tubes, images and receive a license go to HERE.
The adorbale kit I used is called "One Day at the Seashore" by Sevens Scraps and it can be found HERE.

Supplies I used:
Font: FB Melissa
Plug-in: Eye Candy 4000->Gradient Glow
Plug-in: Eye Candy 4000->Jiggle

I used shadow settings V3,H2, O50, B5, Color Black on ALL elements, layers, text and the tube except for the mask layer.
I also sharpened every element and image I had to re size to get the quality like the original size.


1 Open new canvas 700x700 (we will resize later)
2 Open, copy and paste as a new layer the 7S_ODATS_frame07.
3 Resize to desired size and place it towards the middle of the canvas.
4 Open, copy and paste as a new layer the 7S_ODATS_matte01. Resize to desired size and move this below the frame.
5 Open, copy and paste as a new layer the 7S_ODATS_sand01. Place this between the frame and the matte layers.
Use my example as a reference to see where to place this.
6 Get your selection tool and use the freehand selection.
7 Draw at the bottom of the canvas a squiggly area that looks similar like water. See my example to get a better idea.
8 Once your selection is selected and the marching ants are moving around it open, copy and paste your choice of paper to fill this area.
I used: 7S_ODATS_paper12
9 Go to Selections->Invert and hit delete on your keyboard.
10 Go to Selections->Select None
11 Open, copy and paste as a new layer your choice of tube. Resize to desired size and place where desired.
12 Open, copy and paste as new layers your choice of elements.
I used a ton of elements from this kit so please refer to my example to see which ones I used.
13 Get your text tool and choose your desired font.
14 Type out the wording/text you choose. I used text size 36.
I used colors: foreground-#3f7e99
background-#aa1878
I also added a gradient glow to my text with the width of 3 and the same color as the foreground.
15 Add copyrights.
16 If you are not doing the animation, merge all layers, resize to 500x500 and save as a png.
Your all done!!!

If you are doing the animation, follow these steps:

17 Click on your water layer.
18 Duplicate this layer twice giving you 3 layers total.
19 Now rename each water1, water2 and water3.
20 Click on your water1 and go to Effects->Plug-ins->Eye Candy 4000->Jiggle
21 Use the settings: Movement Type: Brownian Motion
Bubble Size: 50.00
Warp Amount: 15.00
Twist: 10
Make sure Seamless Tile is not selected and hit random seed once. Click ok.
22 Now repeat Steps #:12-14 for both water2 and water3.
23 Go to your very 1st layer and get your paint bucket tool.
24 Flood fill white.
25 Now go and hide both water2 and water3.
26 Right-click and select copy merge.
27 Go to Animation shop and right-click. Paste as a new animation.
28 Back in PSP- hide water1 and unhide water2.
29 Copy merge and go back to Animation Shop.
30 Right click on your frame and paste after current frame.
31 Go back to PSP and hide water2 and unhide water3.
32 Copy merge and go back to Animation Shop and paster after current frame.
33 Still in Animation Shop select all and go to Animation->Frame Properties and change it to 35.
34 Resize and save as a gif.
You are all done!!!

I hope you enjoyed my tut and send me your results!!!

Thanks,
Kali

Wednesday, May 20, 2009

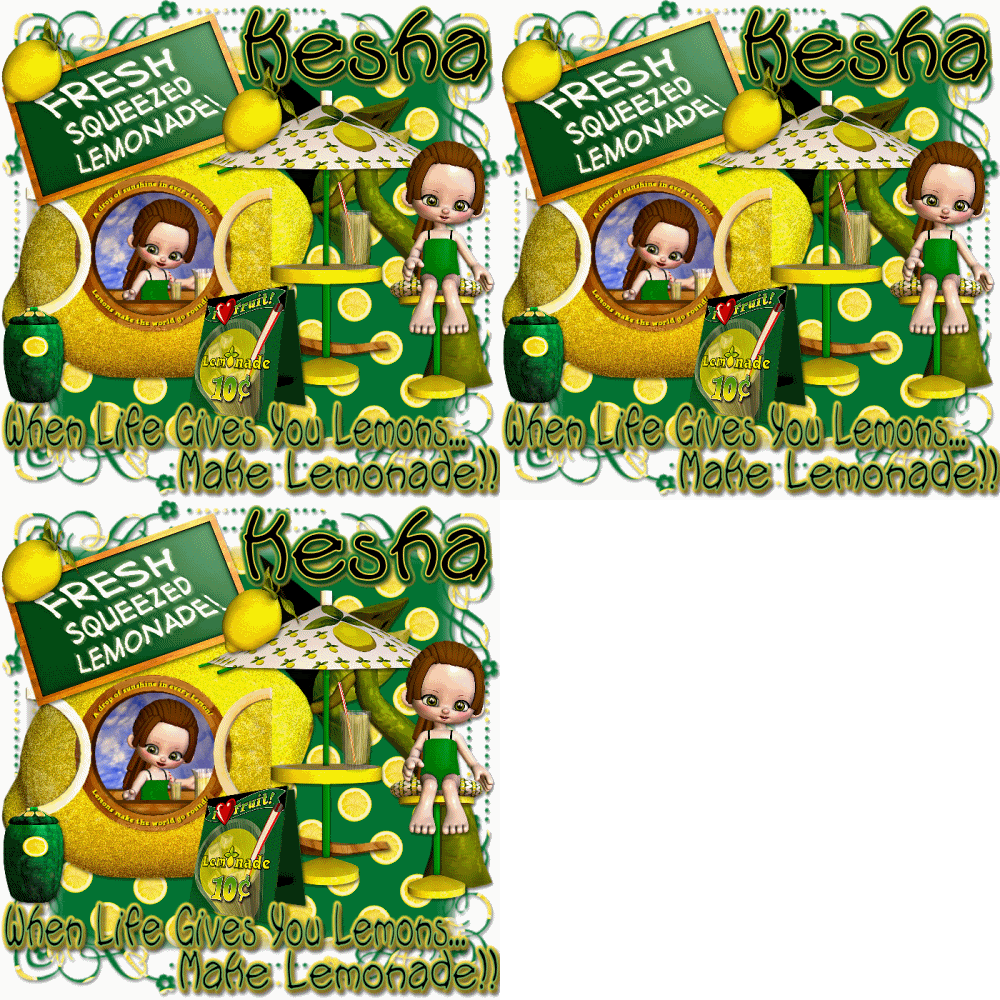
When Life Gives You Lemons..... (Animated) Tut

Photobucket

To do this tutorial you must have some knowledge of PSP and Animation Shop.

This Tag was made using PSPX2 and Animation Shop. This tutorial is also copyrighted by Young at Heart Designs.

The adorbale kit I used is "When Life Gives You Lemons" by KNC Scraps and it can be found HERE.


Supplies I used:
Mask & Wordart: HERE
(If this mask is yours please let me know so I can give you proper credit.)
Font: SBC Pool Noodle
Plug-in: Eye Candy 4000->Gradient Glow
Plug-in": DSB Flux->Bright Noise


I used shadow settings V3,H2, O50, B5, Color Black on ALL elements, layers, text and the tube except for the mask layer.
I also sharpened every element and tube I had to resize to get the quality like the original size.


Ok lets get going!!

1 Open a new blank 700x700, we will resize later.
2 Open, copy and paste your choice of paper.
I used paper5
3 Make sure you are on your new paper layer.
4 Go to Layers->New Layer Mask->From Image
5 Click on Source Window Drop Down and select mask100.
6 Make sure source luminance is selected and hit okay.
7 Right click on the mask layer and select Merge->Merge Group.
8 Resize your mask layer to be as big as the canvas layer so you can see if much better after you have pasted your elements.
9 Open, copy and paste as new layers any elements you desire.
I used: fresh squeezed
glass1
jug
lemon1
lemonade sign
lemonade stand
lemonade stool
lemonade table
lemongirl2
Place the elmenets & tube where desired.
10 Choose desired font and type out your desired text.
I used colors: Foreground: #fcda4a
Background: #000000
I also added a gradient glow to the text with the color: #017534.
I also used text size: 20
11 Add Copyrights
12 If you are not doing the animation merge all layer, resize all layers to 500x500 and save.
ALL DONE!!

If you are going to do the animation follow these steps:

13 Go to your very first layer and get your paint bucket tool and flood fill white.
14 Click on your lemonade stand layer and select your magic wand tool.
15 Then click on the part of the stand that you want to add the effect too.
Use my tag for reference. I selected the whole lemon part.
You may need to hit select and click it at the same time to get the whole lemon.
16 Once you have the part you want selected duplicate the layer twice, giving you a total of 3 layers.
17 Now rename each to lemonade stand1, lemonade stand2 and lemonade stand3.
18 Click on your lemonade stand1 and go to Effects->Plug-ins->DSB Flux->Bright Noise
19 Use the settings: Intesity 40 and on Mix. Hit okay.
20 Now click on your lemonade stand2 and go to Effects->Plug-ins->DSB Flux->Bright Noise
21 Use the same settings and hit okay. Repeat these steps for your lemonade stand3.
22 Go to Selections->Select None
23 Now hide lemonade stand2 and lemonade stand3.
24 Copy merge and go to Animation Shop and paste as a new animation.
25 Back in PSP and hide lemonade stand1 and unhide lemonade stand2.
26 Copy merge and go to Animation Shop and right click on your frame. Select paste after current frame.
27 Back in PSP and hide lemonade stand2 and unhide lemonade stand3.
28 Copy merge and go to Animation Shop and right click on your frame. Select paste after current frame.
29 Still in AS and select all. Go to Animation->Resize Animation and resize.
30 Save as gif and you are done!!

I hope you enjoyed this tutorial and please send me your results.

Thanks,
Kali


Tuesday, May 19, 2009

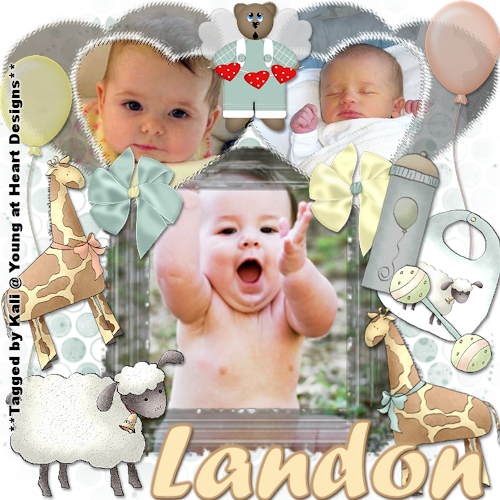
PTU Baby of Mine Tut

Photobucket

To do this tutorial you must have some knowledge of PSP.


This Tag was made using PSPX2. This tutorial is also copyrighted by Young at Heart Designs.
The adorbale kit I used is "Baby Mine" by Danielle Scraps and it can be found HERE.


Supplies:
3 Photo Images of your choice
FTU Photo Masks #7 & 16 by Pelzi's Scrapblog and can be found HERE.
Mask #16 by Babes Designz and can be found HERE.
Font: Forte

1 Open new canvas 700x700.
2 Open, copy and paste as new layers both photo masks. Resize to desired size.
Use my example for reference.
3 Put the rectangle photo mask towards the middle and down towards the bottom of the canvas.
4 Put the heart photo mask up at the corner of the canvas. Duplicate and then go to Image->Mirror.
This way you have two of the heart photo masks side by side.
5 Now click on your rectangle photo mask and then open, copy and paste your choice of image.
6 Position your image right over the rectangle photo mask.
7 Click back on your rectangle photo mask.
8 Go to Selections->Select All->Float->Defloat
9 Click on your image layer and go to Selections->Invert and then hit delete on your keyboard.
10 Right click on the image layer and then select Merge->Merge Down.
11 Repeat Steps #: 5-9 for both heart photo mask layers.
12 Now go to your very first layer which should be raster 1. Get your paintbucket tool and flood fill it white.
13 Open, copy and paste as a new layer your choice of paper. Resize it to the size of the canvas.
I used: paper 12
14 Open your mask and minimize.
15 Still on your new paper you just added go to Layers->New Mask Layer->From Image.
16 In the pop-up window there is a drop down for source window. Click on this and select BabesDesignz_Mask16.
Make sure Source luminance and invert mask data are both checked and hit ok.
17 Right click on your mask layer and select Merge->Merge Group.
18 Now resize your mask layer to much bigger so you can see it better behind your photo masks.
19 Open, copy and paste as new layers any deisred elements. Resize to desired size.
I used: balloon1
balloon2
bear 1
bib3
bottle 1
bow 1
bow 3
giraffe 1
giraffe 2
lamb1
rattle1
Place where desired.
20 Get your text tool and type out desired wording/text.
I used colors: foreground=#c59e75 and background=#fce8b8
I also used size 36.
21 Add your copyrights and then save as jpg.

You are all done!!
I hope you enjoyed my tut and send me your results!!

Thanks,
Kali

Making Waves PTU Animated Tut

Photobucket

To do this tutorial you must have some knowledge of PSP and Animation Shop.

This Tag was made using PSPX2 and Animation Shop. This tutorial is also copyrighted by Young at Heart Designs.
Im using the Beautiful work of Pinup Toons. If you wish to use his work you must have a license to use his work before using his tubes.
To purchase his tubes and receive a license go to HERE.
The awesome kit I used is called "The Saga: Isle Esme" by Pimp'd Designz and it can be found HERE.


Supplies:
Template #17 by Babes Designz and can be found HERE.
Mask #12 by Babes Designz and can be found HERE.
Font: Kingthings InkyDinky
Plug-in: Eye Candy 4000->Gradient Glow
Plug-in: Eye Candy 4000->Jiggle

1 Open Template, Shift+D and duplicate it.
2 Erase original template.
3 Erase copyrights.
4 Make sure you are on your 1st layer which is your background layer.
5 Open, copy and paste as new layer your tube of choice. Resize to desired size.
6 Position your tube in the middle of the frames.
7 Once you have the tube where you desire and the size you desire duplicate it.
8 Move the duplicated tube to above all the frames and dots.
9 Get your eraser tool and erase any of the duplicated tube that is sticking out of the frames.
10 Click on your original tube layer and do the same. (Results should look like she popping out of the frames)
11 Now click on your circle frame layer and open, copy and paste as a new layer your choice of paper.
I used: pp11
12 Now click on your circle frame again.
13 Go to Selections->Float->Defloat and click on your new paper layer you just added.
14 Go to Selections->Invert and then hit the delete key on your keyboard.
15 Go to Selections->Select None and then delete the original circle frame.
16 Now repeat Steps #: 11-15 for each: dots, inner frame and inner dots layers.
I used: dots=pp18, inner frame=pp20 and inner dots=pp24
17 Now click on your square frames layer. Get your magic wand tool and select both opensing on the frames.
18 Open, copy and paste as a new layer your choice of paper.
I used: pp13
19 Now click on your square frames layer again and get your paintbucket tool and flood fill the black area on the frames to a desired color.
I used: 11889c
20 Go back to your first layer which is the background layer.
21 Open your mask and minimize it.
22 Open, copy and paste as a new layer your choice of paper. Resize to the size of the canvas.
I used: pp06
23 Now Go to Layers->New Mask Layer->From Image
24 In the drop down Source Window Select BabesDesignz_Mask12.
Make sure Source luminace and invert mask data are checked. Hit ok.
25 Right-click on the mask layer thumbnail and select Merge->Merge Group.
26 Open, copy and paste as new layers any desired elements. Resize to desired size.
I used a ton of elements so use my example for reference.
Place the elements where desired.
27 Now go to your first layer-background and open, copy and paste as a new layer pp02.
28 Now click back on your 1st layer and add new raster layer.
29 Make sure you are on your new raster layer and select your selection tool set on freehand.
30 Still on your new raster layer drop out the area you want the sand to be. I just kind of drew a squiggly area to look realistic.
31 Now click on your pp02 layer and Go to Selections->Invert and then hit delete on your keyboard.
32 Now get your text tool and write out any desired wording.
I used colors: Foregound- #ba0325 and Background- #11889c
I also used text size 48 and added a whited gradient glow with the width of 4.
33 Add copyrights.
34 If you are not doing the animation merge all layers, resize to 500x500 and save as.

If you are doing the animation please follow these steps:

35 Go to your mask layer and duplicate it twice which will give you 3 mask layers.
36 Rename the layers: mask1, mask2, and mask3.
37 Click on your mask1 and go to Effects->Plug-ins->Eye Candy 4000->Jiggle
38 Once the pop-up window is there set the settings to this:
Movement Type: Bubbles
Bubble Size (Pixels): 76.18
Warp Amount (Pixels): 85.21
Twist: 28
Seamless Tile: unchecked
Then hit Random Speed once and then hit ok.
39 Now repeat Steps #: 37-38 for both mask2 and mask 3.
40 Now hide both mask2 and mask3.
41 Copy merged and go to Animation Shop and paste as a new animation.
42 Back in PSP hide mask1 and unhide mask2.
43 Copy merged and go to Animation Shop and right-click on your frame.
44 Select Paste after current frame.
45 Back in PSP and hide mask2 and unhide mask3.
46 Copy merged and go to Animation Shop and right-click on your second frame.
47 Select Paste after current frame.
48 Select and go to Animation->Frame Properties and change it to 55.
49 Resize to 500x500 and save as gif and you are all done!!!

Thanks for doing my tutorial!! Send me your results!!

Thanks,
Kali

Dark Secrets


Dark Secrets Tutorial By Sher


This tutorial was written using PSPX2 And Animation Shop,
providing you have a basic Knowledge of These two programs you
shouldn't have any problems.

This tutorial is copyrighted by Young at Heart Designs, Any similarities is
purely coincidental.

Im using the beautiful work of Keith Garvey , one of my favorite artists! You must have a license to
use his tubes, You can purchase them , and obtain the proper licenses Here


Supplies
The PTU scrap kit is called Dark Secrets , designed by Nora , you can find this kit here

Remember you can use any kit you want and any tube , this is just a guide to a fairly easy tutorial.

Template is By Rachel , You can find it here

Filters used penta dot, you can find here

Tronds filter , you can find here

Mask wsl84 Here

Ok lets go!

Open mask and minimize

Open template is psp, copy (shift and D.) Close original. go to image and re-size
the canvas to 600x600. delete the copy write layer.
Add a new raster layer and move to bottom, flood fill white

Open paper of choice ( I used crumple PRP 2) and copy. select bottom layer in the layer pallet and using you
magic wand click inside the middle of template box,( you should see the ants going round) then using magic wand again go to the other side and using shift key click on other box. so we have two boxes with ants,
paste as a new layer the paper you just copied. go to selections- modify- smooth by 10~invert
hit delete on your keyboard and select none.

Open a new canvas 600x600~flood fill black, copy ,and minimize for later.

go back to bottom layer~selections~select all~ float~ defloat~ paste this new paper,
go to selections~modify~smooth by 10~ invert~ select none. Now you can delete that template layer.

select the flower matt in the pallet, select all~ float~defloat~open paper 4 and copy it~paste as a new layer
selections~modify~ smooth by 10~invert~Hit delete on your keyboard~ select none.

repeat this step this time paste the black paper you made earlier~ re-size this to 105%
make sure the black layer is under the red layer~ delete the template flower layer.

Click with magic wand inside the black square, paste paper of choice as a new layer,
I used paper 4~ selections~modify~smooth by 10~ invert~ hit delete on your keyboard
select none. Delete the template layer

Click on gray square in pallet~ go to selections~ select all~float~ defloat~
copy black paper again and paste as new layer~ modify~ smooth by 10~
invert~ hit delete on keyboard~select none (deselect)

open paper 14 and copy
click in side the small frames with magic wand(right black rectangle layer)
and paste paper as a new layer~ go to selections~ modify~smooth by 10~
invert ~ hit delete on keyboard and select none.

Repeat for other frame. (left black rectangle layer)

select the left white rectangle layer~ go to selections~ select all~
float~ defloat~copy black paper~paste as new layer~ selections~modify
smooth by 10~invert~ hit delete on keyboard~ deselect.

repeat this for the right rectangle layer. delete both template layers.

Now we are ready to add our tubes and elements.

Open tube and copy and paste as new layer, position where desired,
see my tag for placement!

Using magic wand click inside either one of the frames ~ copy and paste tube again
selections~ invert~ hit delete on keyboard~ select none. lower opacity down to 62 %

Repeat with other frame. If using diff tubes make sure they are all from same Artist!
Mirror tubes if desired.

Add the elements , and word art , re-size to whatever you desire,

drops shadows on all elements, I used 2, 2, 60, 6 color black

Click on flower layer and go to effects~color dot~90, 4, 255, 255, 255

click on bottom white layer~ add a new raster layer~ copy and paste paper of choice or flood fill
whatever color you want> I used paper 4

go to layers~ new mask layer~ from image choose mask wsl 84
source luminance checked, fit too layer~ show all mask. apply and then merge group,

open black glitter splat, copy and paste as new layer , over the mask layer.

If you don't want to animate this tag, re- size all layers to 500x500
Add Name, and copy write and save and your done!

3 frame animation

click on red square layer~ go to effects~ plugins~ tronds filters 2
schizofrenia with these settings~72-149-29-165-123-59 -96-96 click ok

go to edit ~copy special ~ copy merged~

Take to animation shop and paste as a new layer

Back to psp undo schizofrenia and redo it changing the last two settings to 128

go to edit ~copy special ~ copy merged~

Take to animation shop and paste after current frame

Back to psp undo schizofrenia and redo it changing the last two settings to 188

Take to animation shop and paste after current frame

You should have 3 frames, view animation and if you like what you have. save as gif and your done.

You can play around with the settings if you don't like mine and save .! :)

Thanks for trying my tutorial!

Huggies


Monday, May 18, 2009

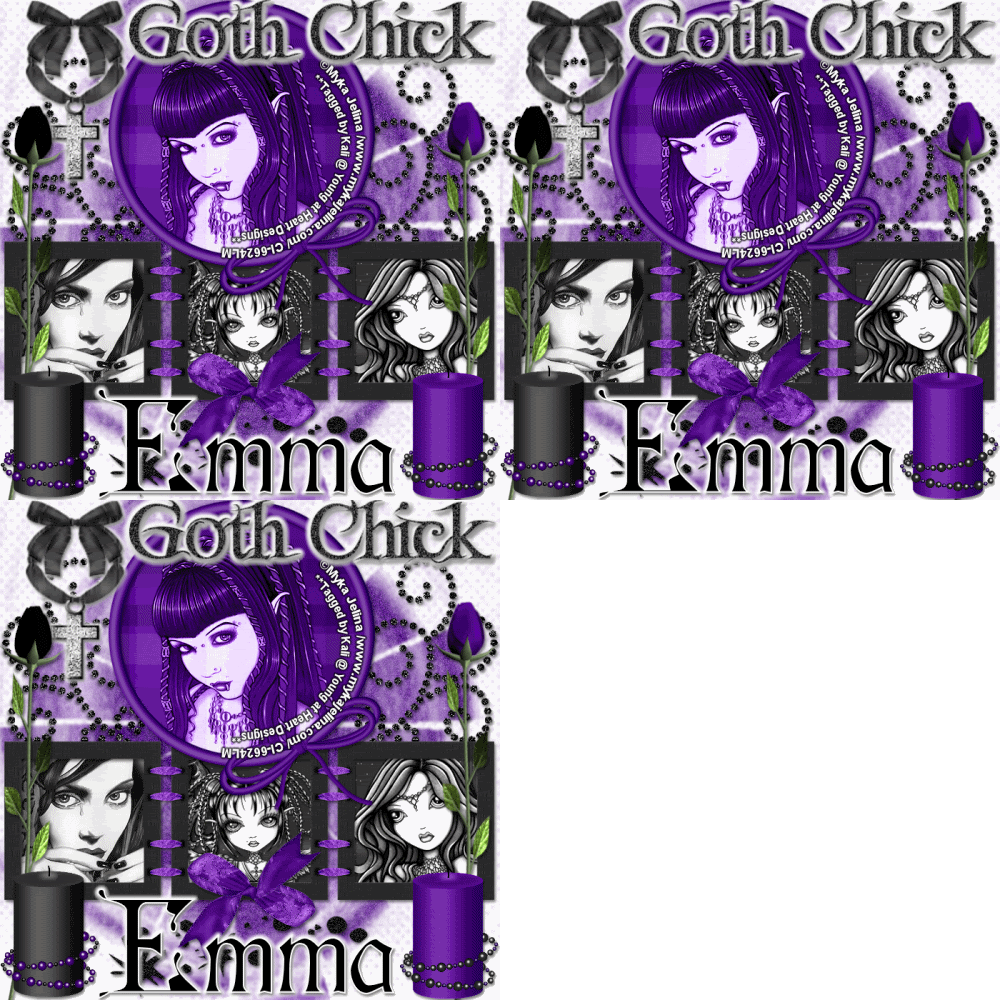
(Animated) Goth Chick Tut

Photobucket

To do this tutorial you must have some knowledge of PSP and Animation Shop.

This Tag was made using PSPX2 and Animation Shop. This tutorial is also copyrighted by Young at Heart Designs.
Im using the Beautiful work of Myka Jelina. If you wish to use her work you must have a license to use her work before using her tubes.
To purchase her tubes and receive a license go to HERE.
The awesome kit I used is called "Gothic Dreams" by Sensual Posers and it can be found HERE.


Supplies:
Mask #11 from Scraps of Enchantment and can be found HERE.
Plug-in: Eye Candy 4000->Gradient Glow
Plug-in: DSB Flux->Bright Noise
Font: Cardinal

1 Open new canvas 700x700, we will resize later.
2 Get your paintbucket tool and flood fill white.
3 Open your mask and minimize it.
4 Open, copy and paste as new layer your choice of paper. Resize to the canvas size.
I used: paper 10
5 Go to Layers->New Mask Layer->From Image
6 Select SOE_Mask11_ByRachel09 in the Source Drop Down Window.
Make sure Source Luminace is selected and hit ok.
7 Now resize right click on the Mask layer and select Merge->Merge Group
8 Resize the mask layer to desired size. I resized it to the canvas size.
9 Open, copy and paste as a new layer frame 1 and frame 6.
10 Resize to desired size and postion to where desired. Use my example as a reference.
11 Now make sure you are on your frame 6 layer.
12 Open, copy and paste a new layer your choice of paper.
I used: paper 9
13 Get your magic wand and select each opening of the frame and then go to Selections->Modify->Expand and put 5.
14 Now click on your choice of paper you just added and go to Selections->Invert and then hit delete on your keyboard.
15 Go to Selections->Select None and move this layer below the frame.
16 Now click on your round frame layer.
17 Open, copy and paste as new layer your choice of paper.
I used: paper 6
18 Now click back on your round frame and get your magic wand and select the opening of the frame.
19 Go to Selections->Modify->Expand and put 10.
20 Click on your paper layer you just added and go to Selections->Invert and then hit delete on your keyboard.
21 Go to selections->Select None and move this layer below the frame.
22 You are going to need a total of 4 tubes. Open, copy and paste as a new layer your 1st tube of choice.
23 Resize and position as desired but use my example as reference and put this tube in the round frame.
It needs to be above the paper layer but below the frame layer.
24 Once the tube is where you want click on the paper layer below it.
25 Go to Selections->Select All->Float->Defloat and then click on the tube.
26 Go to Selections->Invert and then hit delete on your keyboard.
27 Go to Selections->Select None.
28 Go to Layer Properties and select Luminance Legecy so that the tube is blending in with the paper.
29 Now repeat Steps #: 22- 28 for the next 3 tubes of choice for the other frame.
30 Open, copy and paste as new layers any elements you desire.
I used: glitter doodle 2
cross ribbon 2
bow 3a
candle 3
candle 4
long stem rose 1
long stem rose 2
splat 1
Place the elmemnets where desired.
31 Open the Wordart from the Kit-"Goth Chick" and place where desired. I added a gradient glow to the wordart and text as well. Glow width 6 and color white.
32 Choose desired font and type out your desired text.
I used colors: Foreground: #000000
Background: #ffffff
I also used text size: 65
33 Add Copyrights
34 If you are not doing the animation merge all layer, resize all layers to 500x500 and save.
ALL DONE!!

If you are going to do the animation please follow these steps:

35 Click on your Mask Layer and duplicate twice so you have a total of 3 mask layers.
36 Rename each layer such as mask1, mask2 and mask3.
37 Now click on mask1 and go to Effects->Plug-in->DSB Flux->Bright Noise
38 Change the Intensity to 45 and leave it on Mix. Click Ok.
39 Now click on mask2 and repeat Steps #: 37-38 for this layer. (Don't worry since you are leaving it at mix it will be different every time.)
40 Now click on mask3 and repeat Steps #: 37-38 for this layer.
41 Hide mask2 and mask3.
42 Copy merged and open Animation Shop.
43 Paste as a new animation.
44 Go back to PSP and hide mask1 and unhide mask2.
45 Copy merged and Paste after current frame.
46 Go back to PSP and hide mask2 and unhide mask3.
47Copy merged and Paster after current frame.
48 Still in Animation Shop- Select All.
49 Go to Animation->Resize Animation
Make sure Pixel Size says 500 for Width, Resize Type says Smart Size and Maintain Aspect Ration is checked.
Click ok.
50 Save as a gif and you are all done!!!

I hope you enjoyed my tut and send me the results! I would love to see them!!

Thanks,
Kali