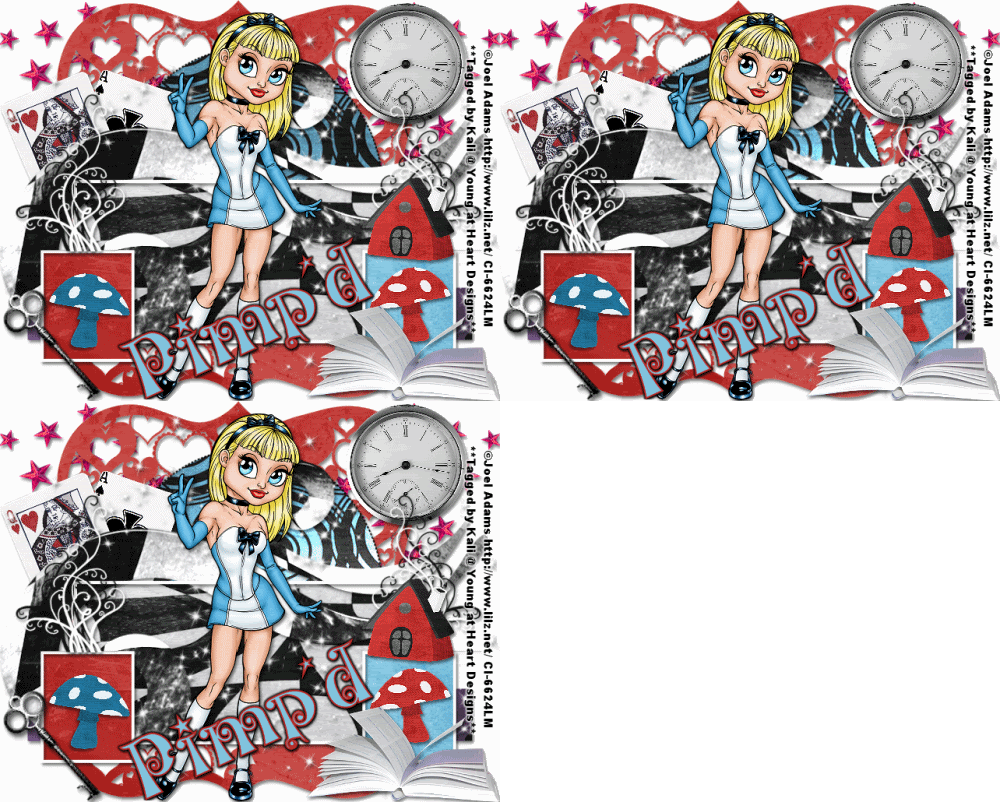
To do this tutorial you must have some knowledge of PSP and Animation Shop.
This Tag was made using PSPX2 and Animation Shop. This tutorial is also copyrighted by Young at Heart Designs.
Im using the Beautiful work of Joel Adam. If you wish to use her work you must have a license to use her work before using her tubes.
To purchase her tubes and receive a license go to HERE.
The awesome kit I used is called "Other Side of Wonderland" by Pimp'd Designz and it can be found HERE.
Supplies:
Template #79 by Scraps of Enchantment and can be found HERE.
Plug-in->Tramages->Pool Shadow
Plug-in->Eye Candy 4000->Gradient Glow
Font: Kingthings Willowless
I used shadow settings V3,H2, O50, B5, Color Black on ALL elements, layers, text and the tube except for the mask layer.
I also sharpened every element and tube I had to resize to get the quality like the original size.
OK Let's get started!!
1 Open Template and hit Shift+D (Duplicate the template)
2 Delete original template and then delete copyright.
3 Go to very first layer and right click on thumbnail.
4 Select New Raster Layer. Keep all settings the same and hit Okay.
5 Move the new raster layer down so it is the first layer.
6 Open, copy and paste as new layer the bracket mat from the kit.
7 Resize to desired size- use my example for reference.
8 Now open your choice of tube and move the tube to be the very last layer. Resize to desired size.
Move the tube to the center of the tag.
9 Click on your Halfcircle Layer.
10 Open, copy and paste your choice of paper. Resize to the size of the canvas.
I used: pp13
11 Now click on your Halfcircle Layer again.
12 Go to Selections->Select All->Float->Defloat
13 Then click on your paper layer that you just added.
14 Go to Selections->Invert and then hit Delete on your keyboard.
15 Go back to Selections->Select None.
16 Delete the original Halfcircle layer.
17 Click on your BlackRectangle layer and repeat Steps #:10-16 for this layer.
I used: pp12
18 After you need to open, copy and paster the swirl-01 element from the kit and resize to desired size.
Now position it similar to my example so it looks as if it is melting out of the Rectangle layer.
(This is if you used the same paper as I did)
19 Click on your GreyRectangle layer and repeat Steps #:10-16 for this layer.
I used: pp10
20 I left the LargeWhite Frame, FrameLeft and FrameRight white but I did add a dropshadow.
21 Now repeat Steps #: 10-16 for both GreySquareLeft and GreySquareRight.
22 I also left BlackSwirlLeft, WhiteSwirlLeft, BlackSwirlRight and WhiteSwirlRight how they were but added a dropshadow.
23 Open, copy and paste as new layers any elements you desire.
I used: book
house
key
mushroom
queen-heart-card
spade-card
sparkle
stars
watch
Place the elmemnets where desired.
24 Go to your 1st layer which should be blank and get your paintbucket tool and floodfill white.
(You only need to do this if you plan on doing the animation)
25 Choose desired font and type out your desired text.
I used colors: Foreground: #b52b28
Background: #81c3de
I also used text size: 36. I also added Gradient Glow to the text at glow width 3 and color black.
26 Add Copyrights
27 If you are not doing the animation merge all layer, resize all layers to 500x500 and save.
ALL DONE!!
If you are doing the animation follow these steps:
28 Go to your Halfcircle layer. Duplicate twice so you have 3 total.
Rename each Halfcirlce1, Halfcircle2 and Halfcircle3.
29 Go to your Swirl layer. Duplicate twice so you have 3 total.
Rename each Swirl1, Swirl2 and Swirl3.
30 click on Halfcircle1 and Swirl1 go to tramages pool shadow and apply these settings:
50-50-50-50-50-50-128-128
Click on Halfcircle2 and Swirl2 apply these settings:
45-45-45-45-45-45--126-126
Click on Halfcircle3 and Swirl3 apply these settings:
40-40-40-40-40-40- 124-124
31 X out Halfcircle2, Swirl2, Halfcircle3 and Swirl3 copy merged and paste in animation shop.
32 Back in PSP X out Halfcirlce1 and Swirl1. Un X Halfcircle2 and Swirl2 copy merged paste after current layer in animation shop.
33 Back in PSP X out Halfcirlce2 and Swirl2 and un X Halfcircle3 and Swirl3 copy merged paste in animation shop after the last layer.
34 Still in animation shop select all go to Animation->Frame Properties change to 25.
35 Save as a gif.
You are all done!!
I hope you enjoyed my tutorial. Send me the results!!!
Thanks,
Kali


No comments:
Post a Comment